Adding a Self-Hosted Docker Registry
To link your self-hosted Docker registry with ODIN Fleet, follow these steps:
1. Access the Docker Registries Section
Navigate to "Settings" in the ODIN Fleet dashboard after selecting/creating your app. In Settings, navigate to the " Docker Registries" tab.
2. Add a New Registry
Click the "Add Registry" button and select "Self-Hosted Registry" from the options.
3. Provide Required Information
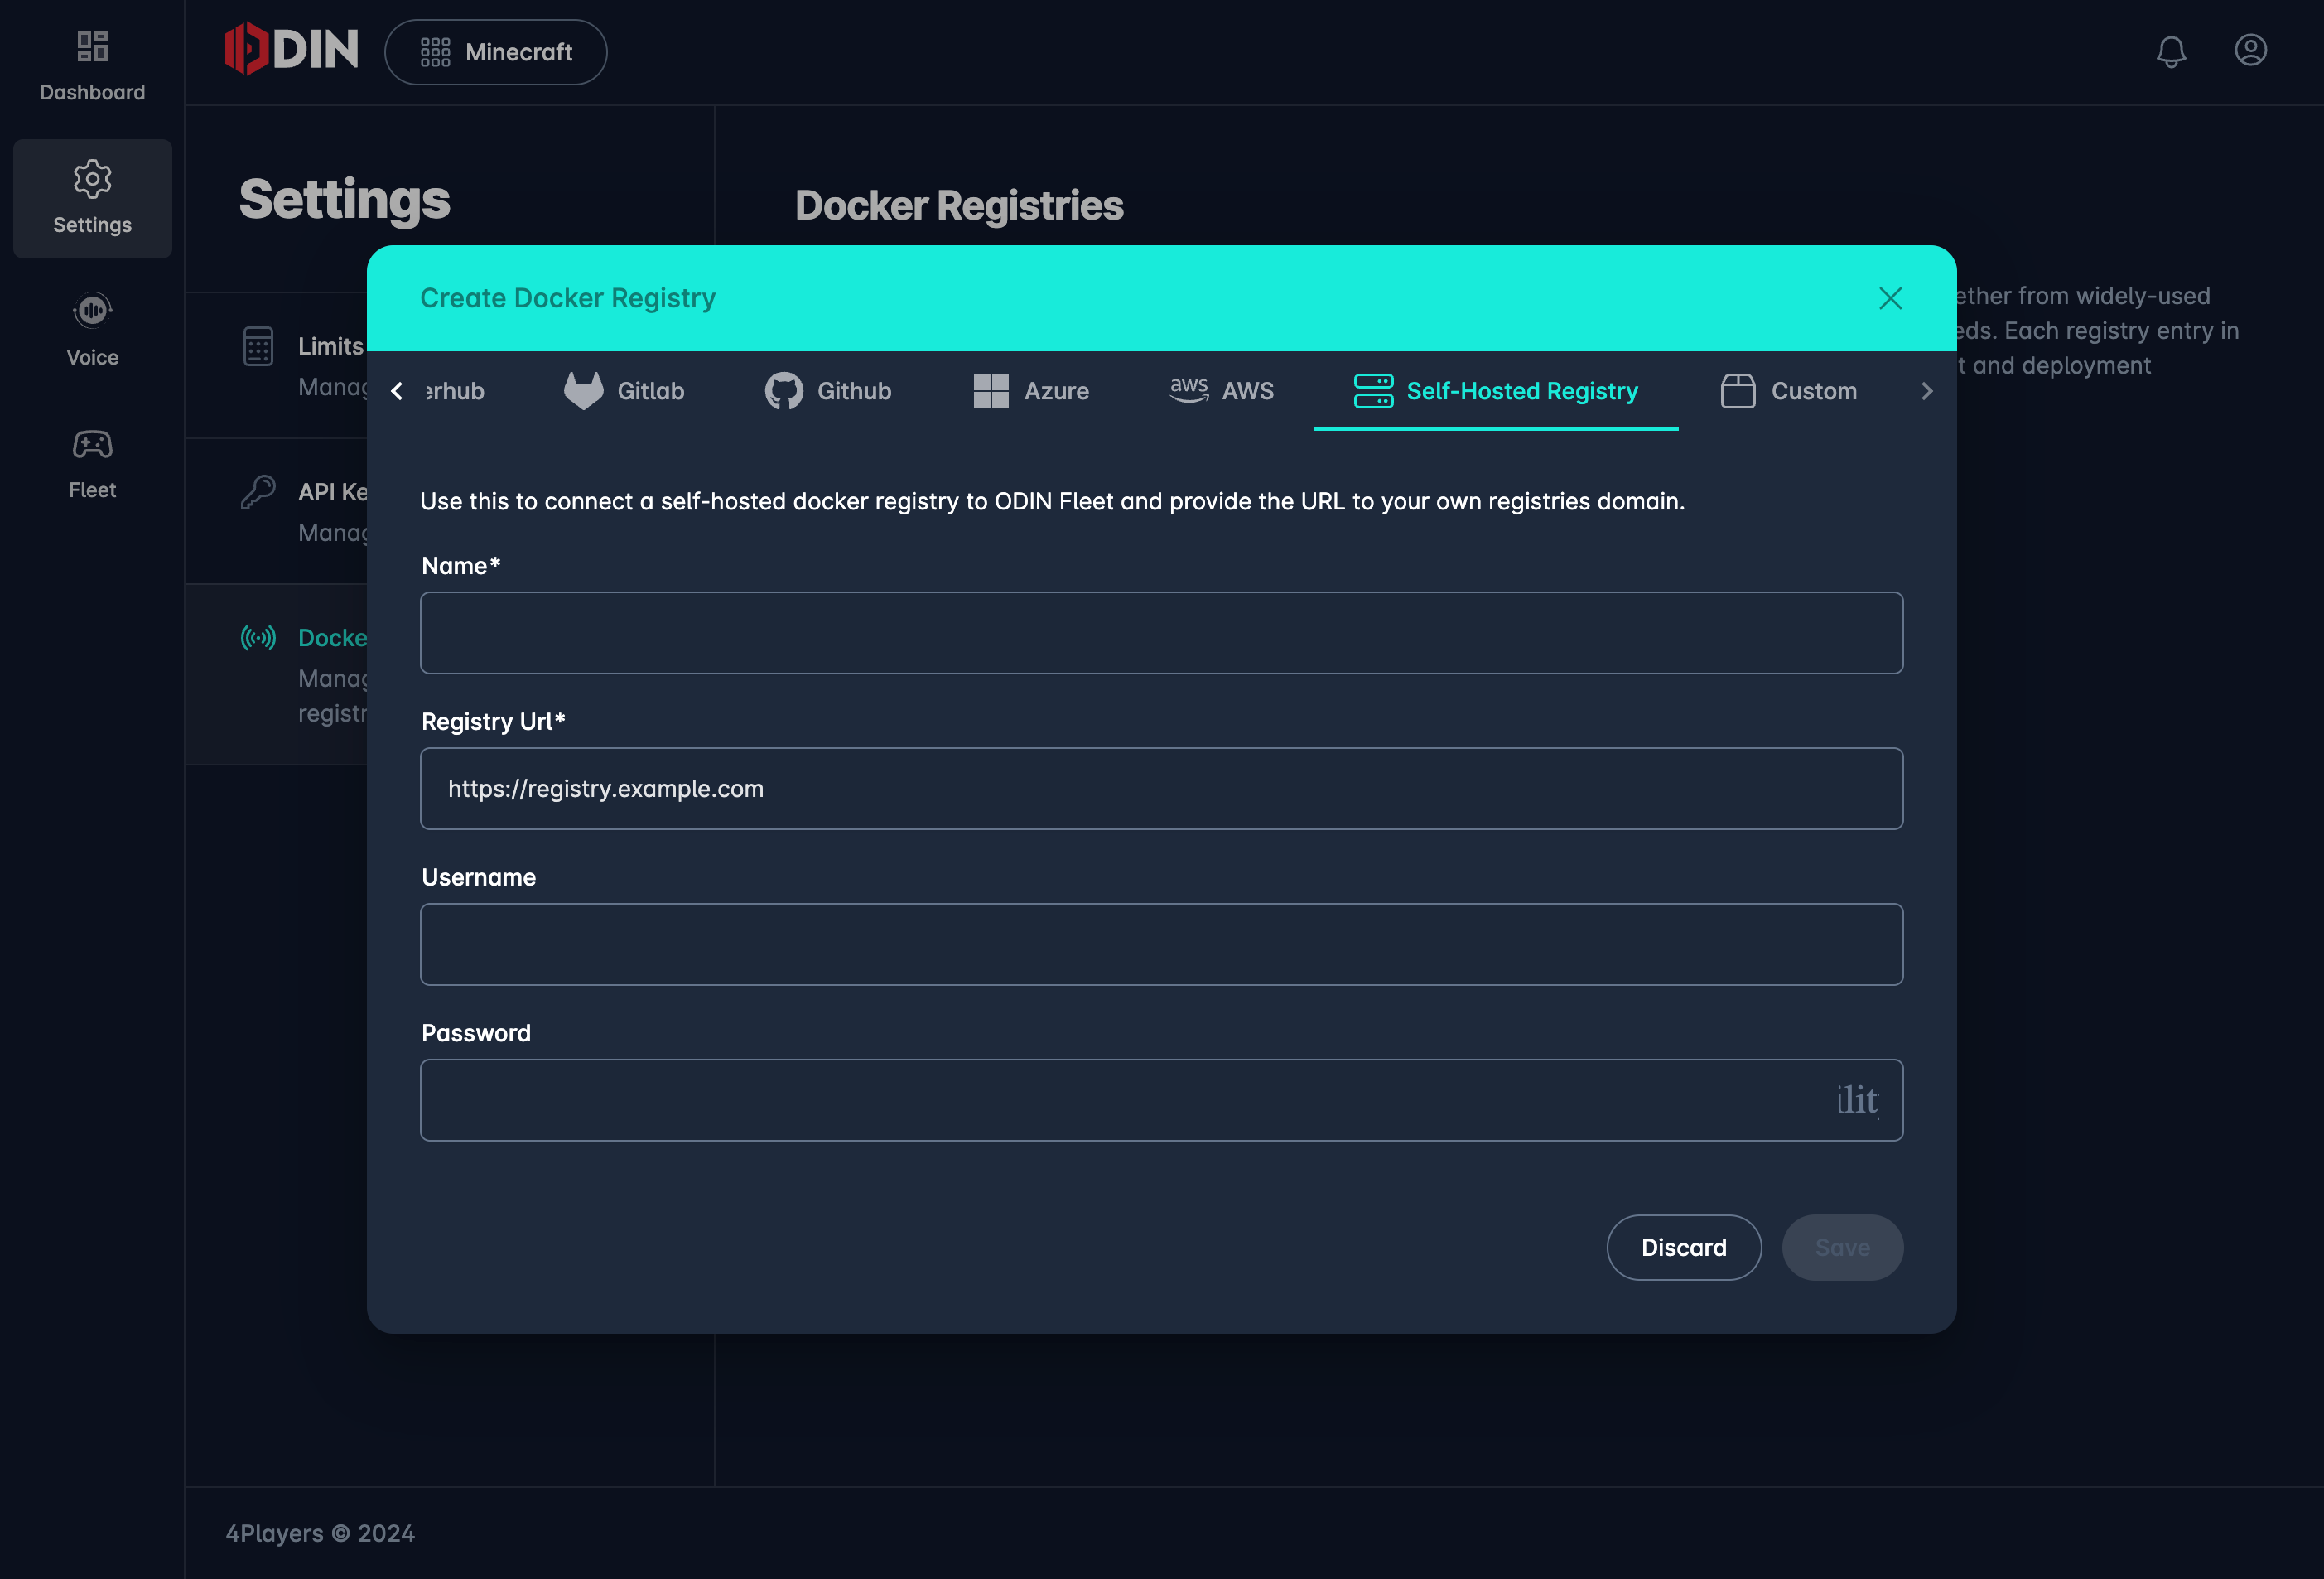
Enter the following details to establish a connection with your self-hosted Docker registry:
- Name: Enter a name for this registry connection.
- Registry URL: Provide the URL of your self-hosted Docker registry (e.g.,
https://registry.example.com). - Username: Enter the username required to access your registry.
- Password: Provide the password for the username above.
Features and Functionality
ODIN Fleet fully supports self-hosted Docker registries, offering the following convenient features:
- Image Name Verification: ODIN Fleet will verify that the image names you use are valid within your self-hosted registry.
- Image Browsing: You can browse the available images within the registry directly from the ODIN Fleet interface.
- Tagged Images: ODIN Fleet will retrieve and display tagged images from your registry, allowing for easy selection and management.
These features provide a smooth and integrated experience when using a self-hosted Docker registry with ODIN Fleet.
4. Save the Configuration
After entering the necessary details, click "Save" to complete the integration.
You can now manage and deploy images from your self-hosted Docker registry directly within ODIN Fleet.