Adding an AWS Elastic Container Registry (ECR)
To link your AWS Elastic Container Registry (ECR) with ODIN Fleet, follow these steps:
1. Access the Docker Registries Section
Navigate to "Settings" in the ODIN Fleet dashboard after selecting/creating your app. In Settings, navigate to the " Docker Registries" tab.
2. Add a New Registry
Click the "Add Registry" button and select "AWS" from the options.
3. Provide Required Information
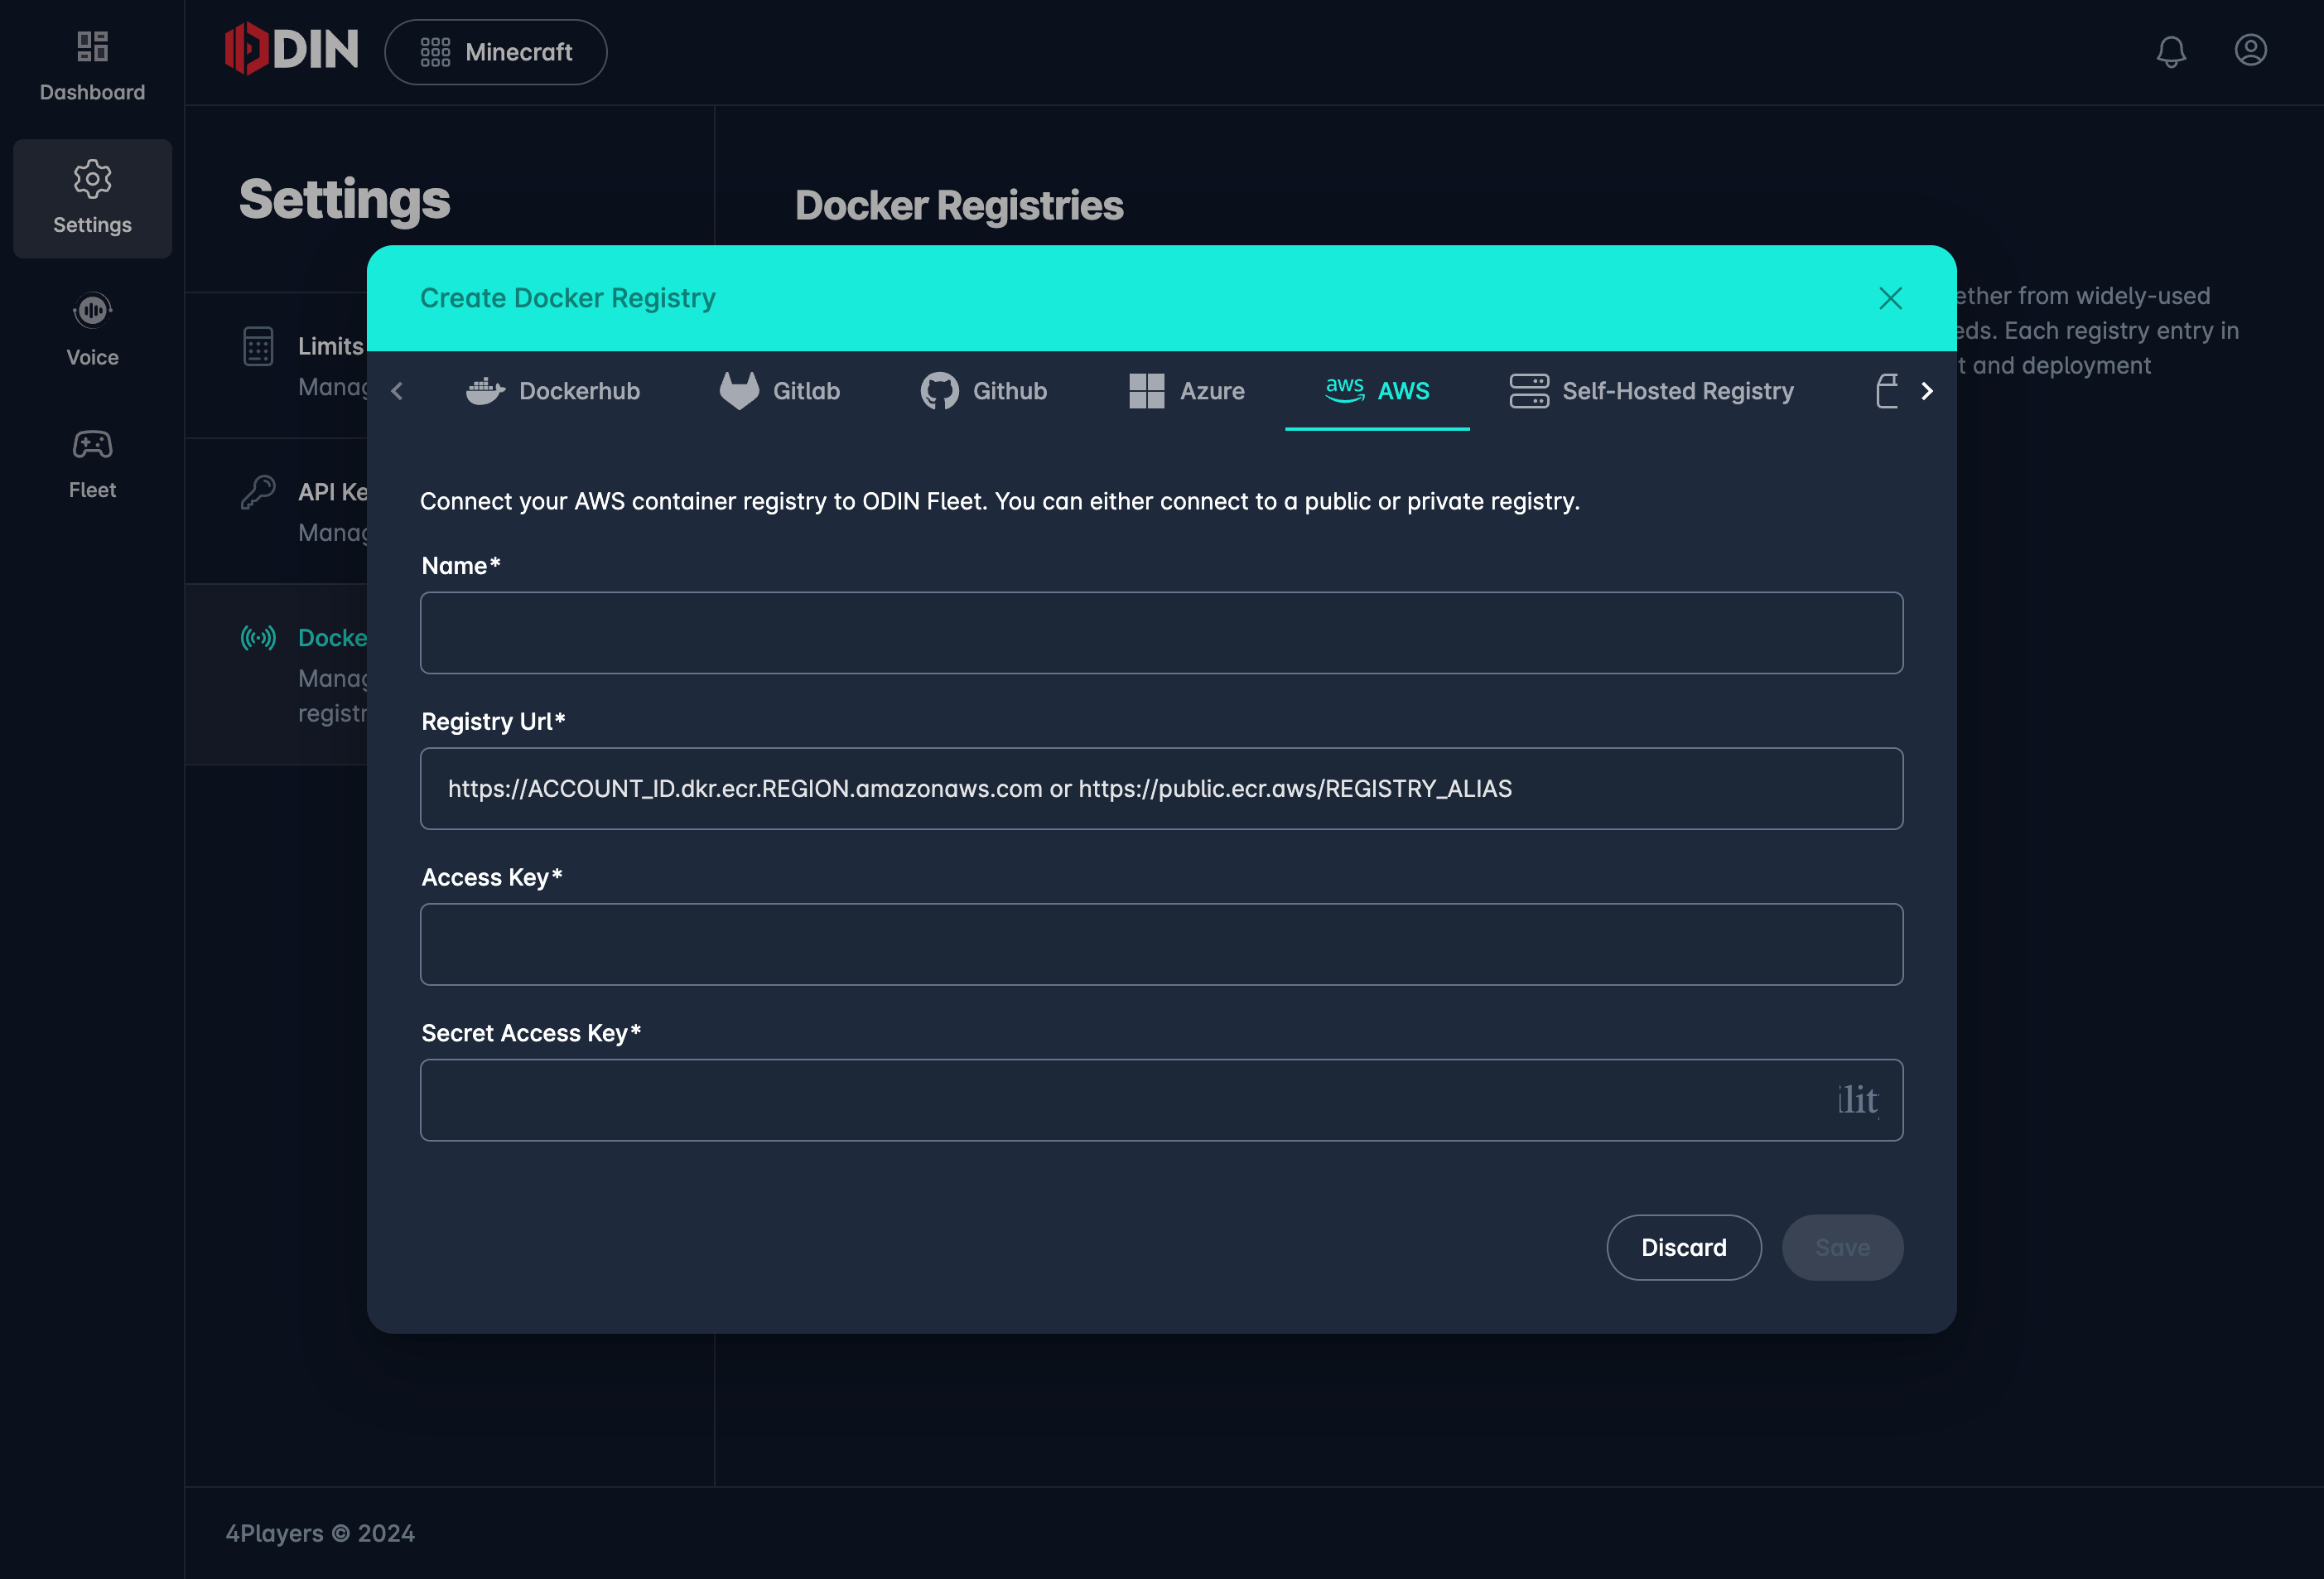
Enter the following details to establish a connection with your AWS ECR:
- Name: Enter a name for this registry connection.
- Registry URL: Depending on whether you're connecting to a private or public repository, use the following formats:
- Private Repositories:
https://<aws_account_id>.dkr.ecr.<region>.amazonaws.com- Example:
https://802596915135.dkr.ecr.eu-central-1.amazonaws.com
- Example:
- Public Repositories:
https://public.ecr.aws/<registry_alias>- Example:
https://public.ecr.aws/r7e4l4q2
- Example:
- Private Repositories:
- Access Key: Your AWS Access Key associated with the IAM user who has the required permissions.
- Secret Access Key: The Secret Access Key corresponding to the above Access Key.
Authentication and Access Permissions
For authenticating with AWS ECR, you'll need an IAM user with the appropriate permissions. Here's how to set up access:
-
Create an IAM User with ECR Permissions:
- In AWS IAM, create a user group named "ECR" and assign the following policies:
AmazonEC2ContainerRegistryFullAccessAmazonElasticContainerRegistryPublicFullAccess
- Add your IAM user (e.g.,
b2b) to this group. - Generate an Access Key and Secret Access Key for this user.
- In AWS IAM, create a user group named "ECR" and assign the following policies:
-
Use the Access Keys:
- The Access Key and Secret Access Key will be required in the ODIN Fleet setup to authenticate and access your repositories.
Automatic Detection
ODIN Fleet automatically detects whether the registry is public or private based on the URL format you provide. The URL is validated upon entry, and an exception is thrown if it doesn't match the expected format.
4. Save the Configuration
After entering the necessary details, click "Save" to complete the integration.
You can now pull images from your AWS ECR directly within ODIN Fleet.