Interactive Autoscaling Demo
This demo applies Autoscaling to a real Counter-Strike 1.6 server. If you haven't read that guide yet, we
recommend starting there to get familiar with minInstances, maxInstances, bufferSize and the instance states.
We will create a Project, Image, Server Config and autoscaled Deployment, then allocate and join a ready instance. After
allocation, we can watch Fleet automatically start a new instance to restore bufferSize, which is exactly what autoscaling does.
Each step includes Console and API instructions. This demo can also create the resources for each step directly in your
Fleet account. To enable this, paste your Fleet Bearer token from
User Settings > Tokens below. The API examples
require curl, jq and the token in ODIN_API_TOKEN. Counter-Strike 1.6 from Steam is only required for the last step if
you want to join the server.
Interactive mode (optional)
Requests run in your browser and send the token only to the Fleet API. The token stays in memory, is never stored, and is cleared when you reload or close this page.
1. Create the Project
- Console
- API
View step in Console
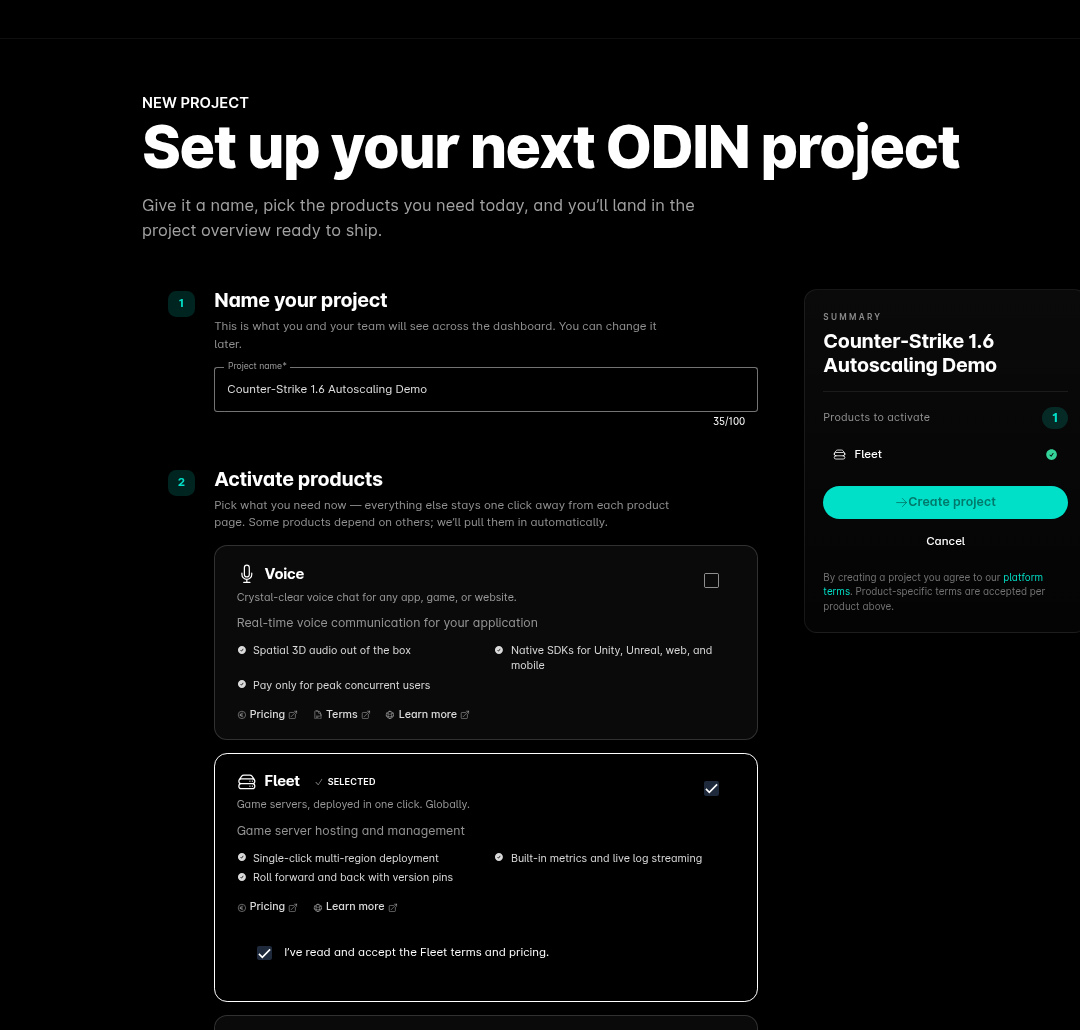
In the Console, open Projects and select Create Project. Name it Counter-Strike 1.6 Autoscaling Demo, activate Fleet, accept the Fleet terms, then click Create Project.
Create the Fleet app and save the returned ID as appId for the following requests.
Open the API reference.
2. Create the Image
For this demo, we created and published fourplayers/fleet-cs16-autoscaling-demo:latest, a public Counter-Strike 1.6
server image. You can use it directly without building your own image and
check its source on GitHub.
- Console
- API
View step in Console
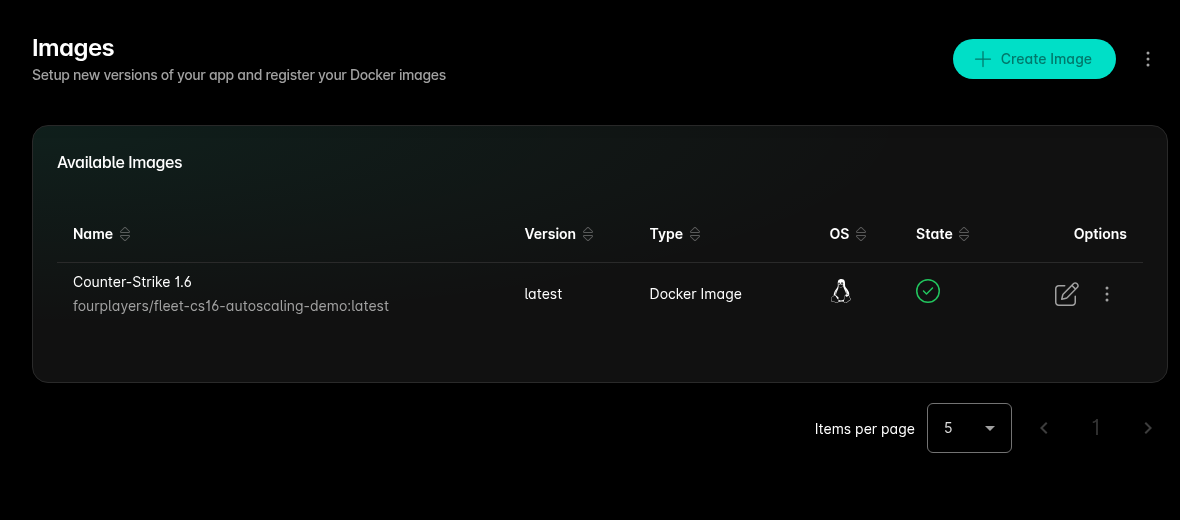
In the Console, open the Project you created, select Fleet, open Images and then select Create Image. Complete the wizard:
- Under Name / OS, enter Counter-Strike 1.6 as the Name, latest as the Version and select Linux as the Operating System.
- Under Image Type, select Image from container registry.
- Under Settings, keep Docker Hub anonymous (default) in Choose Registry and enter
fourplayers/fleet-cs16-autoscaling-demo:latestin The image name.
Select Next after the first two steps, then select Create.
Get the default public Docker Hub registry: Open the registry API reference.
Then create the image: Open the image API reference.
Fleet pulls and prepares the image. Continue when its status is ready.
3. Create the Server Config
The Server Config uses the Image from the previous step and defines the game port, Counter-Strike settings and URLs for status updates and health heartbeats.
- Console
- API
View step in Console
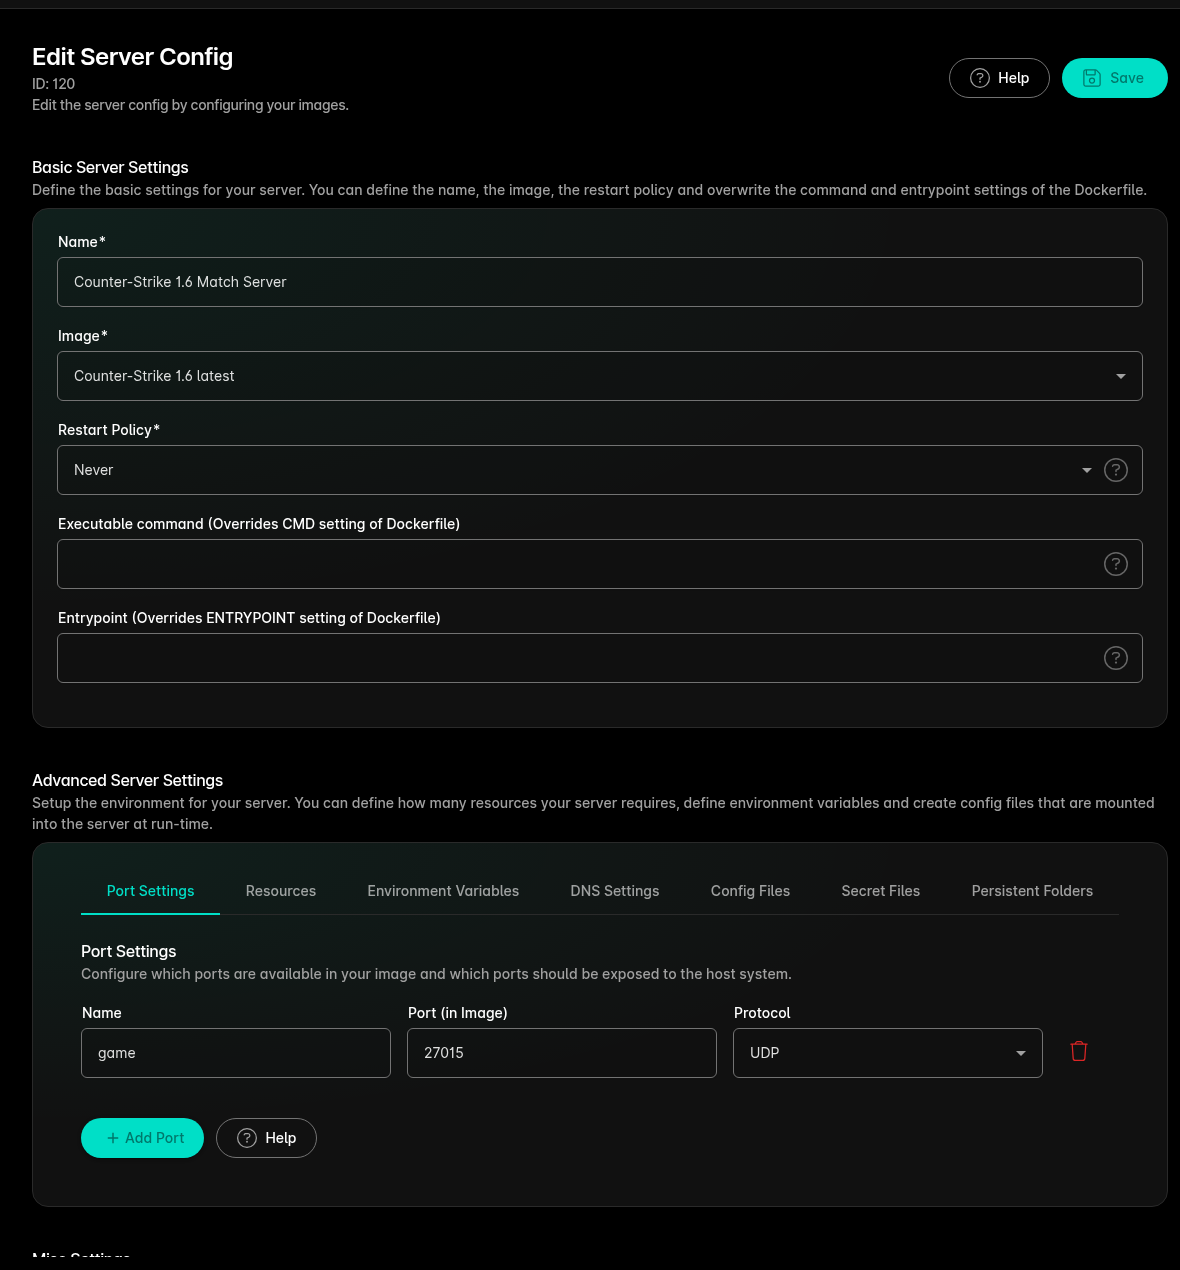
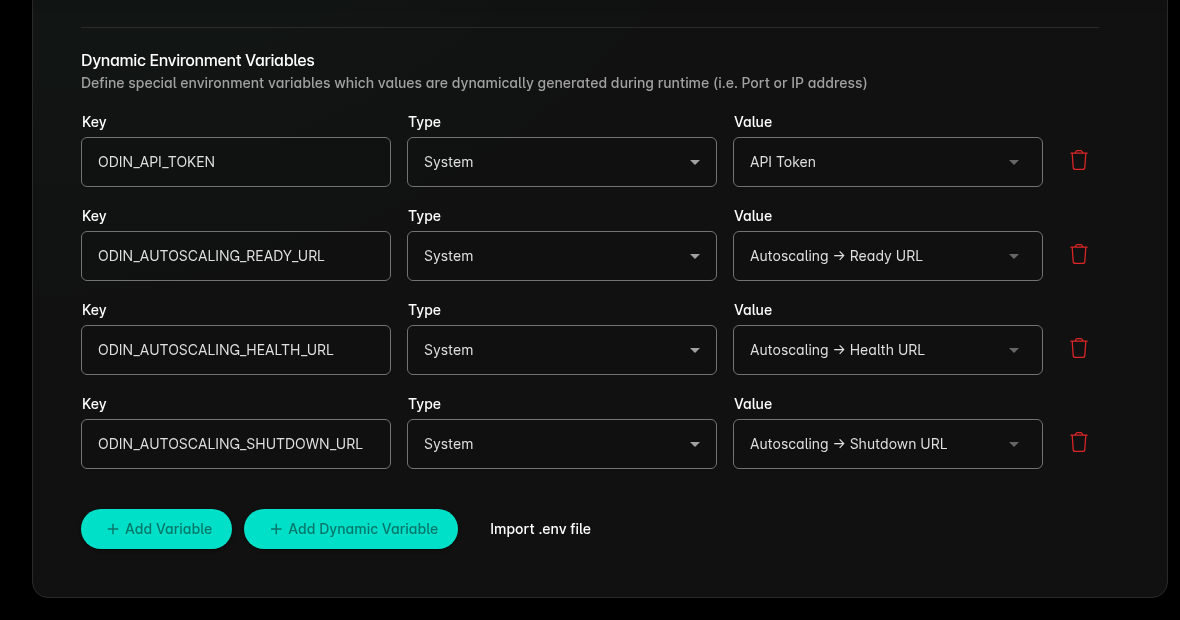
In the Console, open the Project, select Fleet, open Server Configs, then select Create Server Config. Configure it as follows:
-
Under Basic Server Settings, enter Counter-Strike 1.6 Match Server as the Name, select the Counter-Strike 1.6 Image and set Restart Policy to Never.
-
Under Port Settings, add a port named game with 27015 as the Port (in Image) and UDP as the Protocol.
-
Under Environment Variables, add these static values:
-
Select Add Dynamic Variable and add these Key=Value mappings:
Create the Server Config: Open the API reference.
The demo image automatically reports ready after the Counter-Strike server has started. If a health URL is configured, it
also sends heartbeats every 10 seconds. It reports shutdown when the container stops.
4. Create the Autoscaled Deployment
The deployment uses minInstances: 1, maxInstances: 3 and bufferSize: 1, which means Fleet runs at least one instance,
maintains one ready instance in addition to allocated instances and never exceeds three. Health checks stay disabled
for now. The deployment still stores the default health settings so we can enable them later without recreating it.
- Console
- API
View step in Console
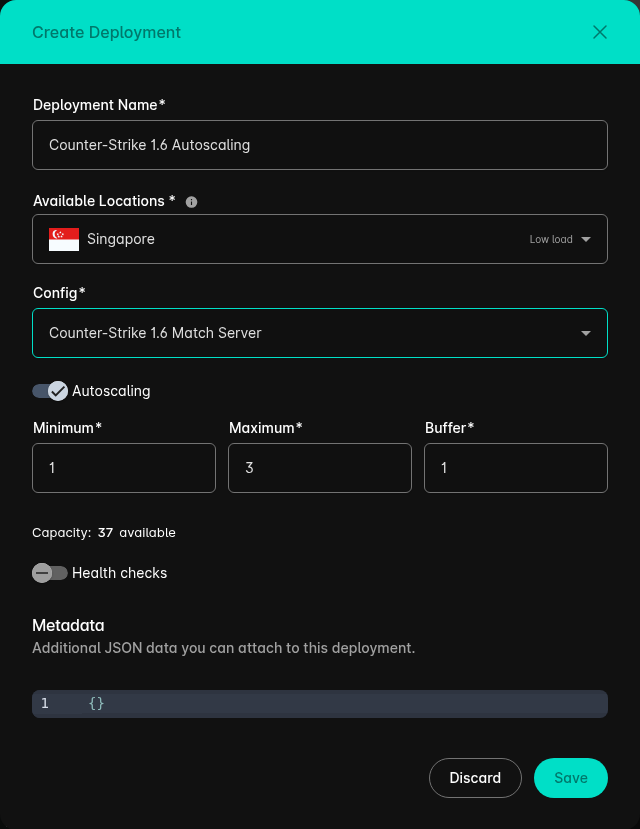
In the Console, open the Project, select Fleet, open Deployments, then select Add Deployment. Configure it as follows:
- Enter Counter-Strike 1.6 Autoscaling as the Deployment Name.
- Choose an Available Location and select Counter-Strike 1.6 Match Server as the Config.
- Enable Autoscaling and set Minimum to 1, Maximum to 3 and Buffer to 1.
- Leave Health checks disabled, then select Save. The Console keeps the default health settings in the background.
The API requires numInstances, but minInstances, maxInstances and bufferSize control capacity while autoscaling
is enabled. It also requires all three health settings, even while healthEnabled is false.
Open the API reference.
Fleet starts the first instance in preparing. Once the Counter-Strike server has started, it reports itself as ready
through the injected URL configured in the Server Config.
5. Allocate and Connect
Only a ready instance can be allocated. Allocation changes its status from ready to allocated and returns connection
details such as the node address and published port. When we allocate the only ready instance, Fleet starts another one
to restore bufferSize: 1.
We do not use metadata for this allocation. Metadata can limit allocation to a matching map, server version, custom flag or any other value previously added to the instance. See how to add metadata to a server.
- Console
- API
View step in Console
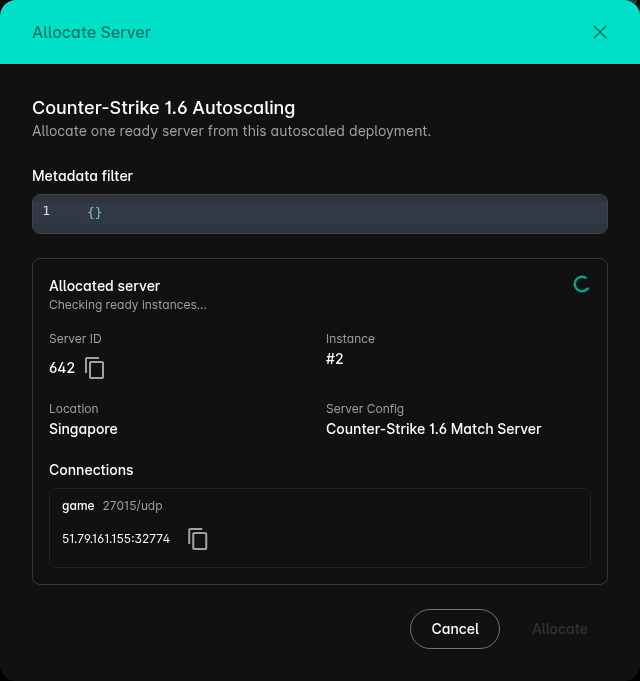
In the Console, open Deployments and wait until the first instance is ready. Open the deployment actions and select
Allocate Server. The dialog returns one ready instance with its address, published game port and other connection
details.
Call the allocation endpoint after the instance becomes ready. If none is ready yet, Fleet returns 409 Conflict.
Wait for the server to report ready, then retry.
The response contains the instance ID, node address and published game port. The instanceId variable keeps the ID for
the later shutdown request.
Now you can start the game and connect to your allocated server. Start Counter-Strike 1.6, open the developer console and connect using the returned IP address and port:
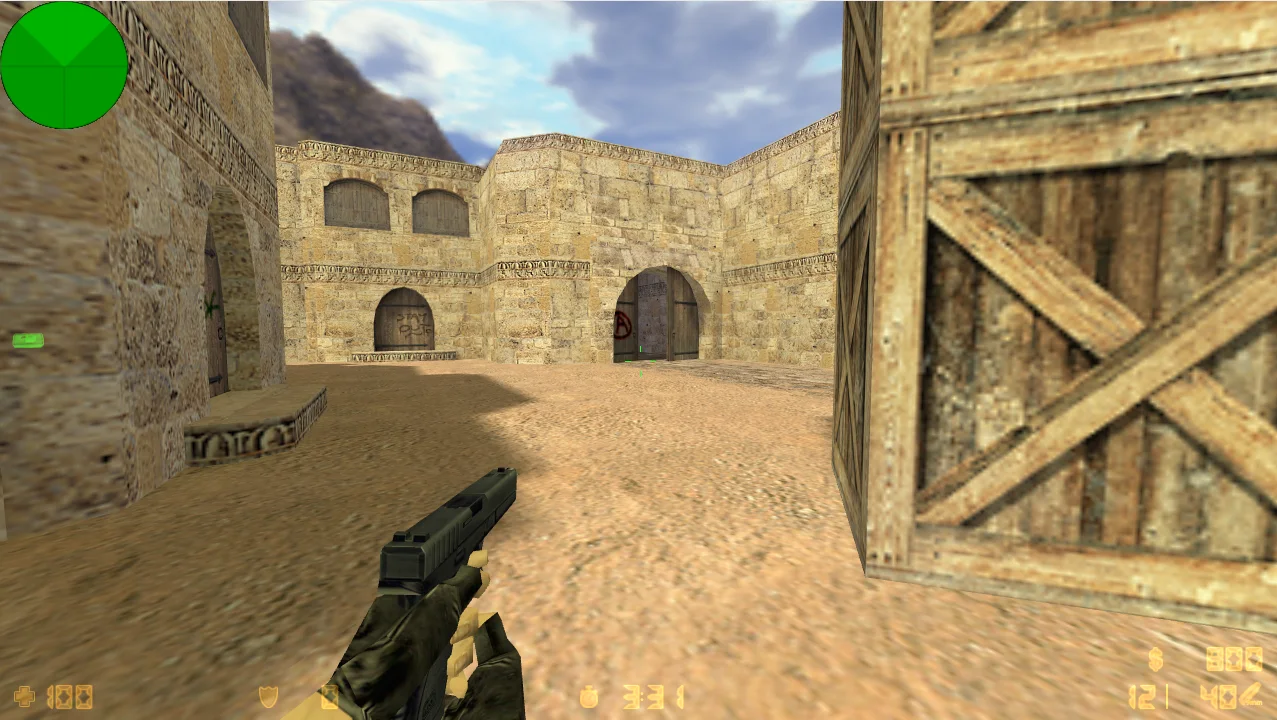
While the match runs, the deployment contains the allocated instance and another instance moving from preparing to
ready.
6. Enable Health Checks (Optional)
For this demo, the image automatically sends heartbeats every 10 seconds when the Server Config provides a health URL. The deployment allows 10 seconds before checking starts, expects a heartbeat every 10 seconds and marks an instance unhealthy after three missed heartbeat periods. Read Health Checks for the complete behavior.
View step in Console
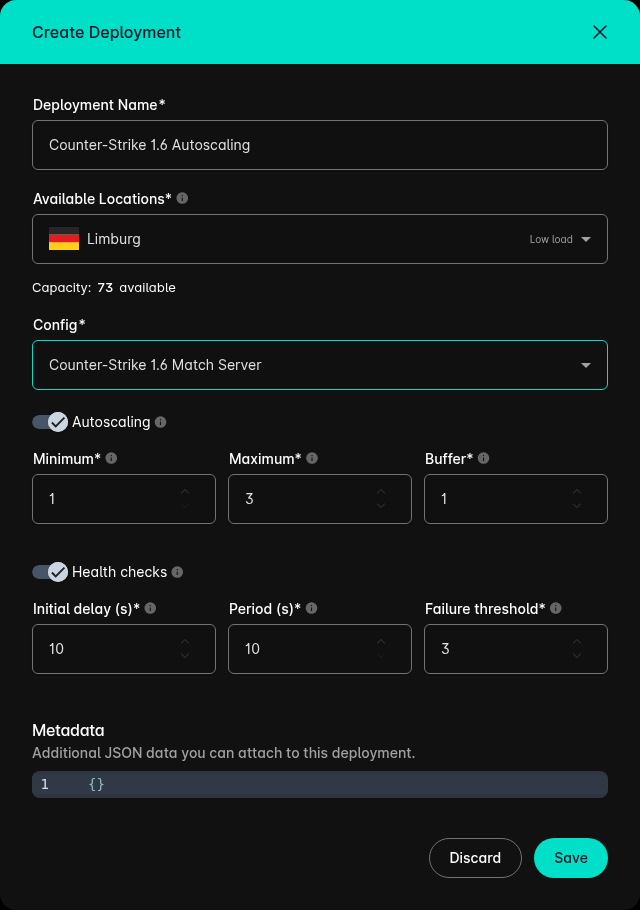
In the Console, open Deployments, edit the deployment and enable Health checks. Keep Initial delay (s) and Period (s) at 10 and Failure threshold at 3, then select Save.
7. Finish the Demo
When you no longer need the instance, report shutdown so Fleet can remove it. If you enabled health checks, disable them
first.
You can use Autoscaling Controls in the server detail view to report shutdown manually. In production, the server
sends this status update itself, for example when a match ends. It can report ready instead if it should be reused.
- Console
- API
View step in Console
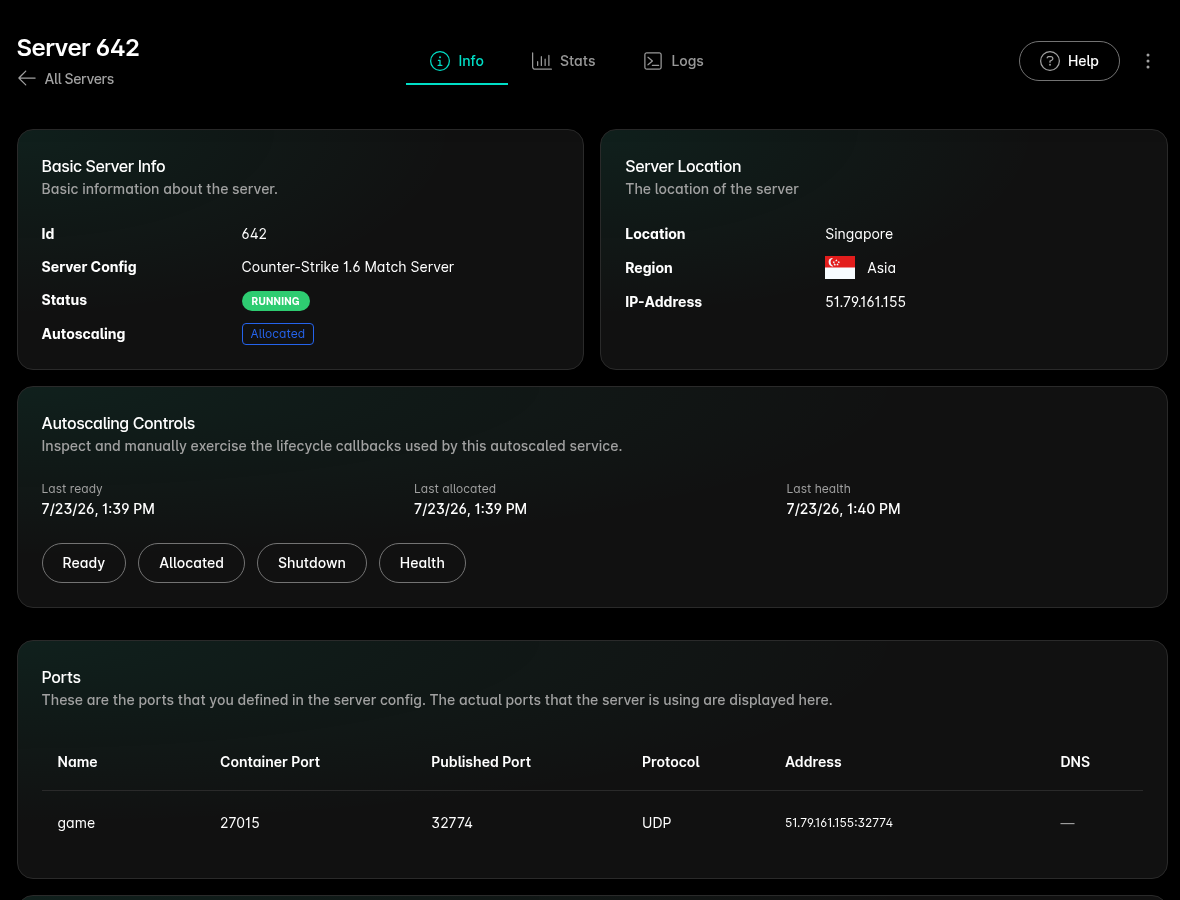
In the Console:
- If needed, edit the deployment, disable Health checks and wait for maintenance to finish.
- Open Servers, apply the Autoscaling filter, select the allocated instance and choose Shutdown under Autoscaling Controls.
- Return to Deployments, wait for maintenance to finish, then delete Counter-Strike 1.6 Autoscaling.
API references: report shutdown and delete deployment.
Troubleshooting
| Symptom | Likely cause | What to check |
|---|---|---|
An instance remains in preparing. | The server has not reported ready. | Check the server logs, API token and autoscaling-ready-url. |
Allocation returns 409 Conflict. | No matching instance is ready. | Wait for the ready status update, then check autoscaling-ready-url and the server logs if it does not arrive. |
| Instances are replaced repeatedly or the deployment cannot be deleted during maintenance. | Health heartbeats have stopped or never started. | Disable health checks, wait for maintenance to finish, then delete the deployment or restore heartbeats before enabling them again. |
| Counter-Strike 1.6 cannot connect. | The address or port does not match the allocation. | Use node.address and the publishedPort of the game port. |
| Run this step cannot reach Fleet. | The token is invalid or the browser blocks the call. | Check the token, then use the matching request in the API tab if the browser reports a network error. |