Implementing Push-To-Talk with ODIN in Unreal
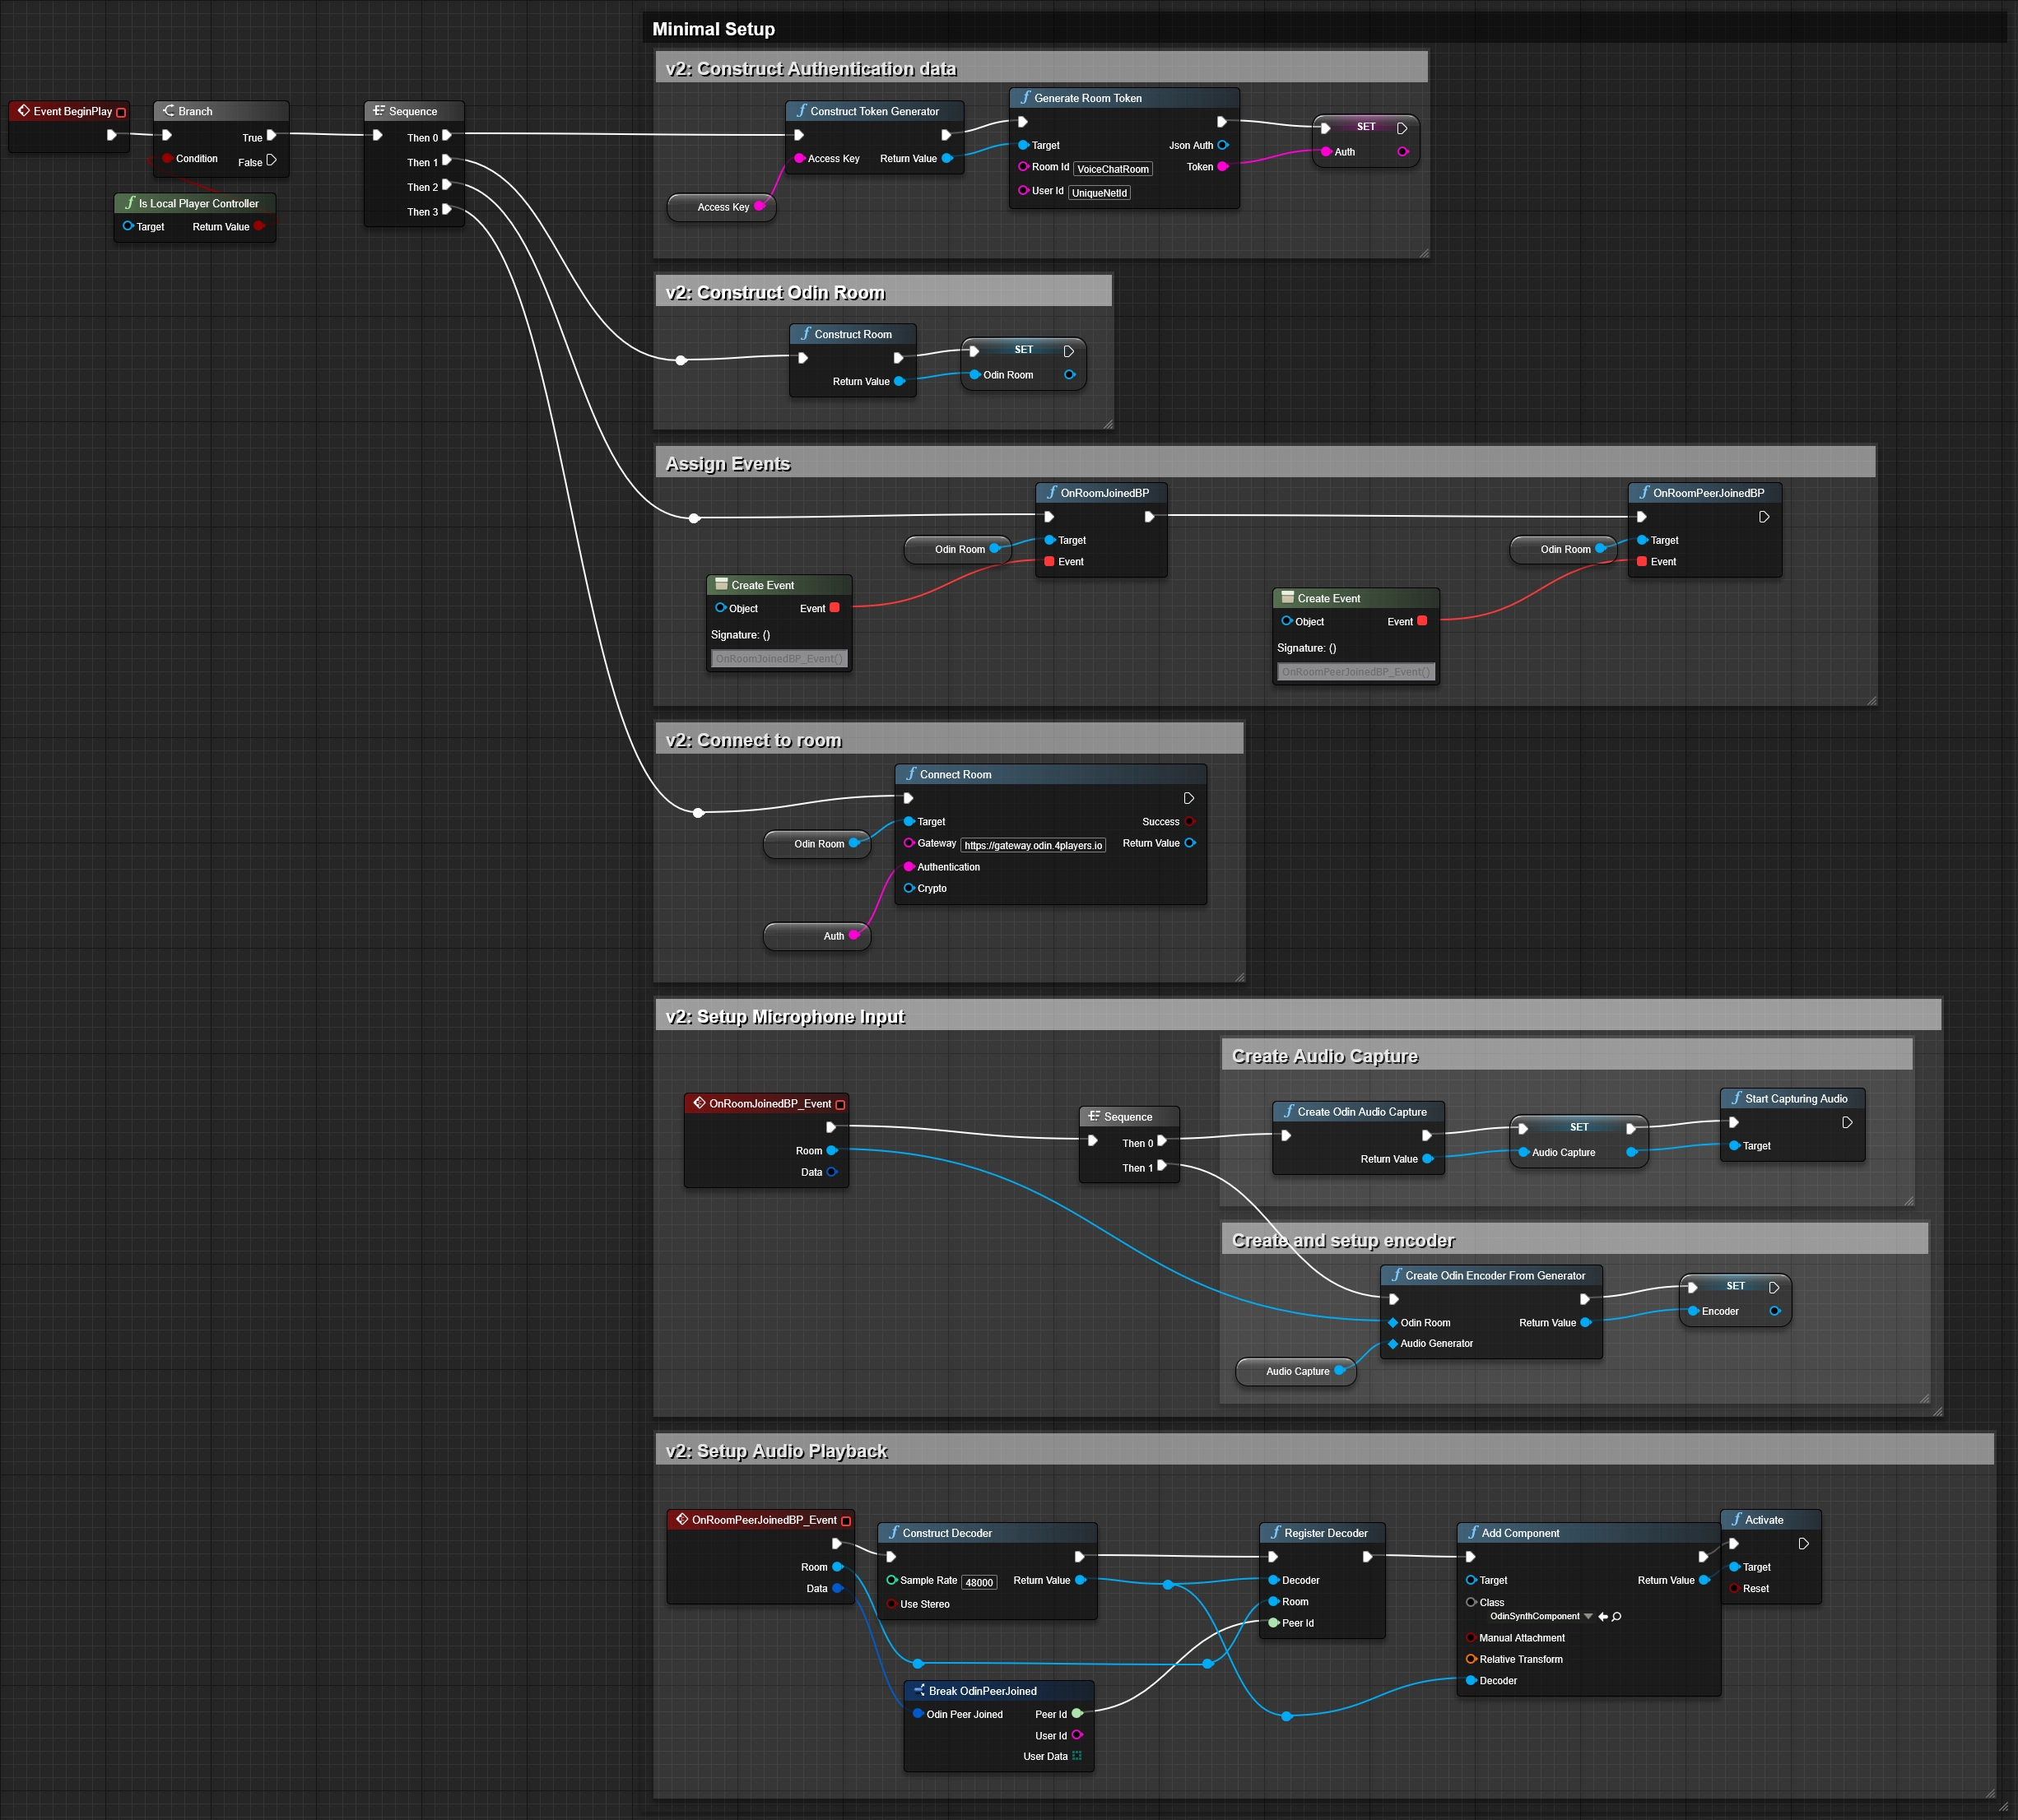
In this guide, we'll cover how to implement Push-To-Talk functionality in the Unreal Engine using the ODIN plugin. This feature is crucial for multiplayer games where players might want to control when they are heard. We're assuming you already have a working ODIN implementation. If not, take a look at the quick overview below.
Sample Project
You can find a sample implementation in the v2.x/push-to-talk branch of the
Odin Unreal Minimal Samples Github repository.
To view the relevant Blueprints, navigate into Content/Odin/PushToTalk. Feel free to download the project and set it
up in order to view a working implementation of the concepts shown in the following sections.
Setting up the Mute Effect
To implement Push-To-Talk functionality, we will need to add a Mute Effect
to the Encoders audio pipeline. The best place to do this is right after the UOdinEncoder is created, usually as part of the
OnRoomJoined event callback. We retrieve the encoder's audio pipeline with Get Or Create Pipeline and call Create Mute Effect on the pipeline object.
We use Get Effect Count as input into Index to make sure, we use a valid index value. We then store the resulting effect object in a variable for later access.
Your Blueprint will look something like this:
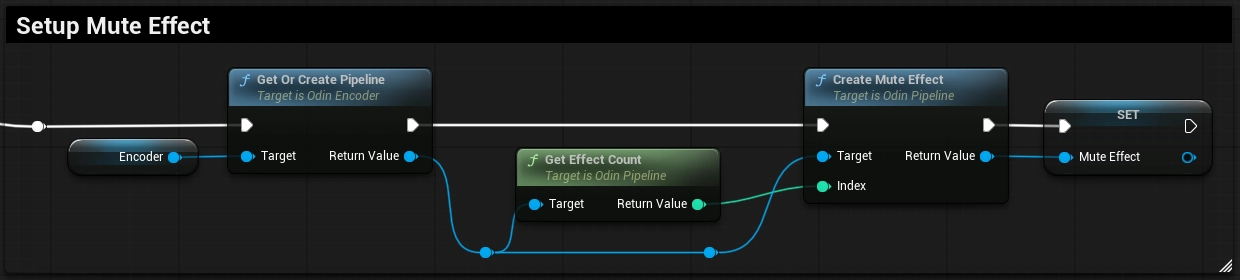
Please note the Index value of the Create Mute Effect call. You will need to make sure to insert your audio pipeline effects using a valid index.
A simple way to ensure this, is to call Get Effect Count, which will insert the effect at the end of the pipeline.
Setting Up the Input Action
For this guide, we'll leverage Epic's Enhanced Input System to define a Push-To-Talk Input Action. If you're new to the Enhanced Input System, it's highly recommended to first familiarize yourself with its functionalities by consulting the Unreal documentation.
Here is a step-by-step guide to setting up your Push-To-Talk Input Action using Enhanced Input:
- Create Input Mapping Context: If you haven't already set up an Input Mapping Context in your project, begin by creating a new Input Mapping Context Data Asset. This context will hold your game's specific input configurations.
- Define the Input Action: Next, create a
new Input Action Data Asset.
Set the
Value TypetoDigital (bool), which is ideal for binary actions like Push-To-Talk. - Bind the Input Action: Add the newly created Input Action to your Input Mapping Context. For this example, we'll
assign the
Tkey on the keyboard as the control binding for the Push-To-Talk action. - Activate the Input Mapping Context: To ensure your Input Action is recognized and processed, use the
Add Mapping Contextnode in your Player Controller. This action activates the Input Mapping Context containing your Push-To-Talk action.
Integrating Push-To-Talk
Once the Input Action is set up, follow these steps to integrate Push-To-Talk:
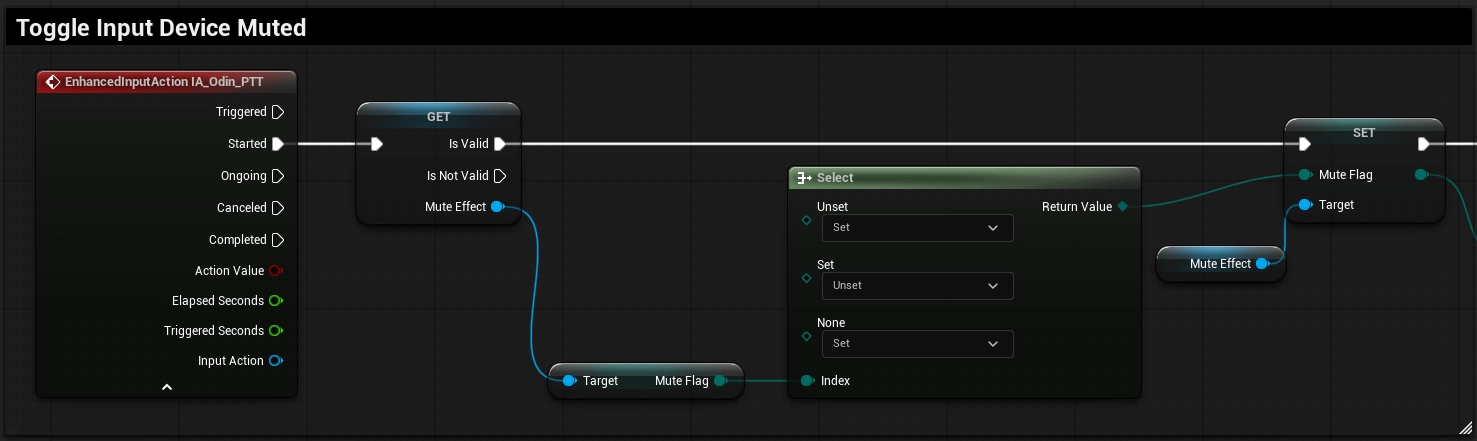
- Listen to the Enhanced Input Action event for the
PushToTalkaction we defined. You can do this in your character or controller blueprint. - In the event's
Startedoutput, set theMute Flagbased on the current value of theMute Flag:Unset/None: Switch Flag toSetSet: Switch Flag toUnset
- Always check if the
Mute Effectobject reference is valid before setting the parameter to avoid Null Reference Errors.
Usage of Stop / Start Capturing Audio
We strongly advise against using the Stop Capturing Audio and Start Capturing Audio nodes provided by Epic's
Audio Capture and therefore also the Odin Audio Capture objects. Sine Unreal Engine version 5.3 onwards,
the nodes to stop and start audio capture can lead to application crashes. Furthermore, using these nodes has been observed to cause significant
performance degradation.
To ensure optimal performance and stability, especially for features like Push-To-Talk, we recommend utilizing the audio pipelines audio effect. This effect is specifically optimized for such use cases, offering a more efficient and less resource-intensive approach to controlling audio capture in your game.
Conclusion
With these steps, you've successfully integrated Push-To-Talk functionality in your Unreal Engine game using the ODIN plugin. This will enhance your game's voice chat experience by giving players control over their microphone input.
For further information on Unreal with Odin Voice Chat, join our community discussions on Discord and explore our additional guides:
Follow this guide to learn how to install and setup ODIN in your Unreal Project using Blueprint.
Check out our extensive Blueprint reference to learn more about the nodes our SDK provides and how to connect them into your game.