Input Device Selection
Unreal does not provide an easy method to switch input devices (like a microphone) when using the default Audio Capture, even though most players would expect this feature in a game with Voice Chat. Let's take a look at how we handle this in the ODIN plugin.
Sample Project
You can find a sample implementation in the v2.x/input-device-selection branch of the
Odin Unreal Minimal Samples Github repository.
To view the relevant Blueprints, navigate into Content/Odin/DeviceSelection. Feel free to download the project and set it
up in order to view a working implementation of the concepts shown in the following sections.
Creating an Odin Audio Capture
To change input devices, instead of using Unreal's Create Audio Capture method, we'll use the
Create Odin Audio Capture function call. This will create an extended Audio Capture object that allows us to change
the audio capture device using either Blueprints or C++.
Your logic for joining an Odin room should look something like this:
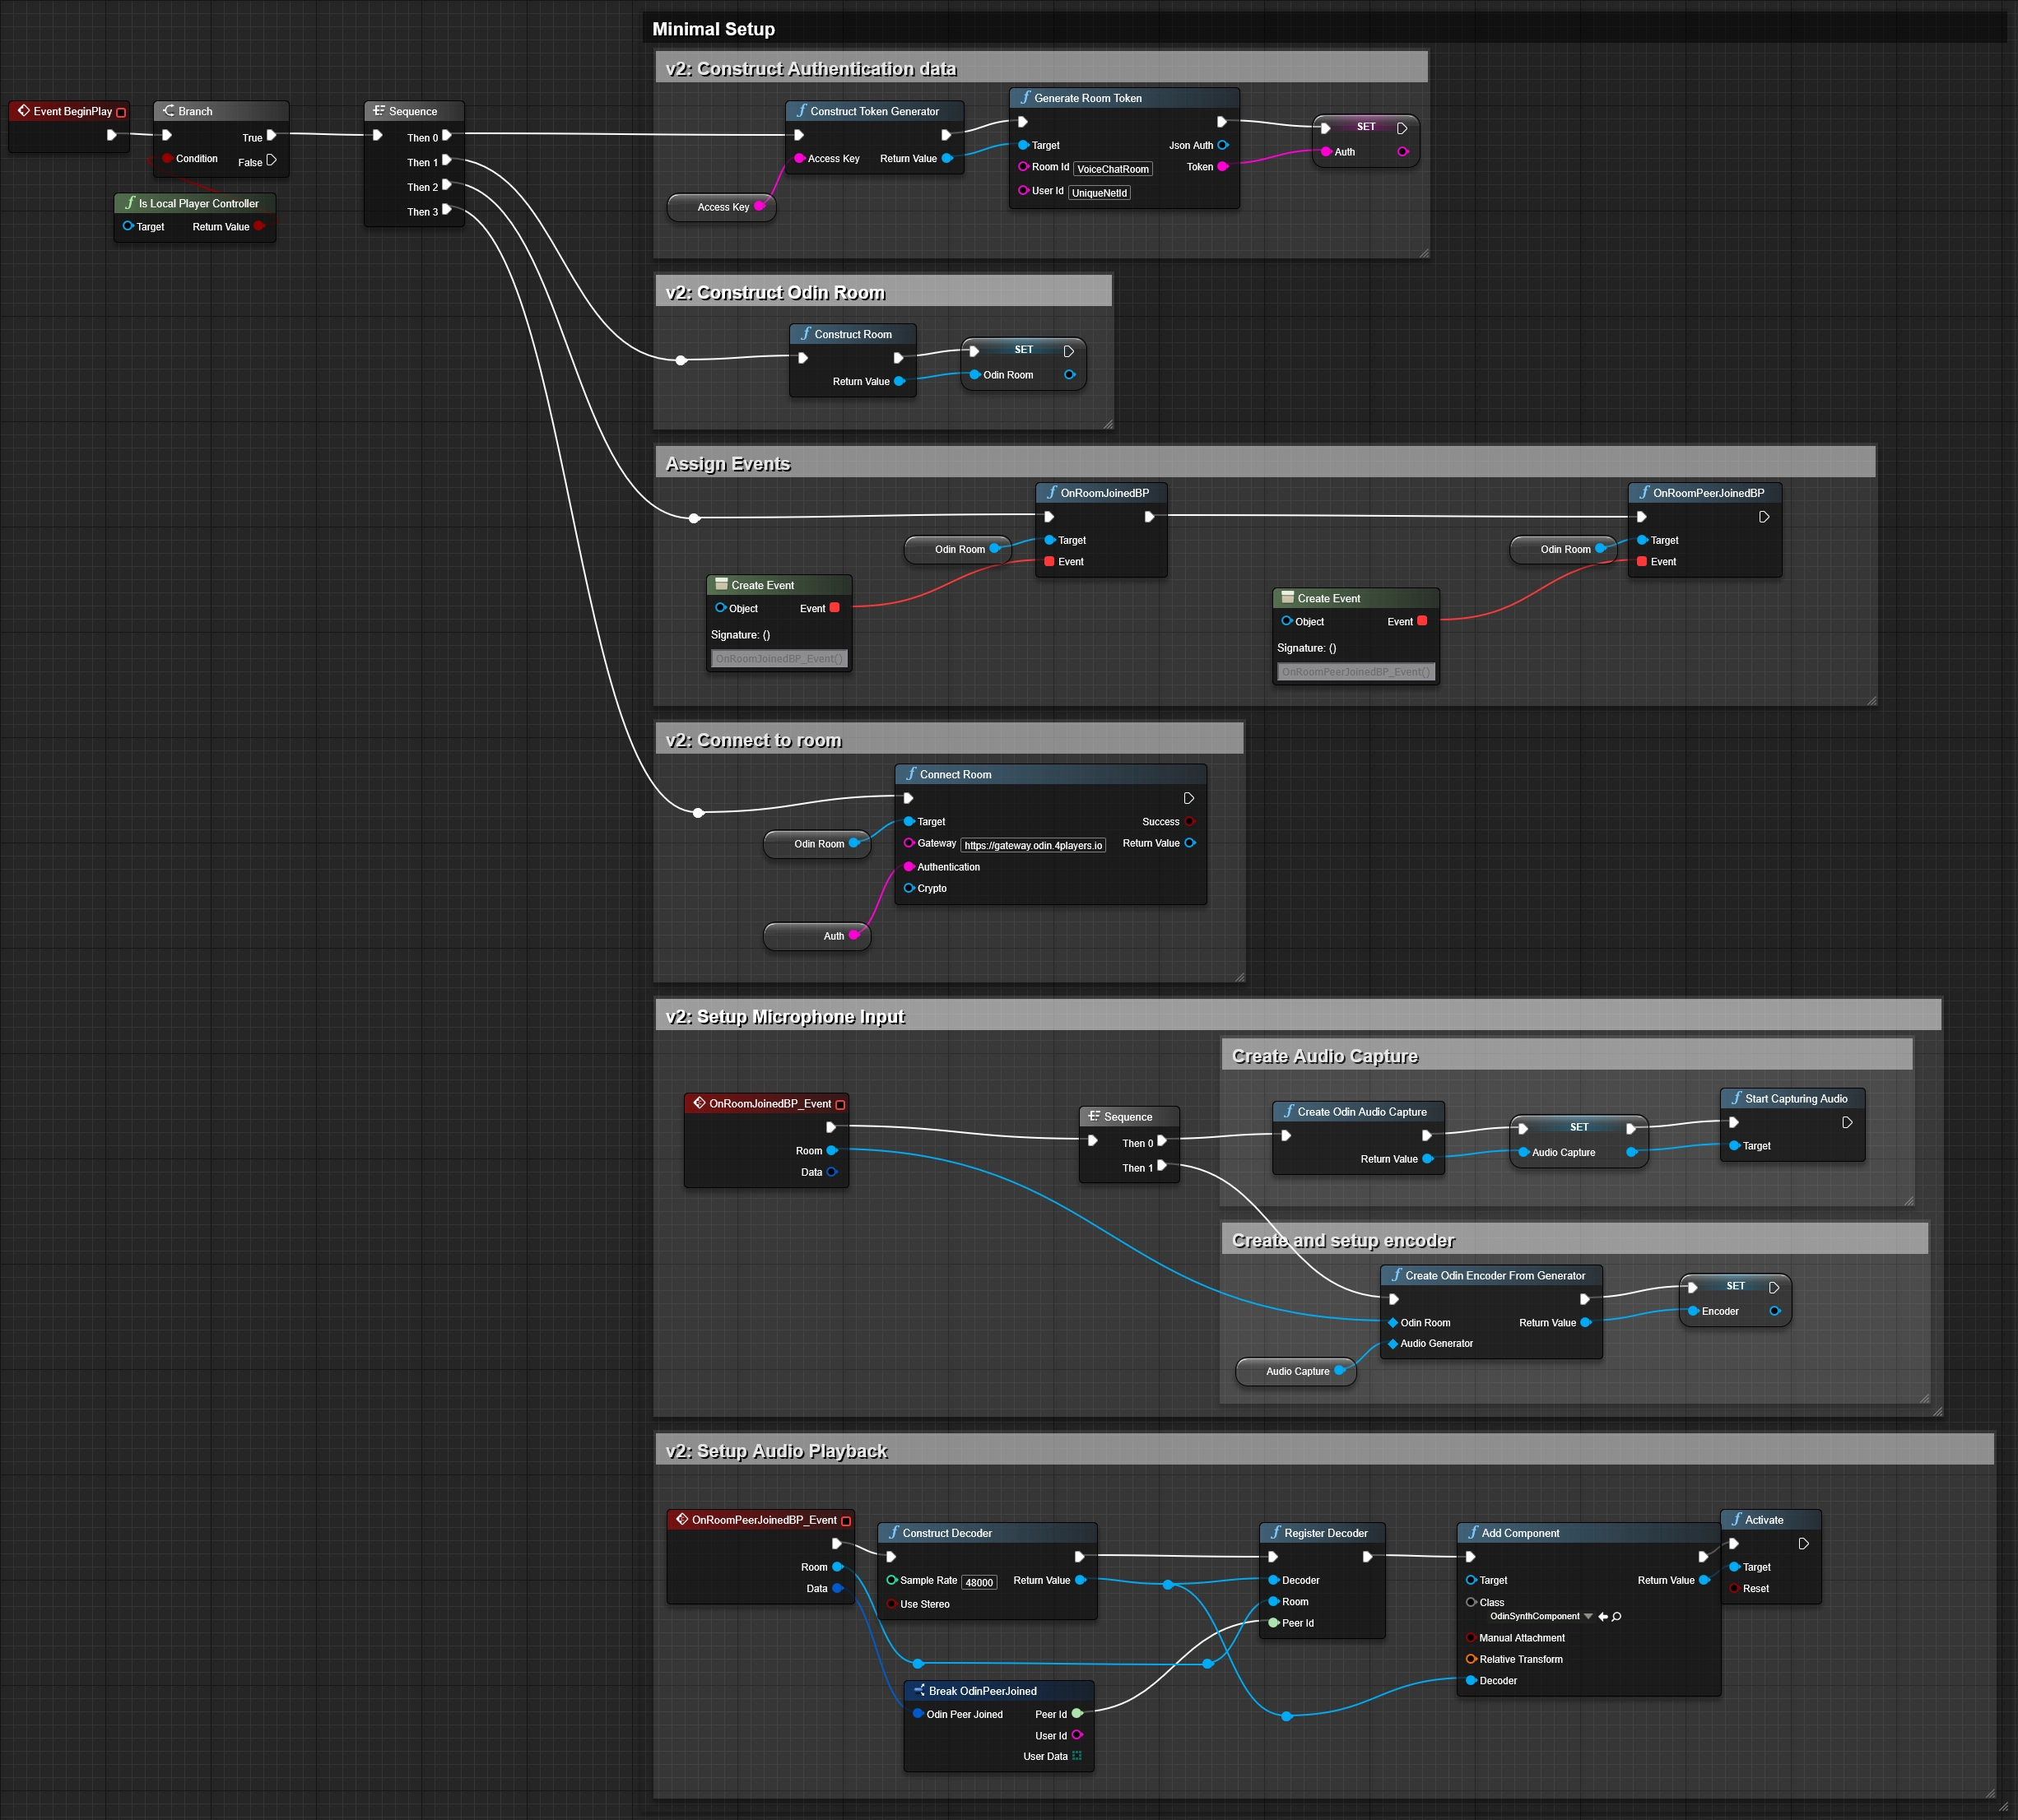
Please note that we store a reference to the Odin Audio Capture object as a variable. We're going to use it in the next
sections to display the available devices in the UI.
If you'd like more information on how to setup Odin, please take a look at our Odin Unreal Voice Chat manual.
UI Creation
You'll probably have to adjust the next steps to fit your UI implementation, but in general it's easy to adapt the necessary UI elements.
We'll create a new Blueprint Widget that gets displayed when the player presses Tab. This Widget should show the
available capture devices in a drop-down box and change the active device on selection.
- Create a new Widget Blueprint in your project-we'll call it
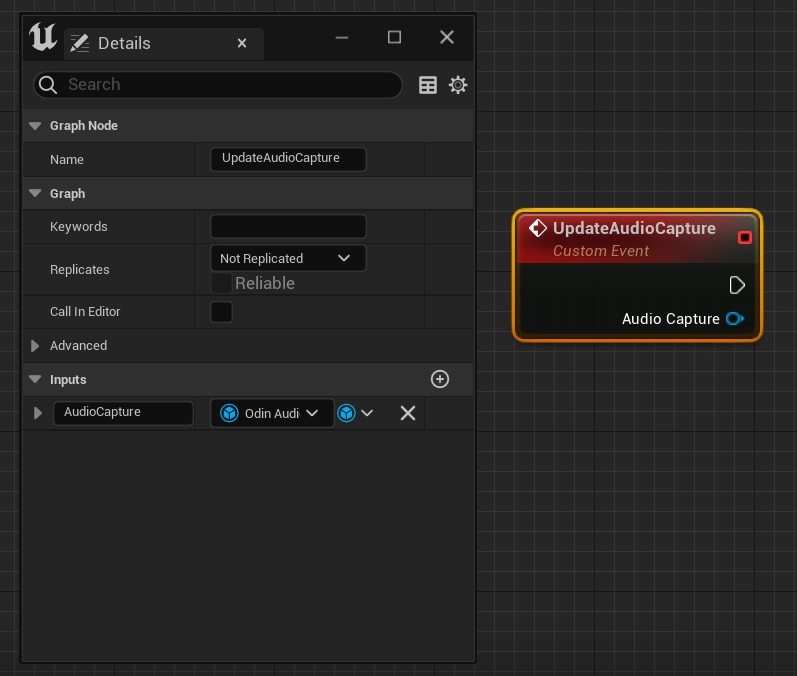
BPW_SelectInputDevice. - In the widget's event graph, create a new Custom Event called
UpdateAudioCapturewith an input parameter of typeOdin Audio Capture. We'll use this event in the next section, so simply leave it unconnected for now.
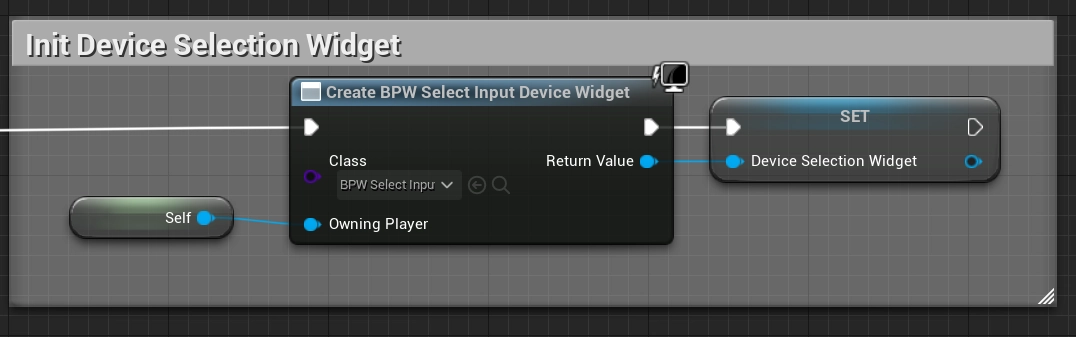
- In your player controller's
Begin Play, add aCreate Widgetcall, select the classBP_SelectInputDevice, connect theSelfproperty to theOwning Playerinput, and save the resulting widget object in a variable.
- The final step in the player controller is to add logic for toggling the "Select Input Device" UI, as shown below.
Please note the call to
Update Audio Capturewhen making the UI visible. This will supply theAudio Captureobject to the widget blueprint, which we'll use to request the available capture devices.
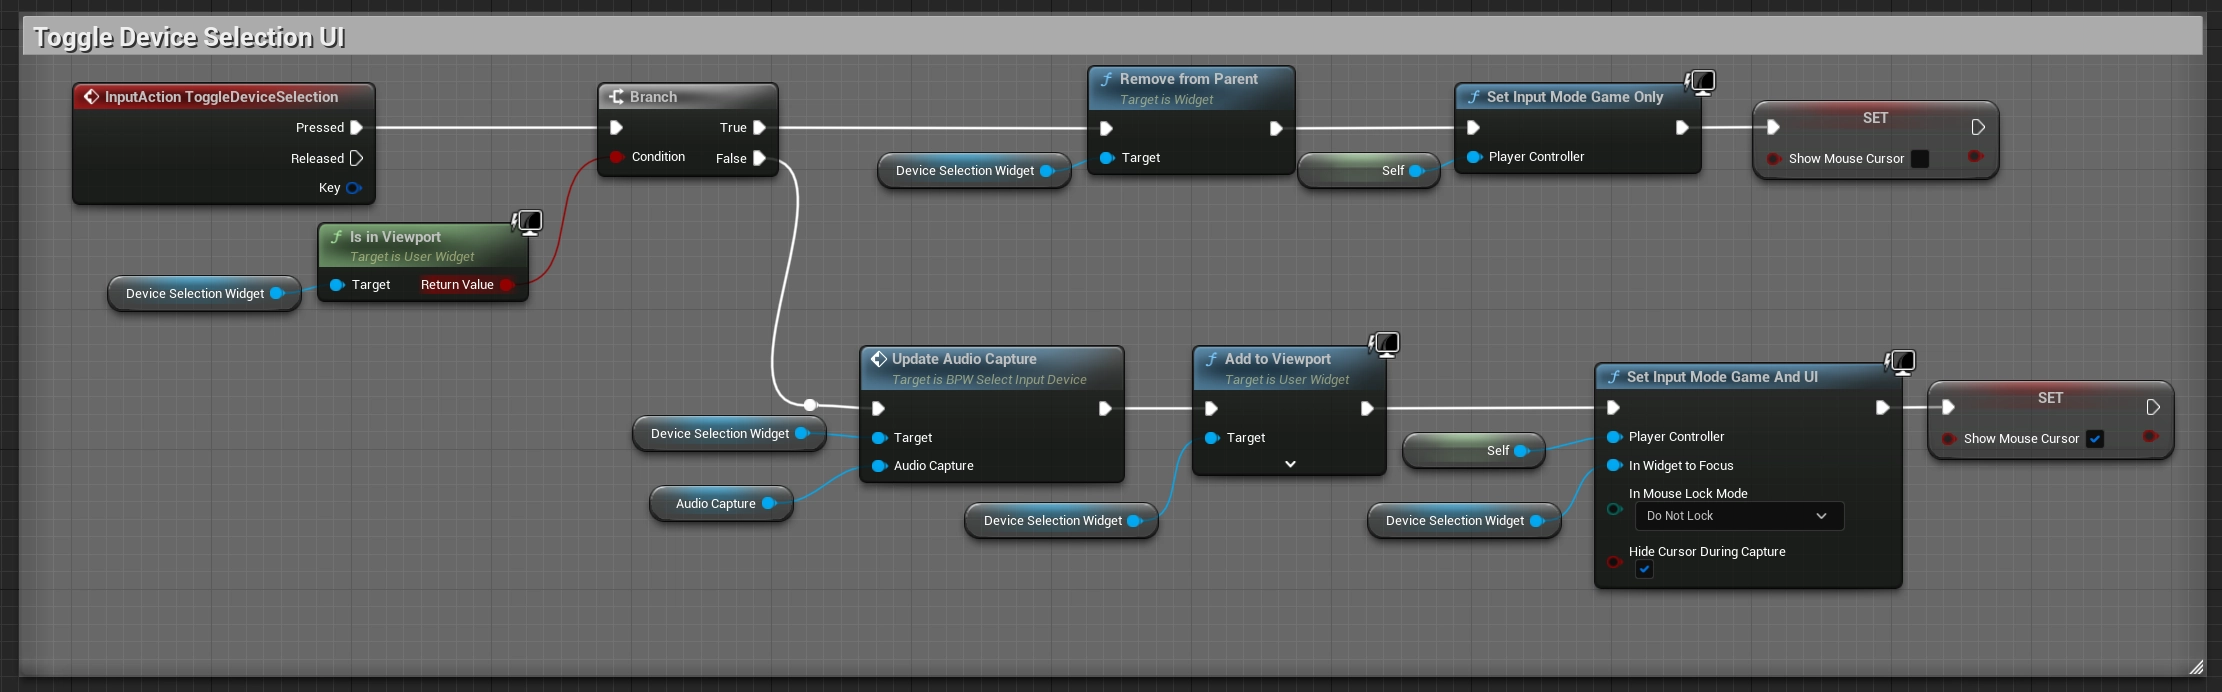
If you can't create the InputAction ToggleDeviceSelection event, make sure to add an Action in
Project Settings > Input > Action Mappings and bind it to a keyboard input-we're using Tab for testing.
Widget implementation
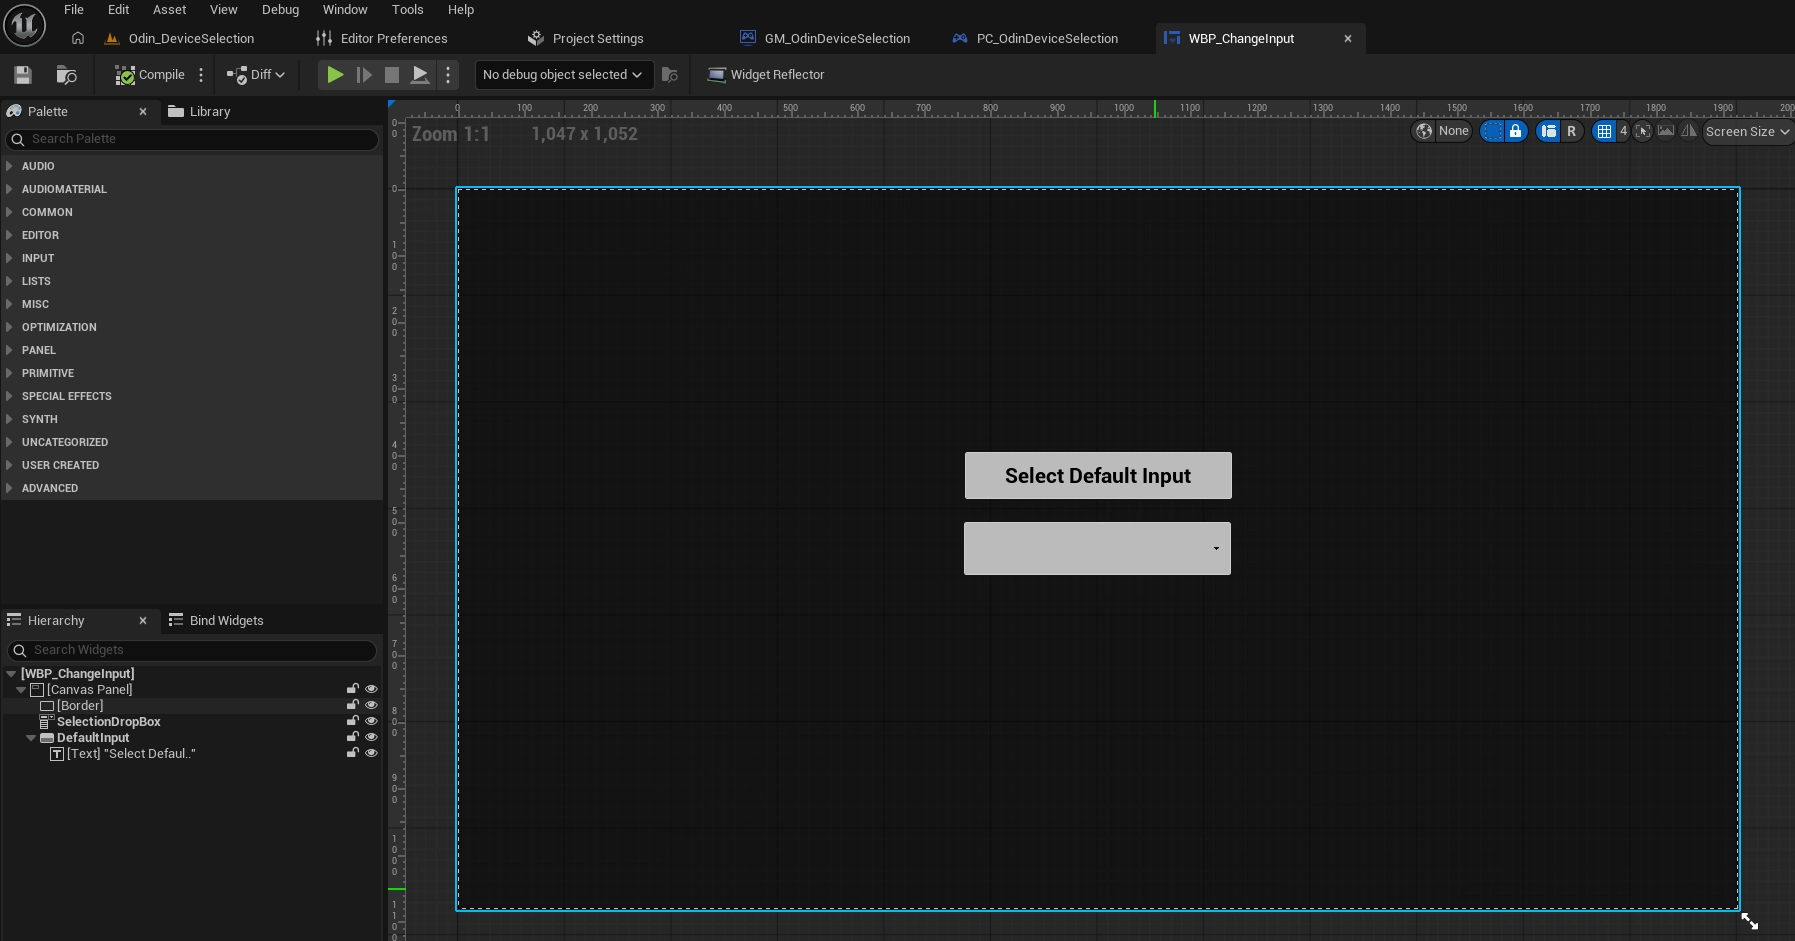
Currently, the widget does not contain any visible UI elements, so let's change this. We'll add a simple see-through background and a dropdown box, in which we'll list all available capture devices. Changing the selection in the dropdown box will change the capture device used for Odin. Additionally, we'll preselect the currently active capture device in the dropdown box.
- In the widget's
Designermode, add aCanvas Panelas the root element and aBorderandComboBox (String)as direct children. Set theBorderelement'sBrush Colorto(0,0,0,0.5)to make it darken the gameplay, but still keep it see-through. Additionally, let's give theComboBoxa meaningful name, e.g. "SelectionDropBox". Let's also add aButtonto the root element, for switching the input device selection back to the system default.
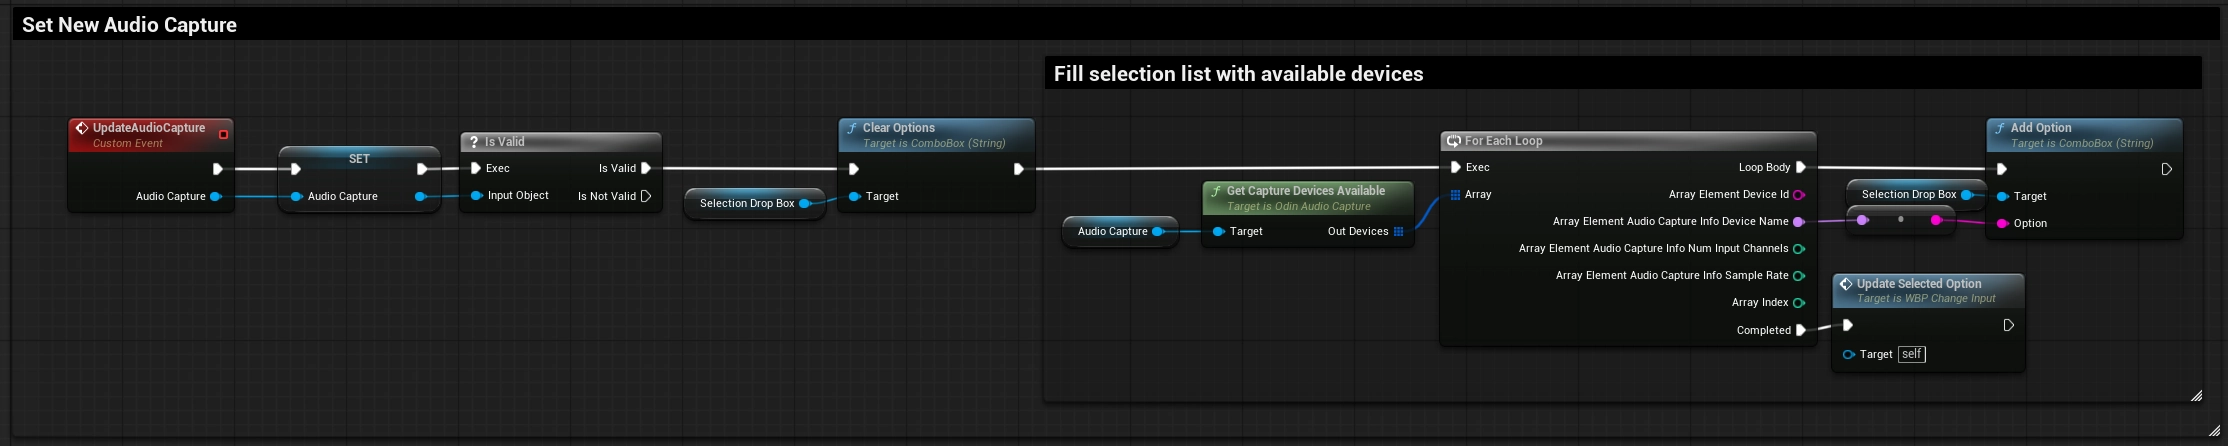
- Let's now switch to the
Graphmode and start extending our Custom EventUpdateAudioCapture. We'll store theOdin Audio Captureobject as a variable, clear theSelection Drop Boxand then callGet Capture Devices Available. This will return the available capture devices. We then use the Device Names to fill the drop box.
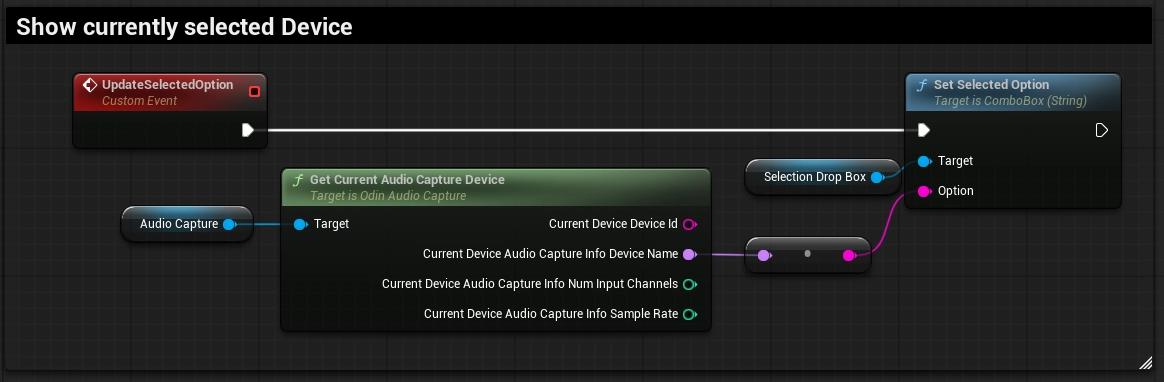
- We'll implement the
Update Selected Optionfunction next. TheGet Current Audio Capture Devicefunction of theAudio Captureobject returns the currently active Audio Capture device information. We use it to set the selected option on the drop box.
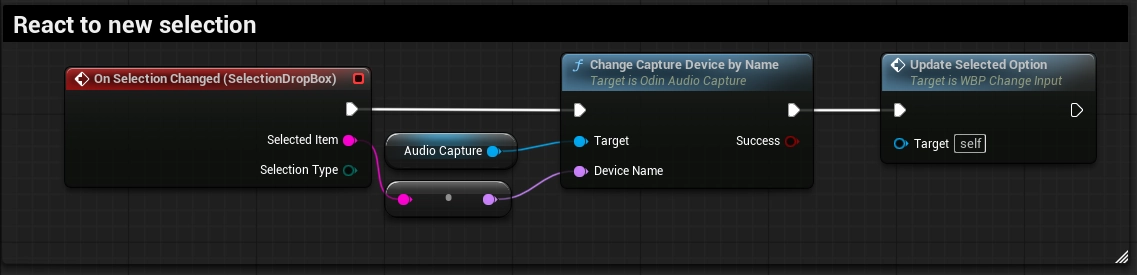
- Next, we will listen to the
On Selection Changedevent of the combo box. Based on the selection, we callChange Capture Device by Nameon theUOdinAudioCaptureobject. After this, the selected Capture Device will be used by Odin to transmit audio data.
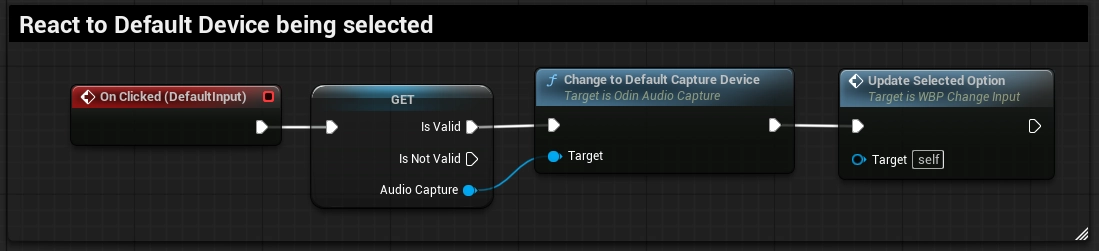
- Finally, we add a listener to the
On Clickedevent of the Default Input Button. To activate the default device, we simply callChange to Default Capture deviceon theUOdinAudioCaptureobject. Because this will internally change the input device to the system default one, we also need to callUpdate Selected Optionagain.
Now anytime a user chooses a new option, the Odin Audio Capture object will change the capture device and restart the
input stream automatically.
What's next?
This is a very simple implementation with minimal UI, which you'll be able to easily adapt to your project's needs. For more information on Unreal with Odin Voice Chat, check out our Discord and take a look at the following guides we've prepared for you:
Follow this guide to learn how to install and set up ODIN in your Unreal Project using Blueprint.
Check out our extensive Blueprint reference to learn more about the nodes our SDK provides and how to connect them into your game.