Getting Started with ODIN FLeet
ODIN Fleet is designed to simplify the process of deploying and managing game servers across our global network. With ODIN Fleet, you can easily deploy and manage game servers for your games, regardless of the game engine or platform you are using. ODIN Fleet is optimized for real-time, stateful game server hosting, making it ideal for world-building games. It is also versatile enough to handle short-term, stateless server tasks typical in match-based games.
In most cases, you'll have your own gameserver, but for this example, we'll use an existing Minecraft Docker image to deploy a Minecraft server.
Background
You have two options to deploy a game server with ODIN Fleet:
- Docker Image: You can create your own Docker image and deploy it with ODIN Fleet.
- Steamworks: You can deploy a game server using Steamworks.
In this case, we'll use the excellent itzg/minecraft-server Docker image to deploy a Minecraft server.
Let's get started...
Sign in to the 4Players dashboard
Our dashboard is an easy way of managing your game servers and applications. It's also a good way to see which items are
created by the examples and how they are structured.
Navigate to the dashboard at https://console.4players.io. All you need is a 4Players
account, which you can also create on the dashboard.
Once you have signed in, you need to create an application. An application is a space within ODIN Fleet that has its own resource limits and configurations. You can create multiple applications to separate different environments or projects.
Create an application
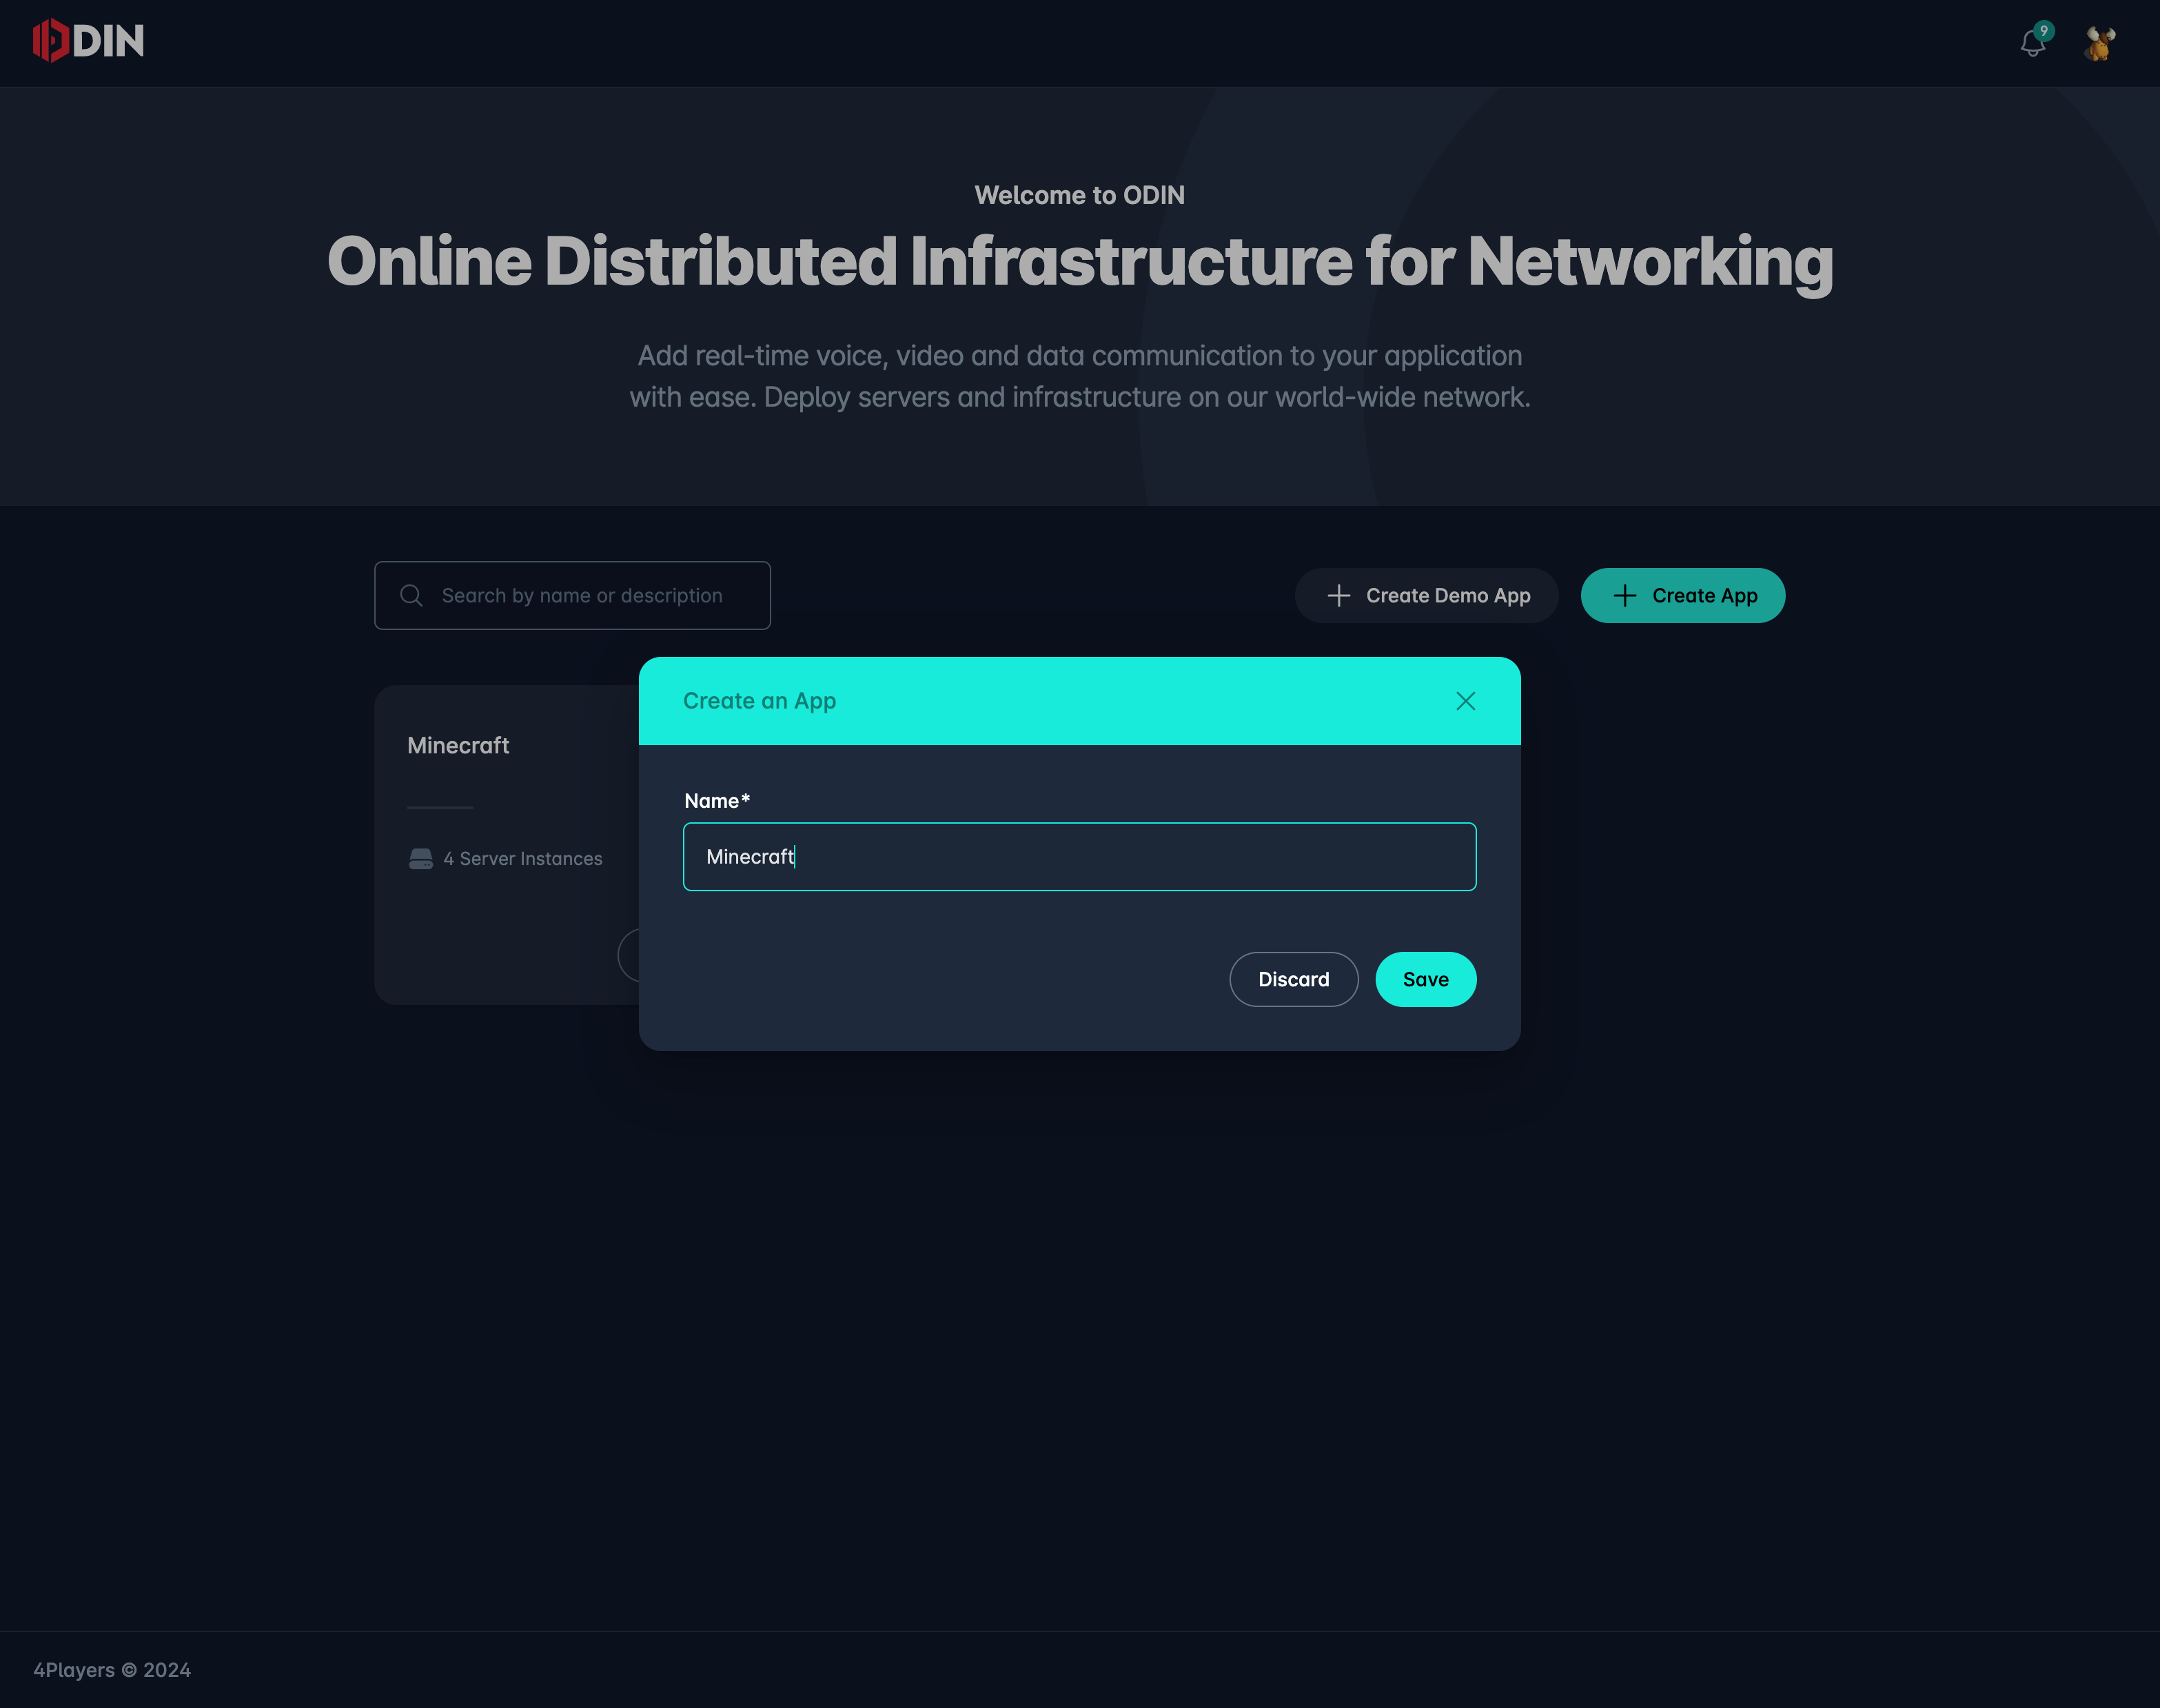
Once you have signed in to the dashboard, you'll be on the "Manage Apps" page. Click on the Create App button to
create a new application. You can name it whatever you want, but for this example, we'll name it Minecraft.
If you don't want to follow the tutorial step by step, we have made a shortcut for you: You can also install a demo
application that will create all the necessary resources for you via script. Instead of clicking on the Create App
button, click on the Create Demo App button. Choose Minecraft from the list, give it a name, and click on **Create
**.
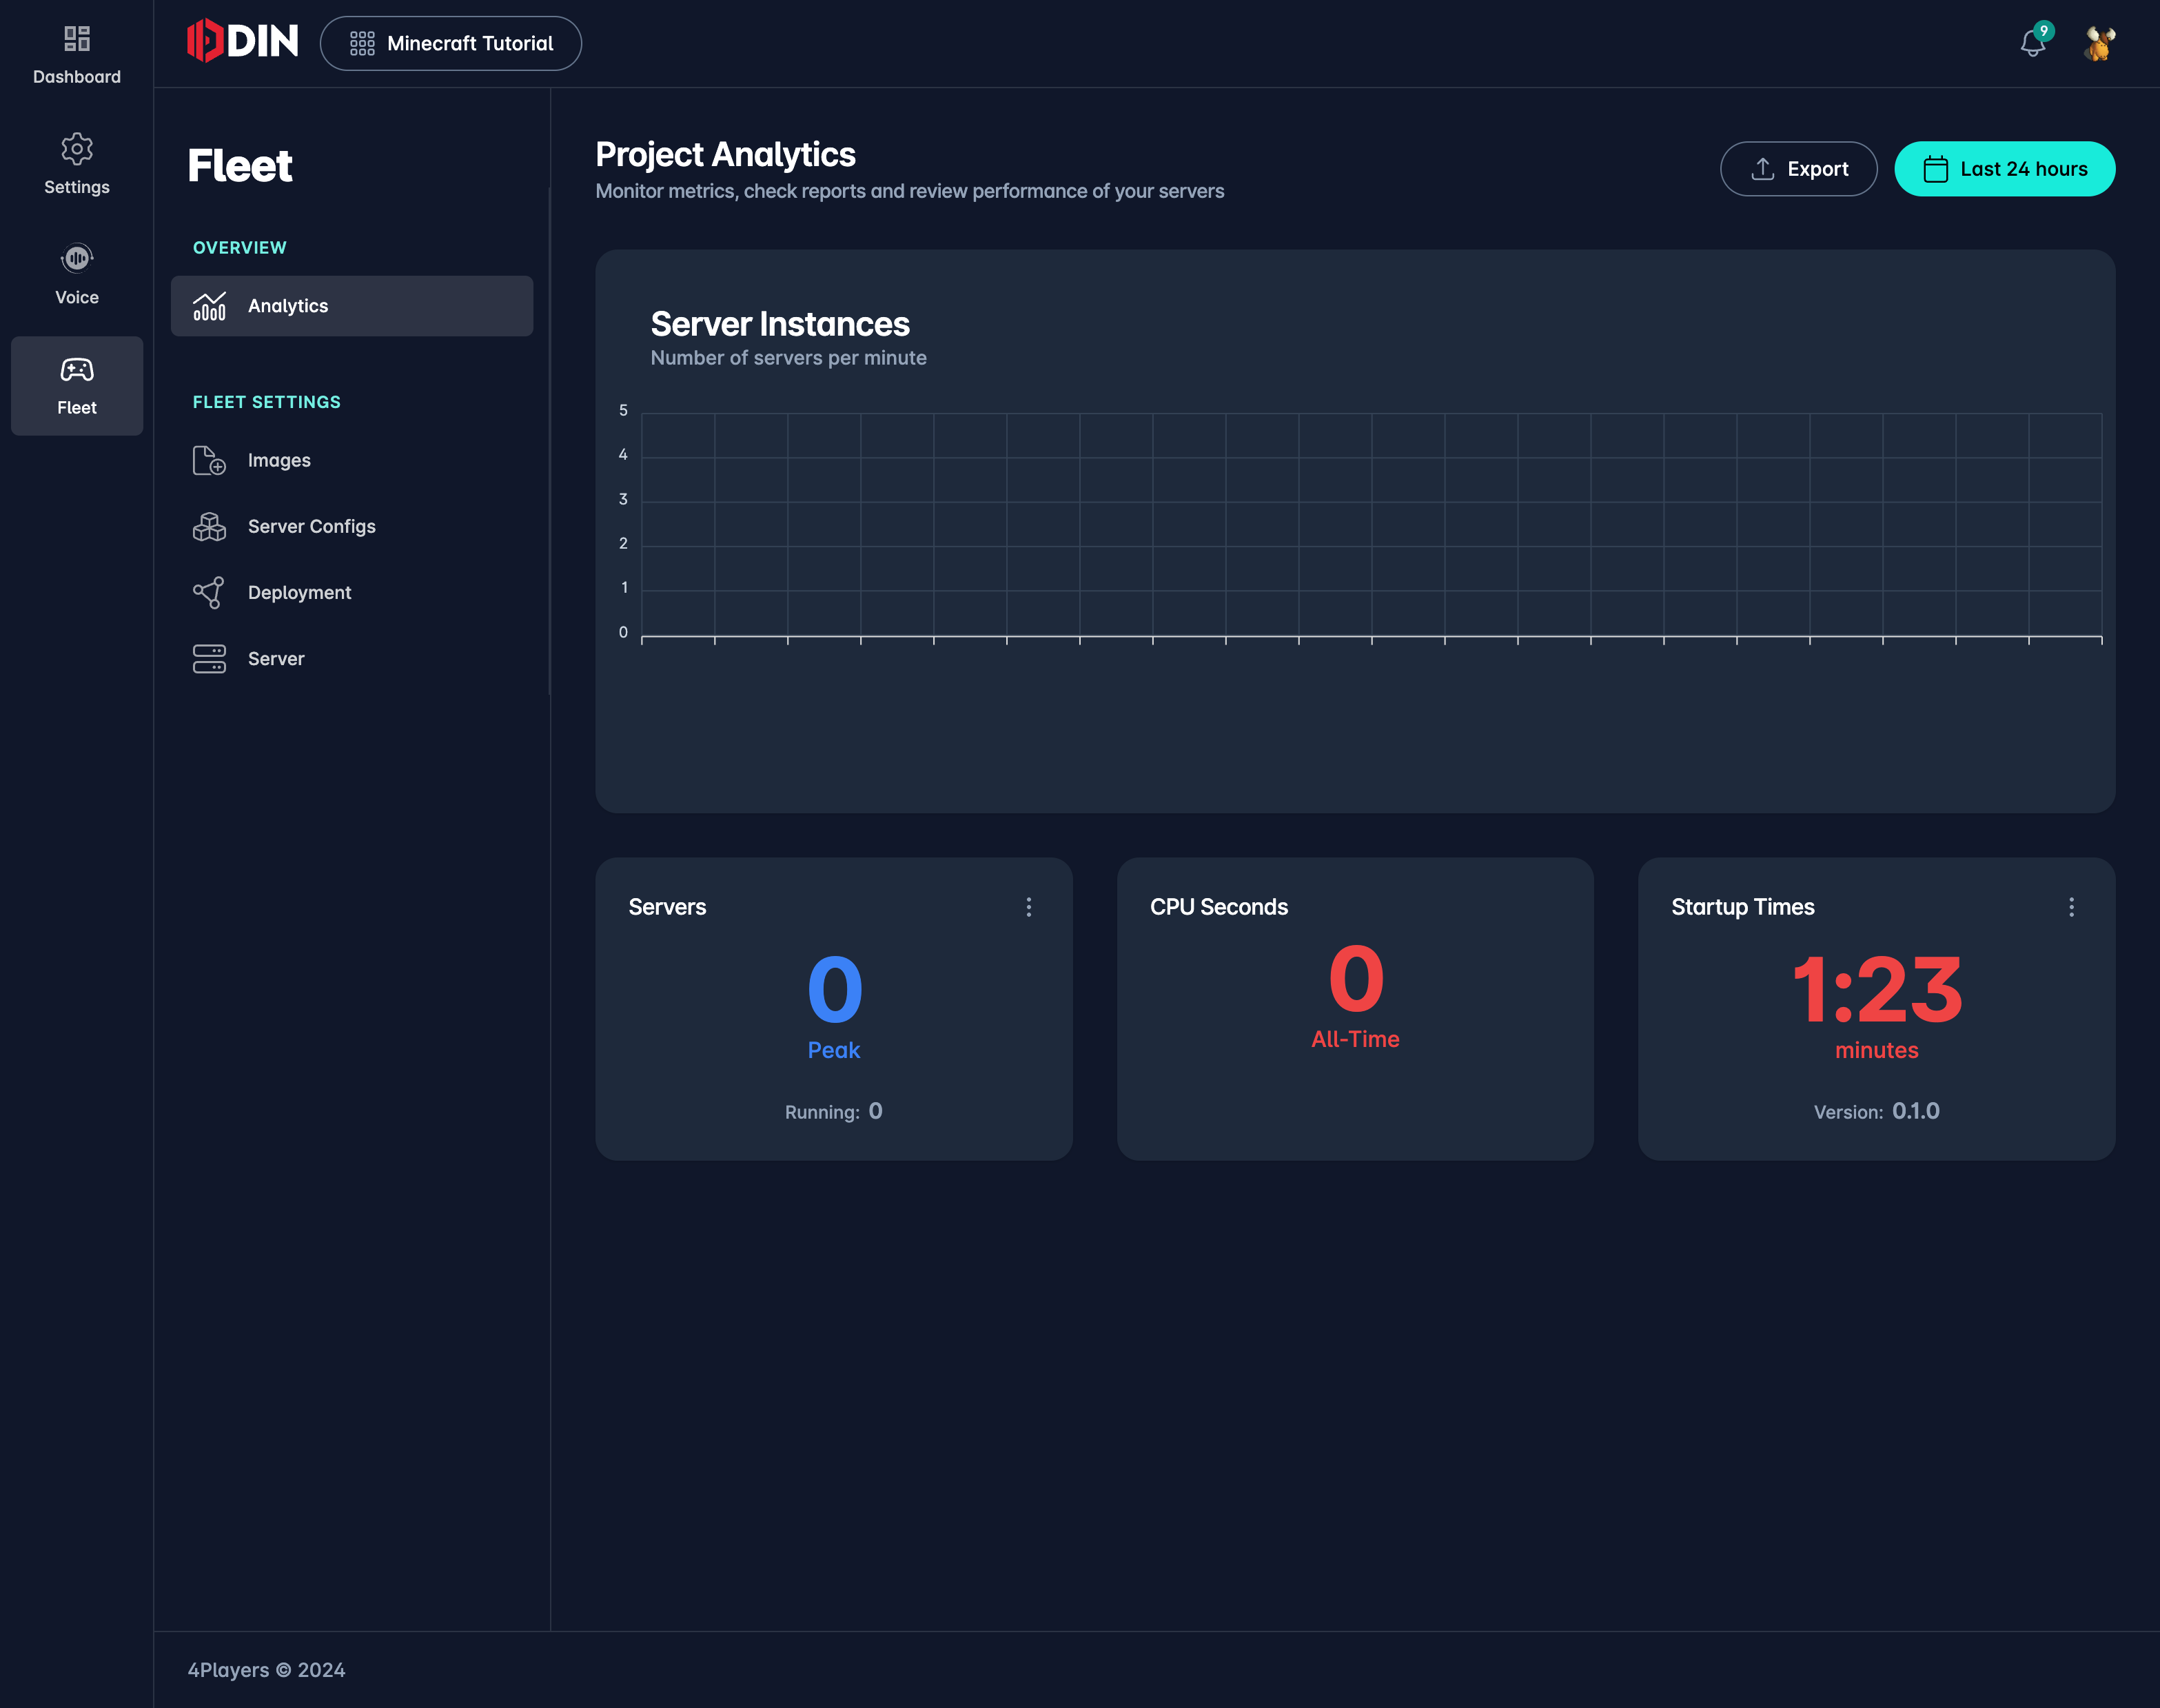
Once you have created the application, you'll be routed to the apps dashboard. Click on Fleet in the left sidebar to choose the Fleet product. In the sidebar, you can also choose Voice, which is our [real-time voice-chat SDK](/voice) with deep game engine integration to Unity and Unreal, but for now, we'll concentrate on gameserver deployment.
Create an image
The next step is to register an image. An image is a snapshot of your gameserver that can be deployed to a server. You can create an image from a Docker image or from a Steamworks app. As discussed earlier, we'll be using an existing docker image for Minecraft.
On the left side, click on Images and then on Create Image. This is a three-step process.
- Provide basic image details like its name, version, and underlying operating system.
- Choose whether to provide a docker image or Steamworks credentials to create the image.
- Enter the necessary information for the chosen image type.
This gallery shows you which data to enter:
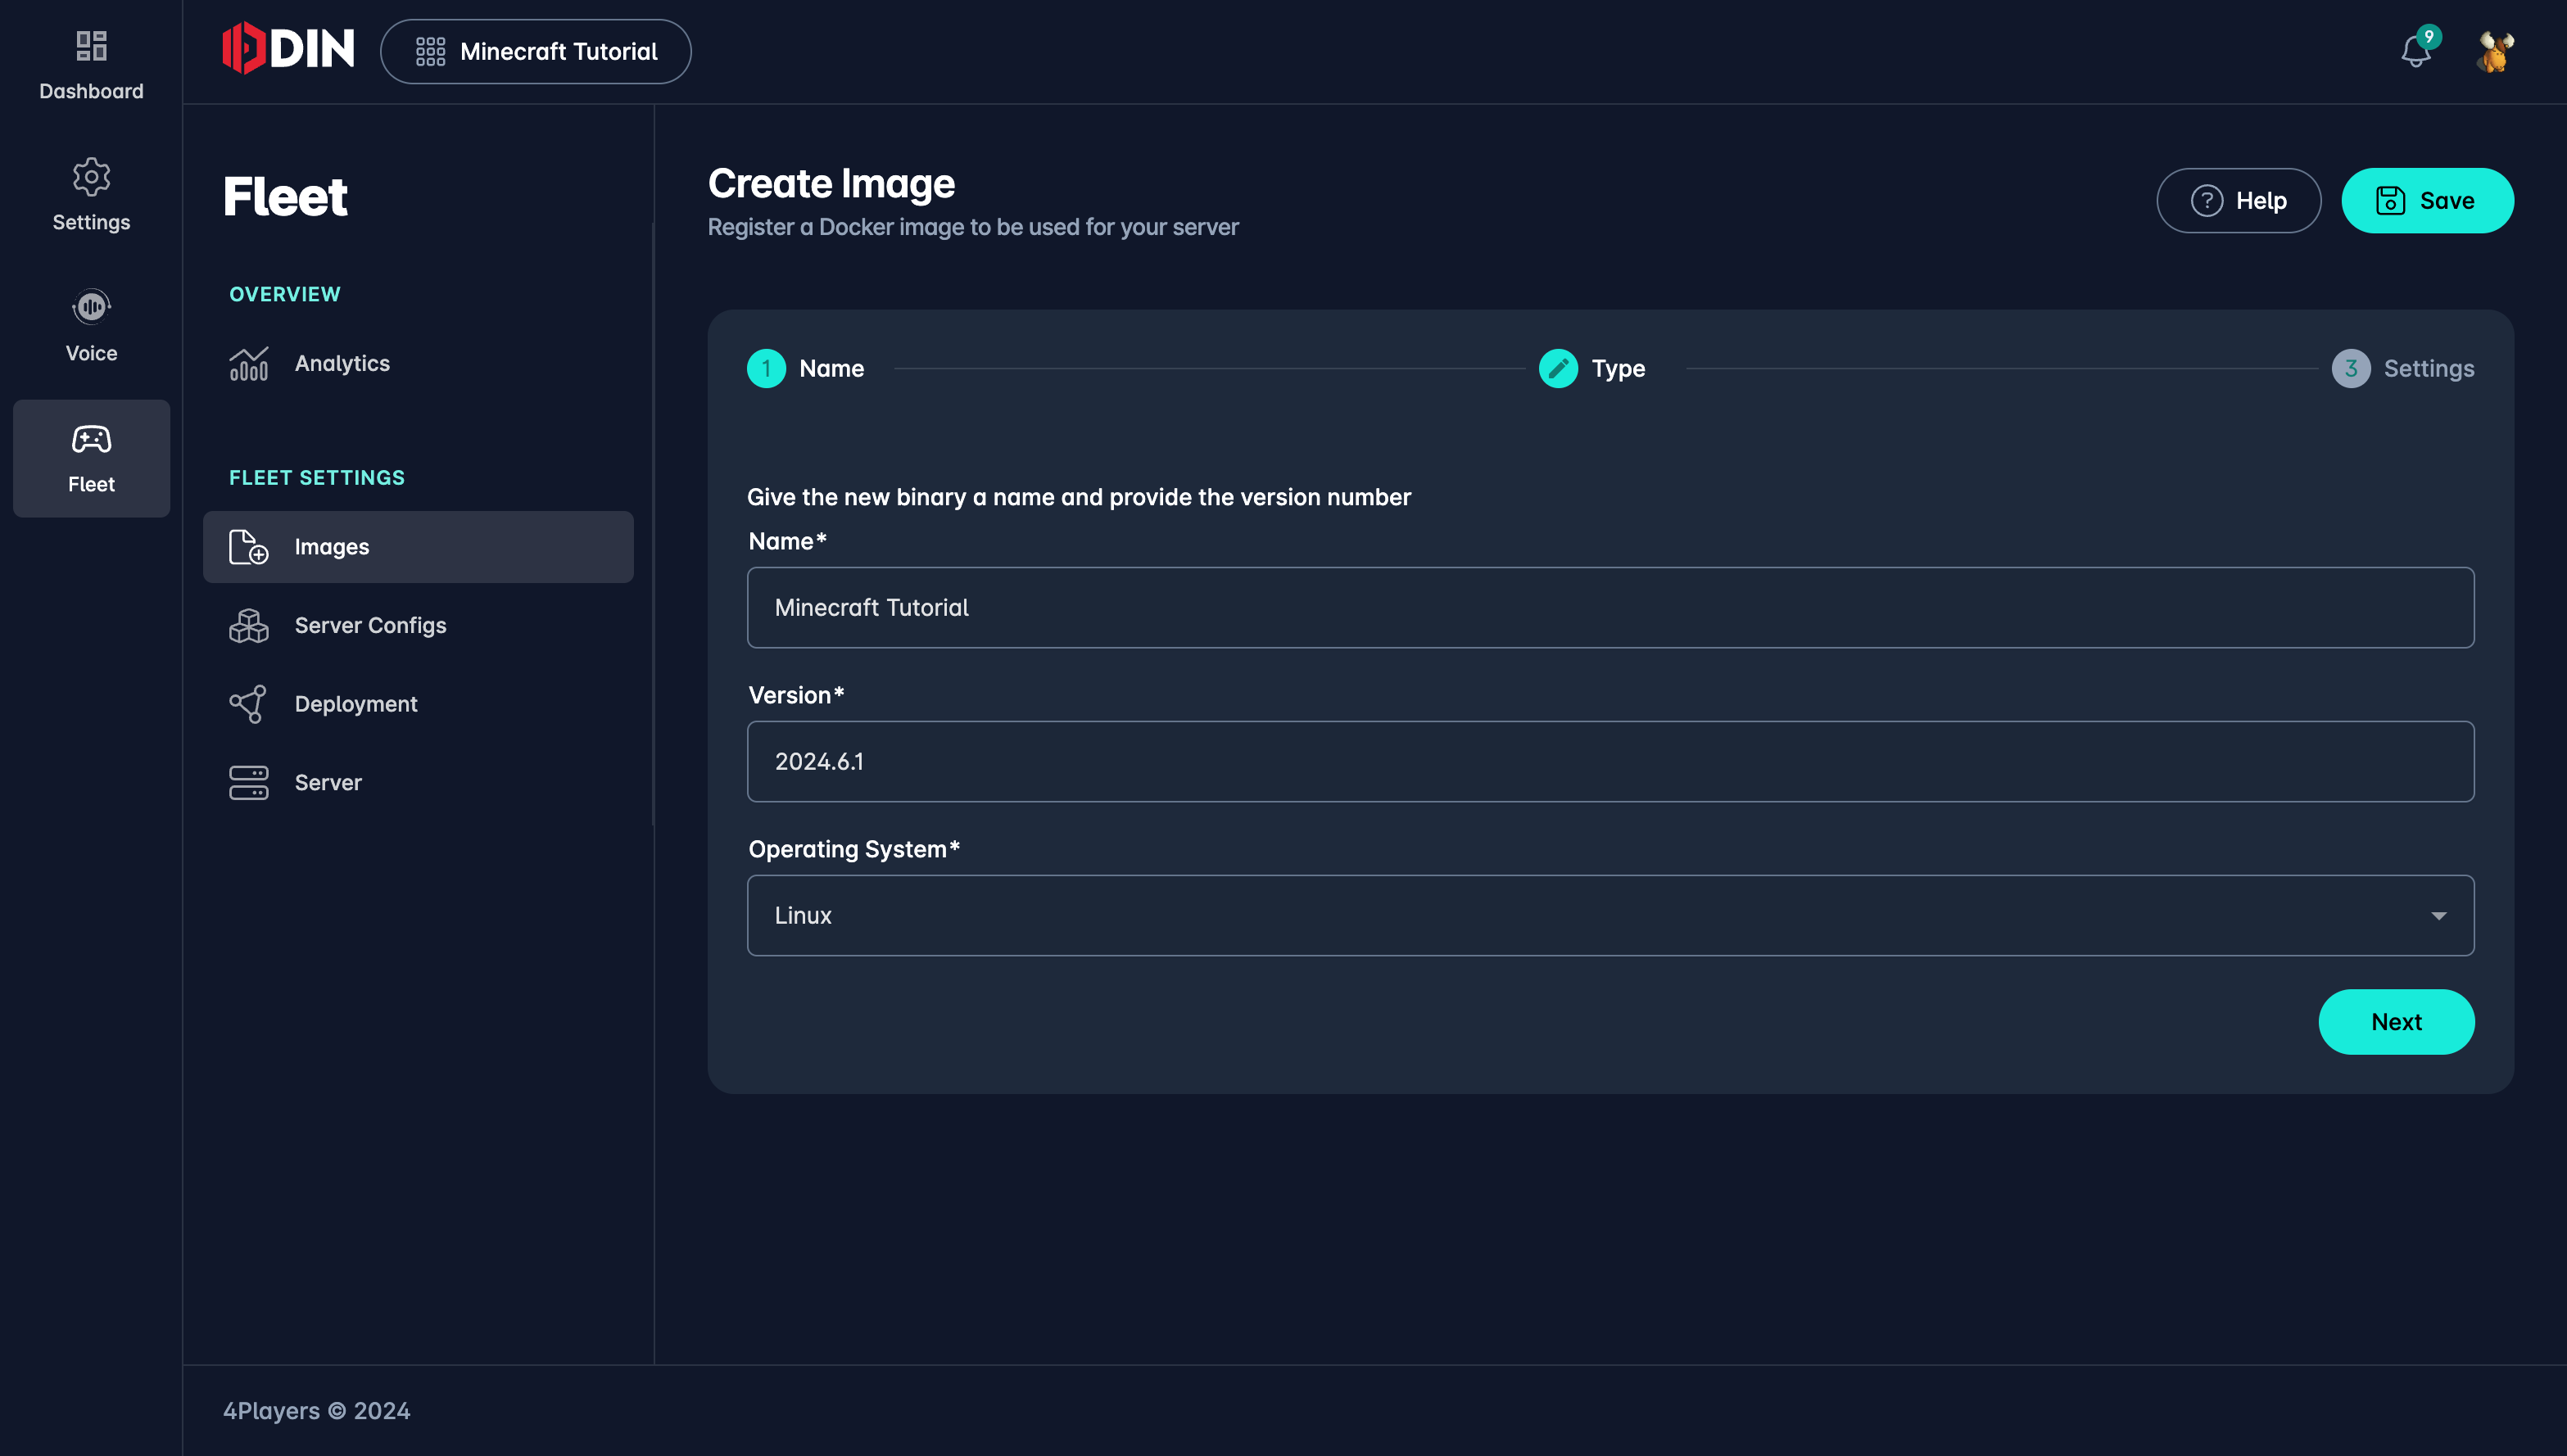
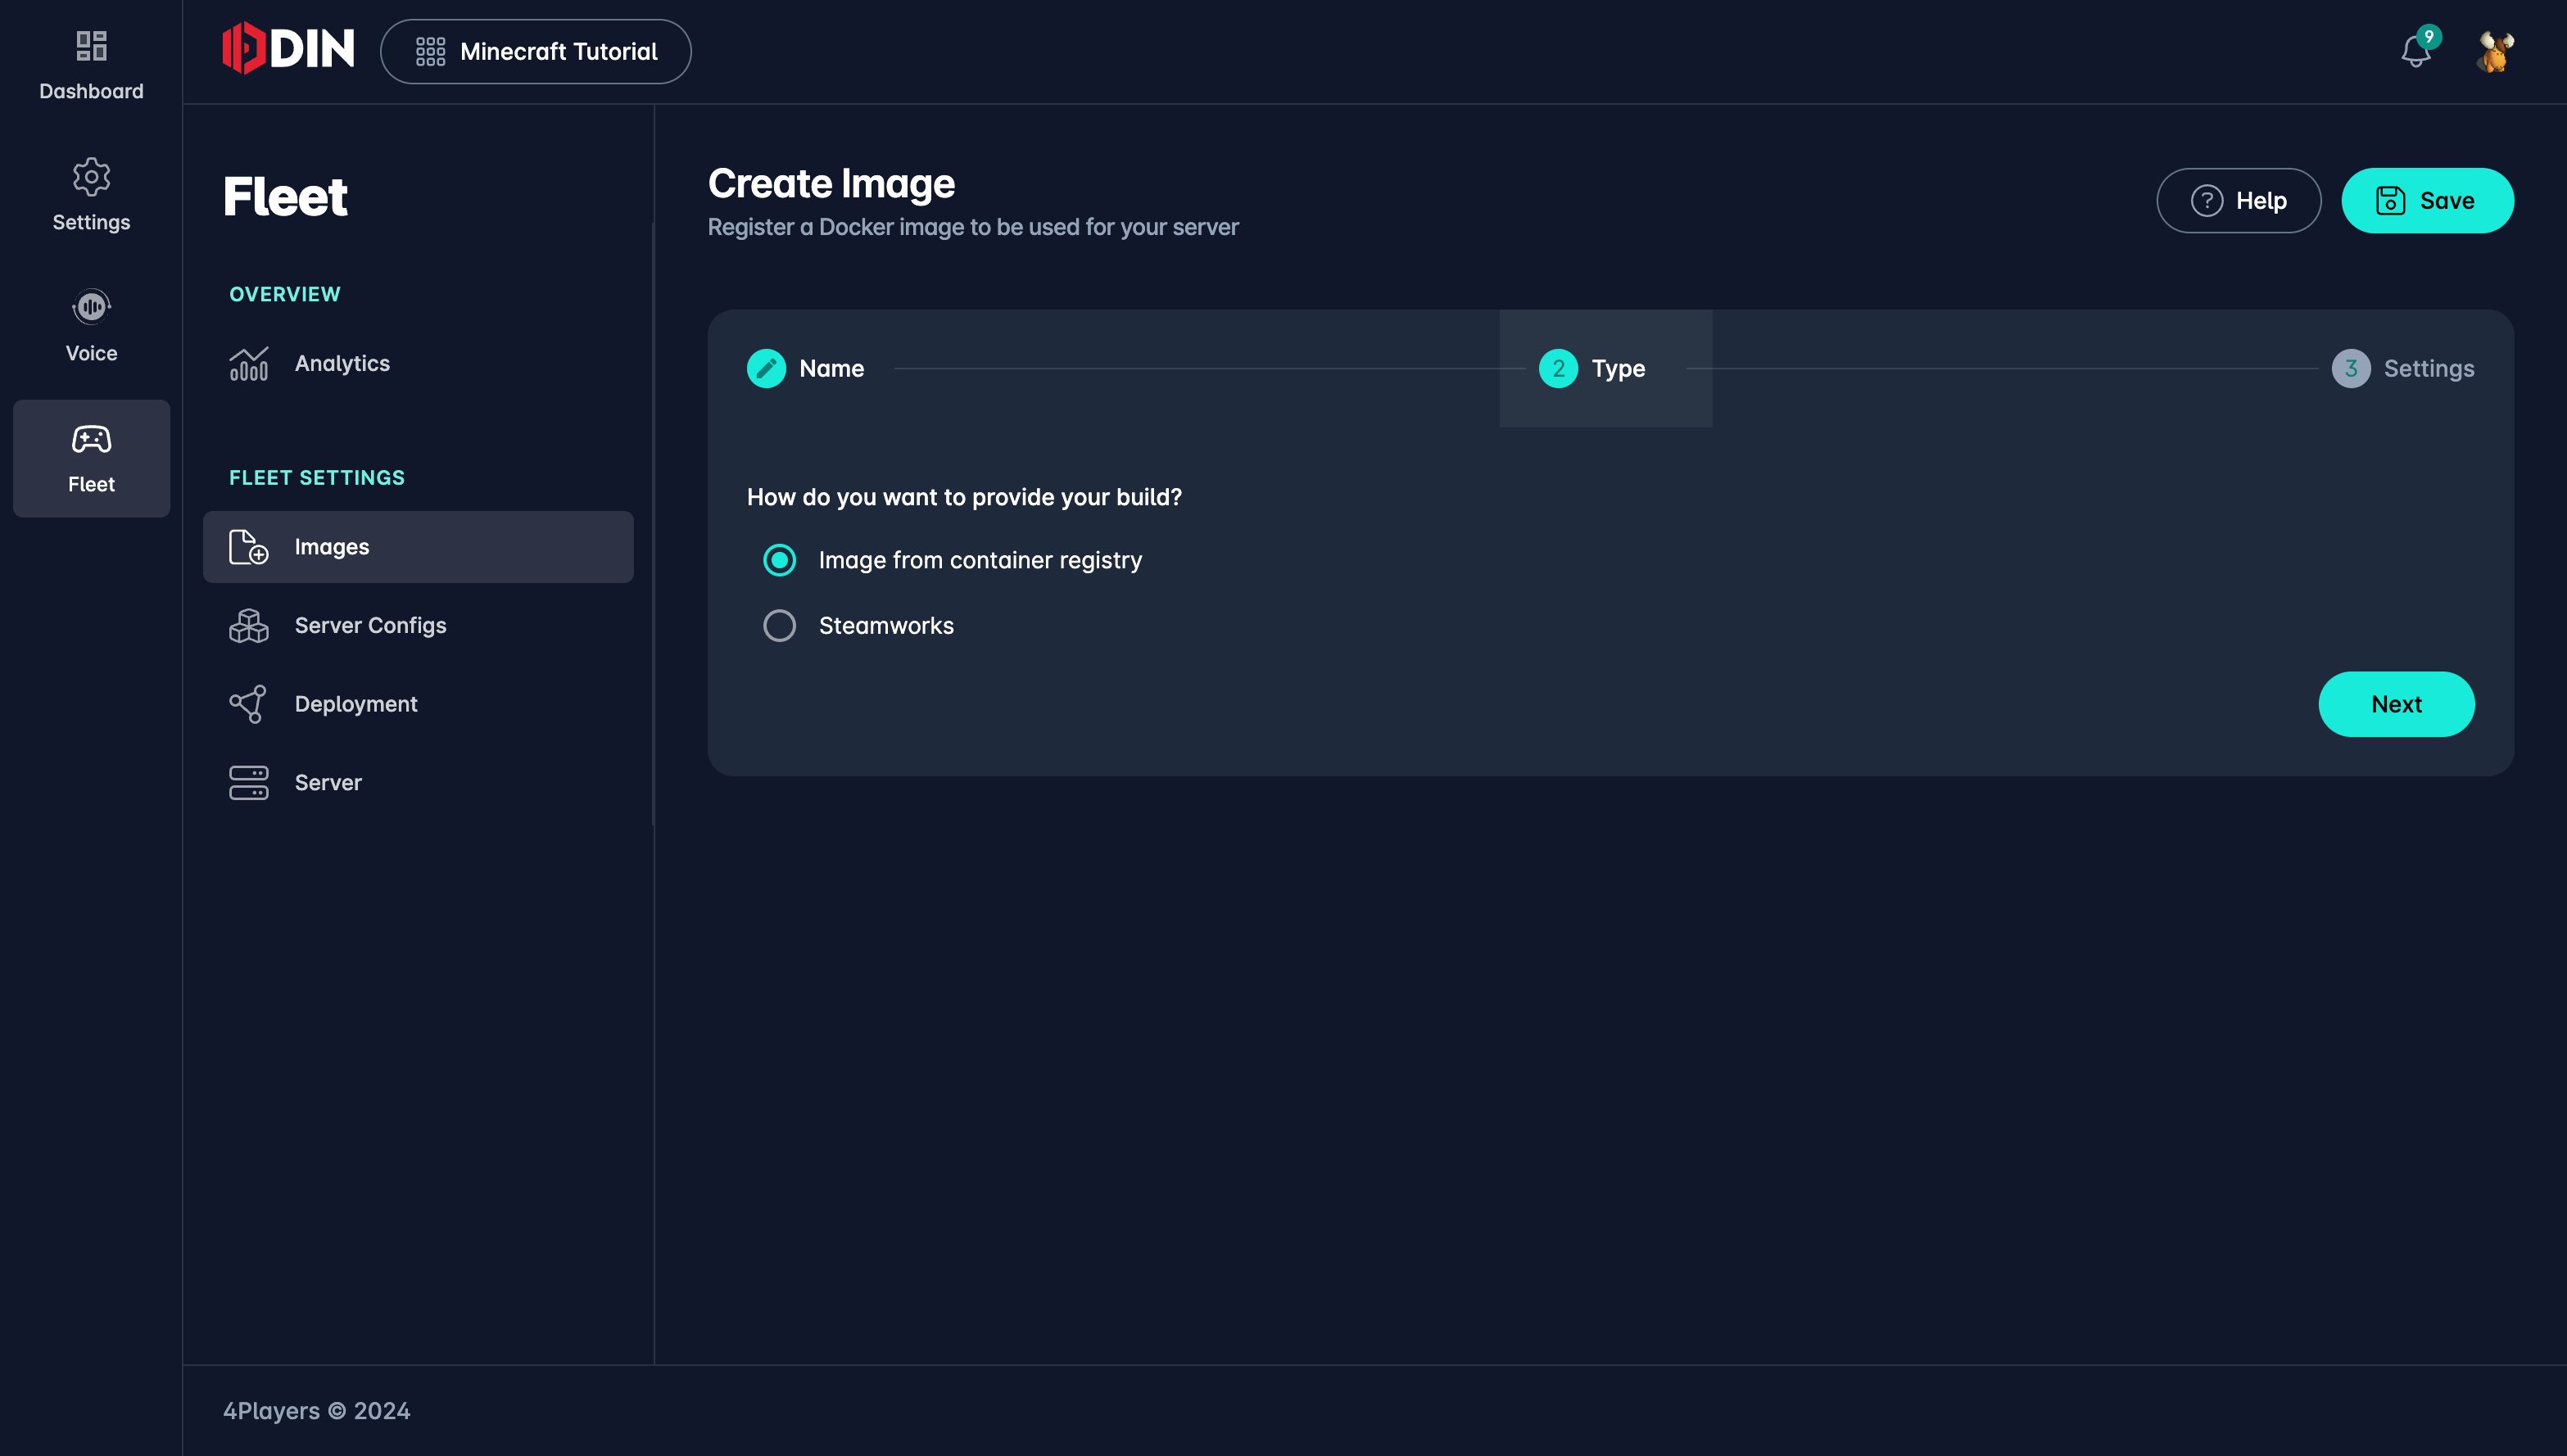
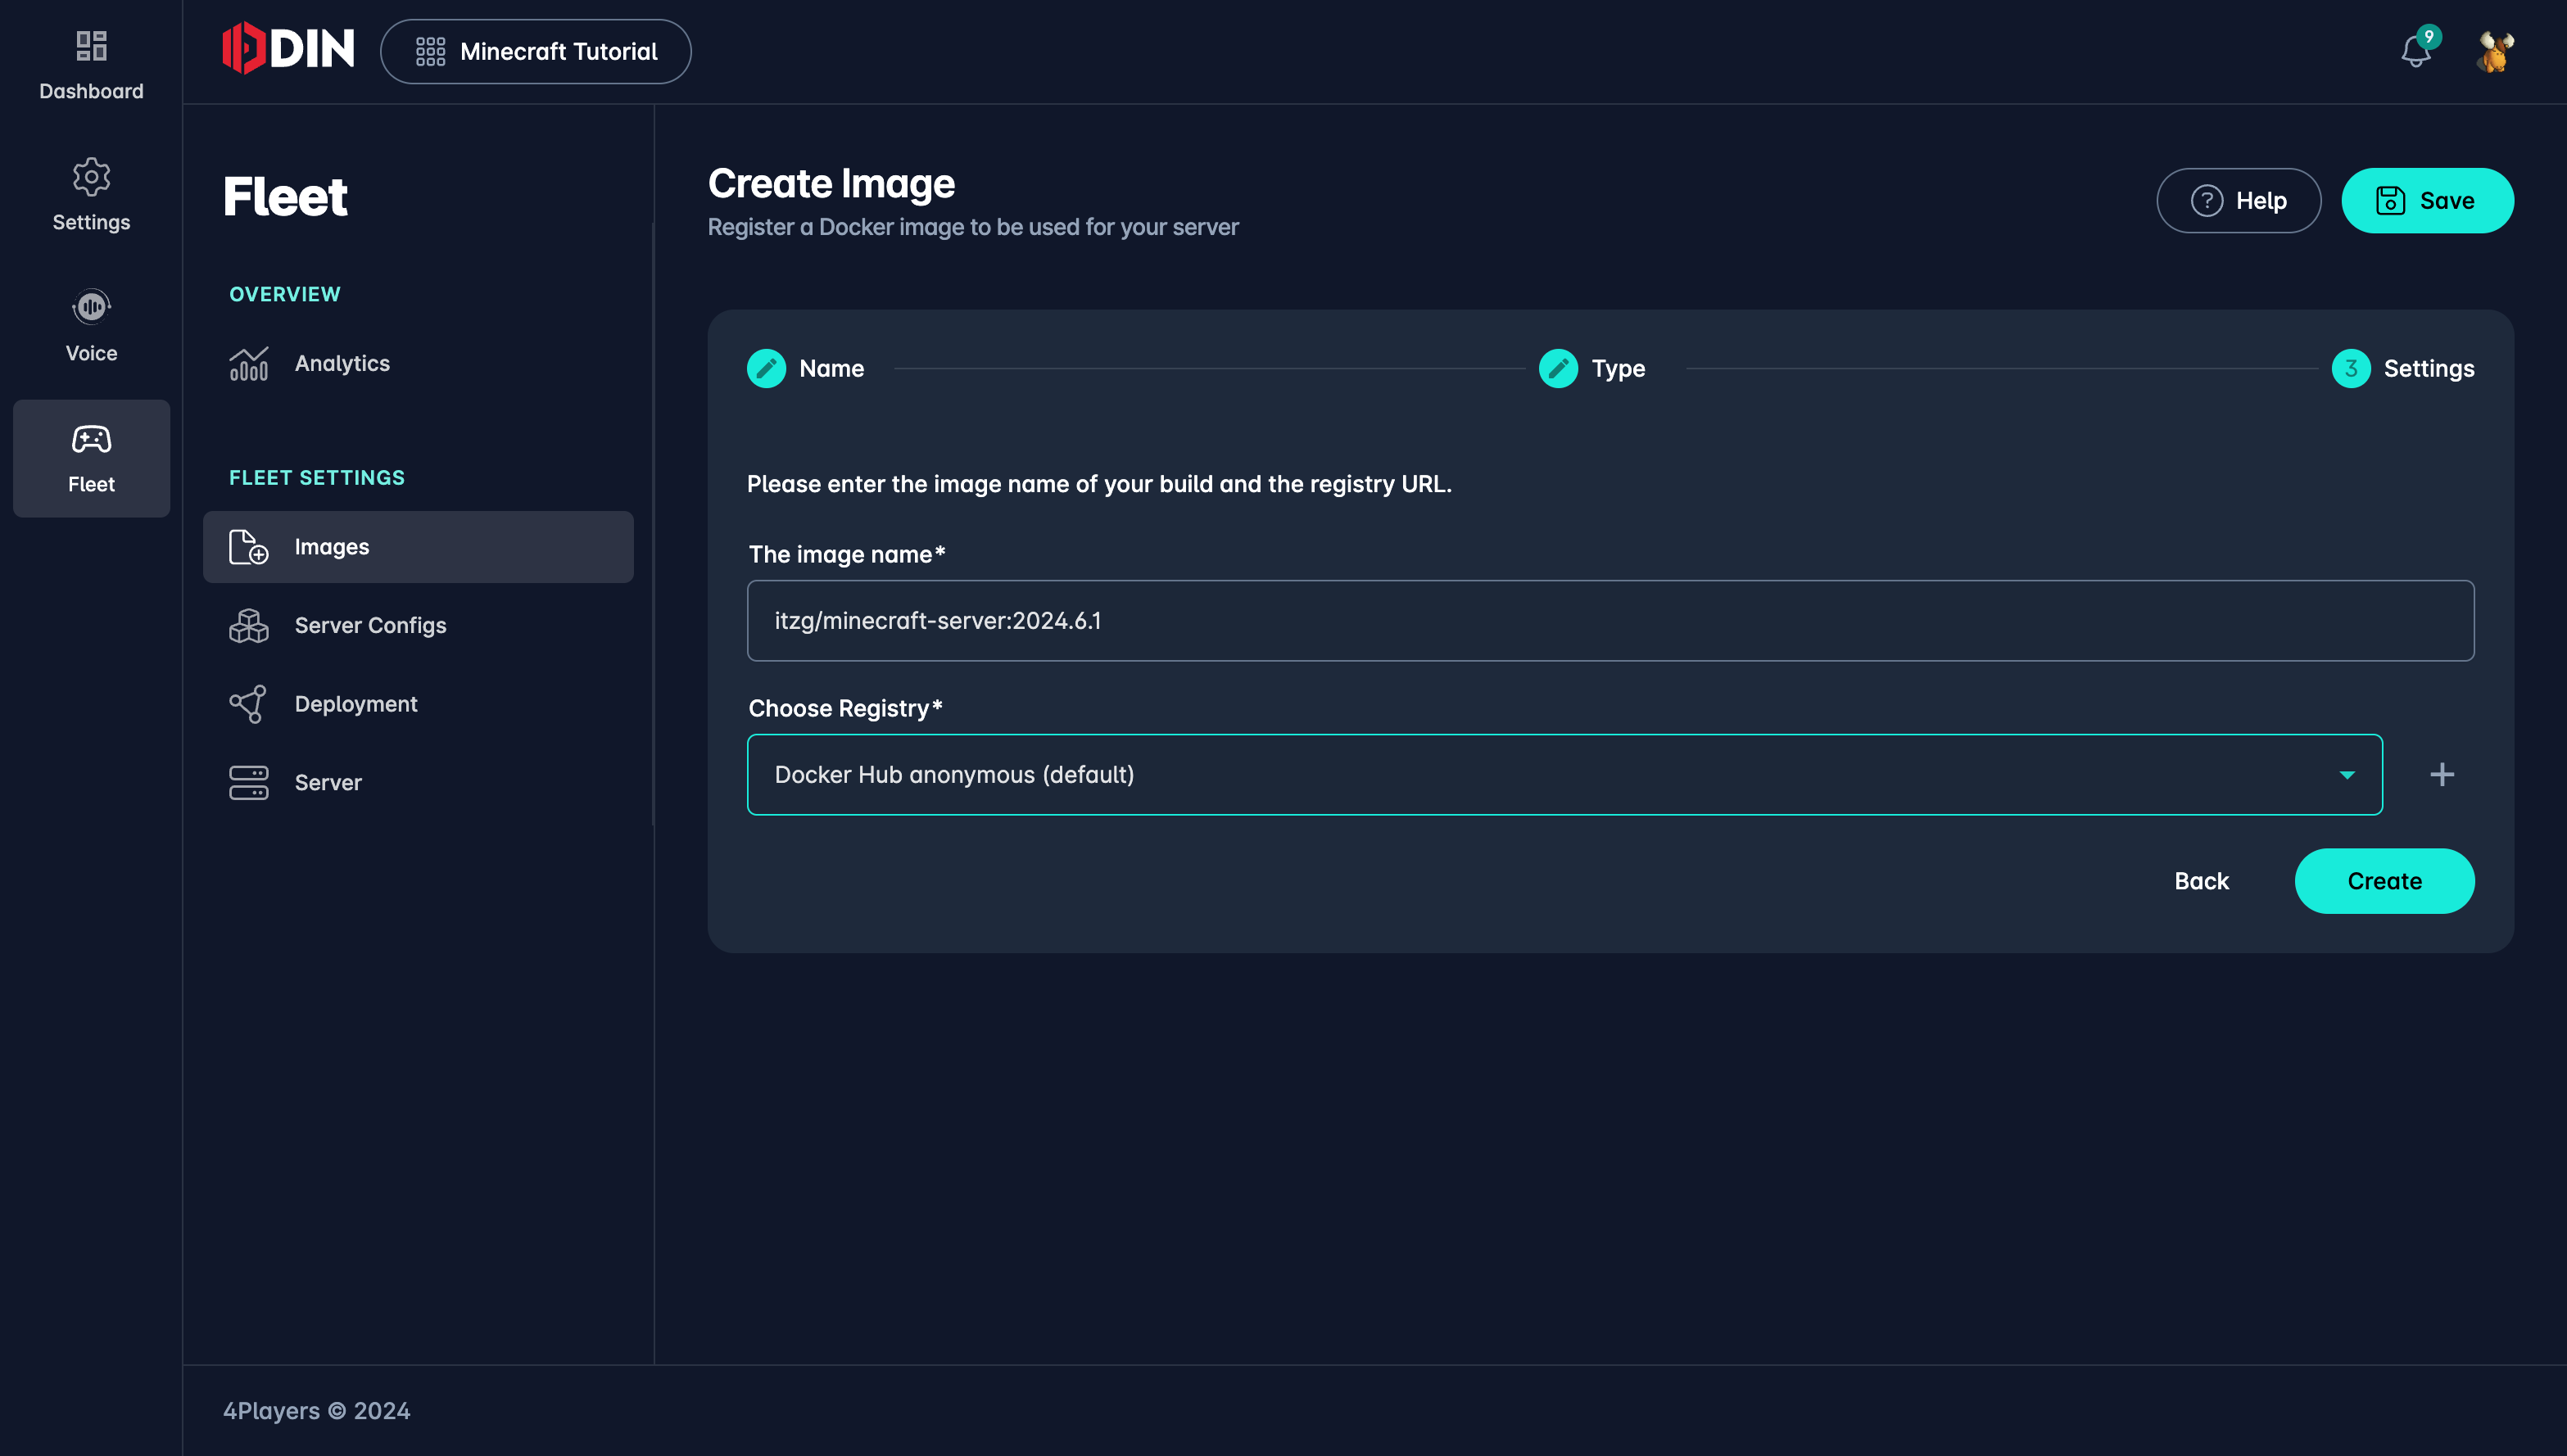
Data to enter:
- Name:
Minecraft Tutorial - Version:
2024.6.1 - Operating System:
Linux - Image Type:
Docker Image - Image Name:
itzg/minecraft-server:2024.6.1 - Registry:
Docker Hub anonymous (default)
The Minecraft docker images are tagged with the version number. This way, we make sure that we have a specific version of the image. If the server restarts or changes the underlying machine (e.g., in the case of a defect), the docker image remains the same and doesn't change implicitly by the docker registry.
You also need to choose a docker registry from the list. In this case, we choose Docker Hub, which is the public
registry of docker images. If you have your own registry, you can choose that one.
We could also create an image that is always the latest version, but this is not recommended for production environments. It's better to create new images within ODIN Fleet for each new version of your gameserver. This gives much better control. You'll find more of these topics in the guides section.
Next, we'll need to create the server config. This is the most complex part, as you define everything that configures your gameserver. Many games have different modes, maps, mods, etc., and you can define all of that here.
Creating a server configuration
Navigate to Server Configs in the left sidebar and click on Create Config. You'll see a fairly complex editor, but we'll guide you through it.
As there are a lot of settings, you might risk losing your data if you don't save it. We have implemented a feature that will constantly (on any change) store the current settings in your browser's local storage. If you accidentally close the browser or tab, you can just open the tab again and you'll be notified that there are unsaved changes, which you can restore.
Basic information
In the first part of the editor, you can provide basic information about the image, such as its name and which image should be used in this server configuration. Later, when you want to deploy a new version of your gameserver, all you need to do is to change the image of the server configuration, and that image will be rolled out in all deployments using this server configuration.
So, let's enter this data into the first couple of fields:
- Name:
Minecraft Tutorial - Image:
Minecraft Tutorial(the image we have just created) - Restart:
Always
You can leave CMD and Entrypoint empty. This allows you to override the fields from the docker image if you want to start a different entrypoint script than defined in the docker container. This can be useful for development but is typically not used in production.
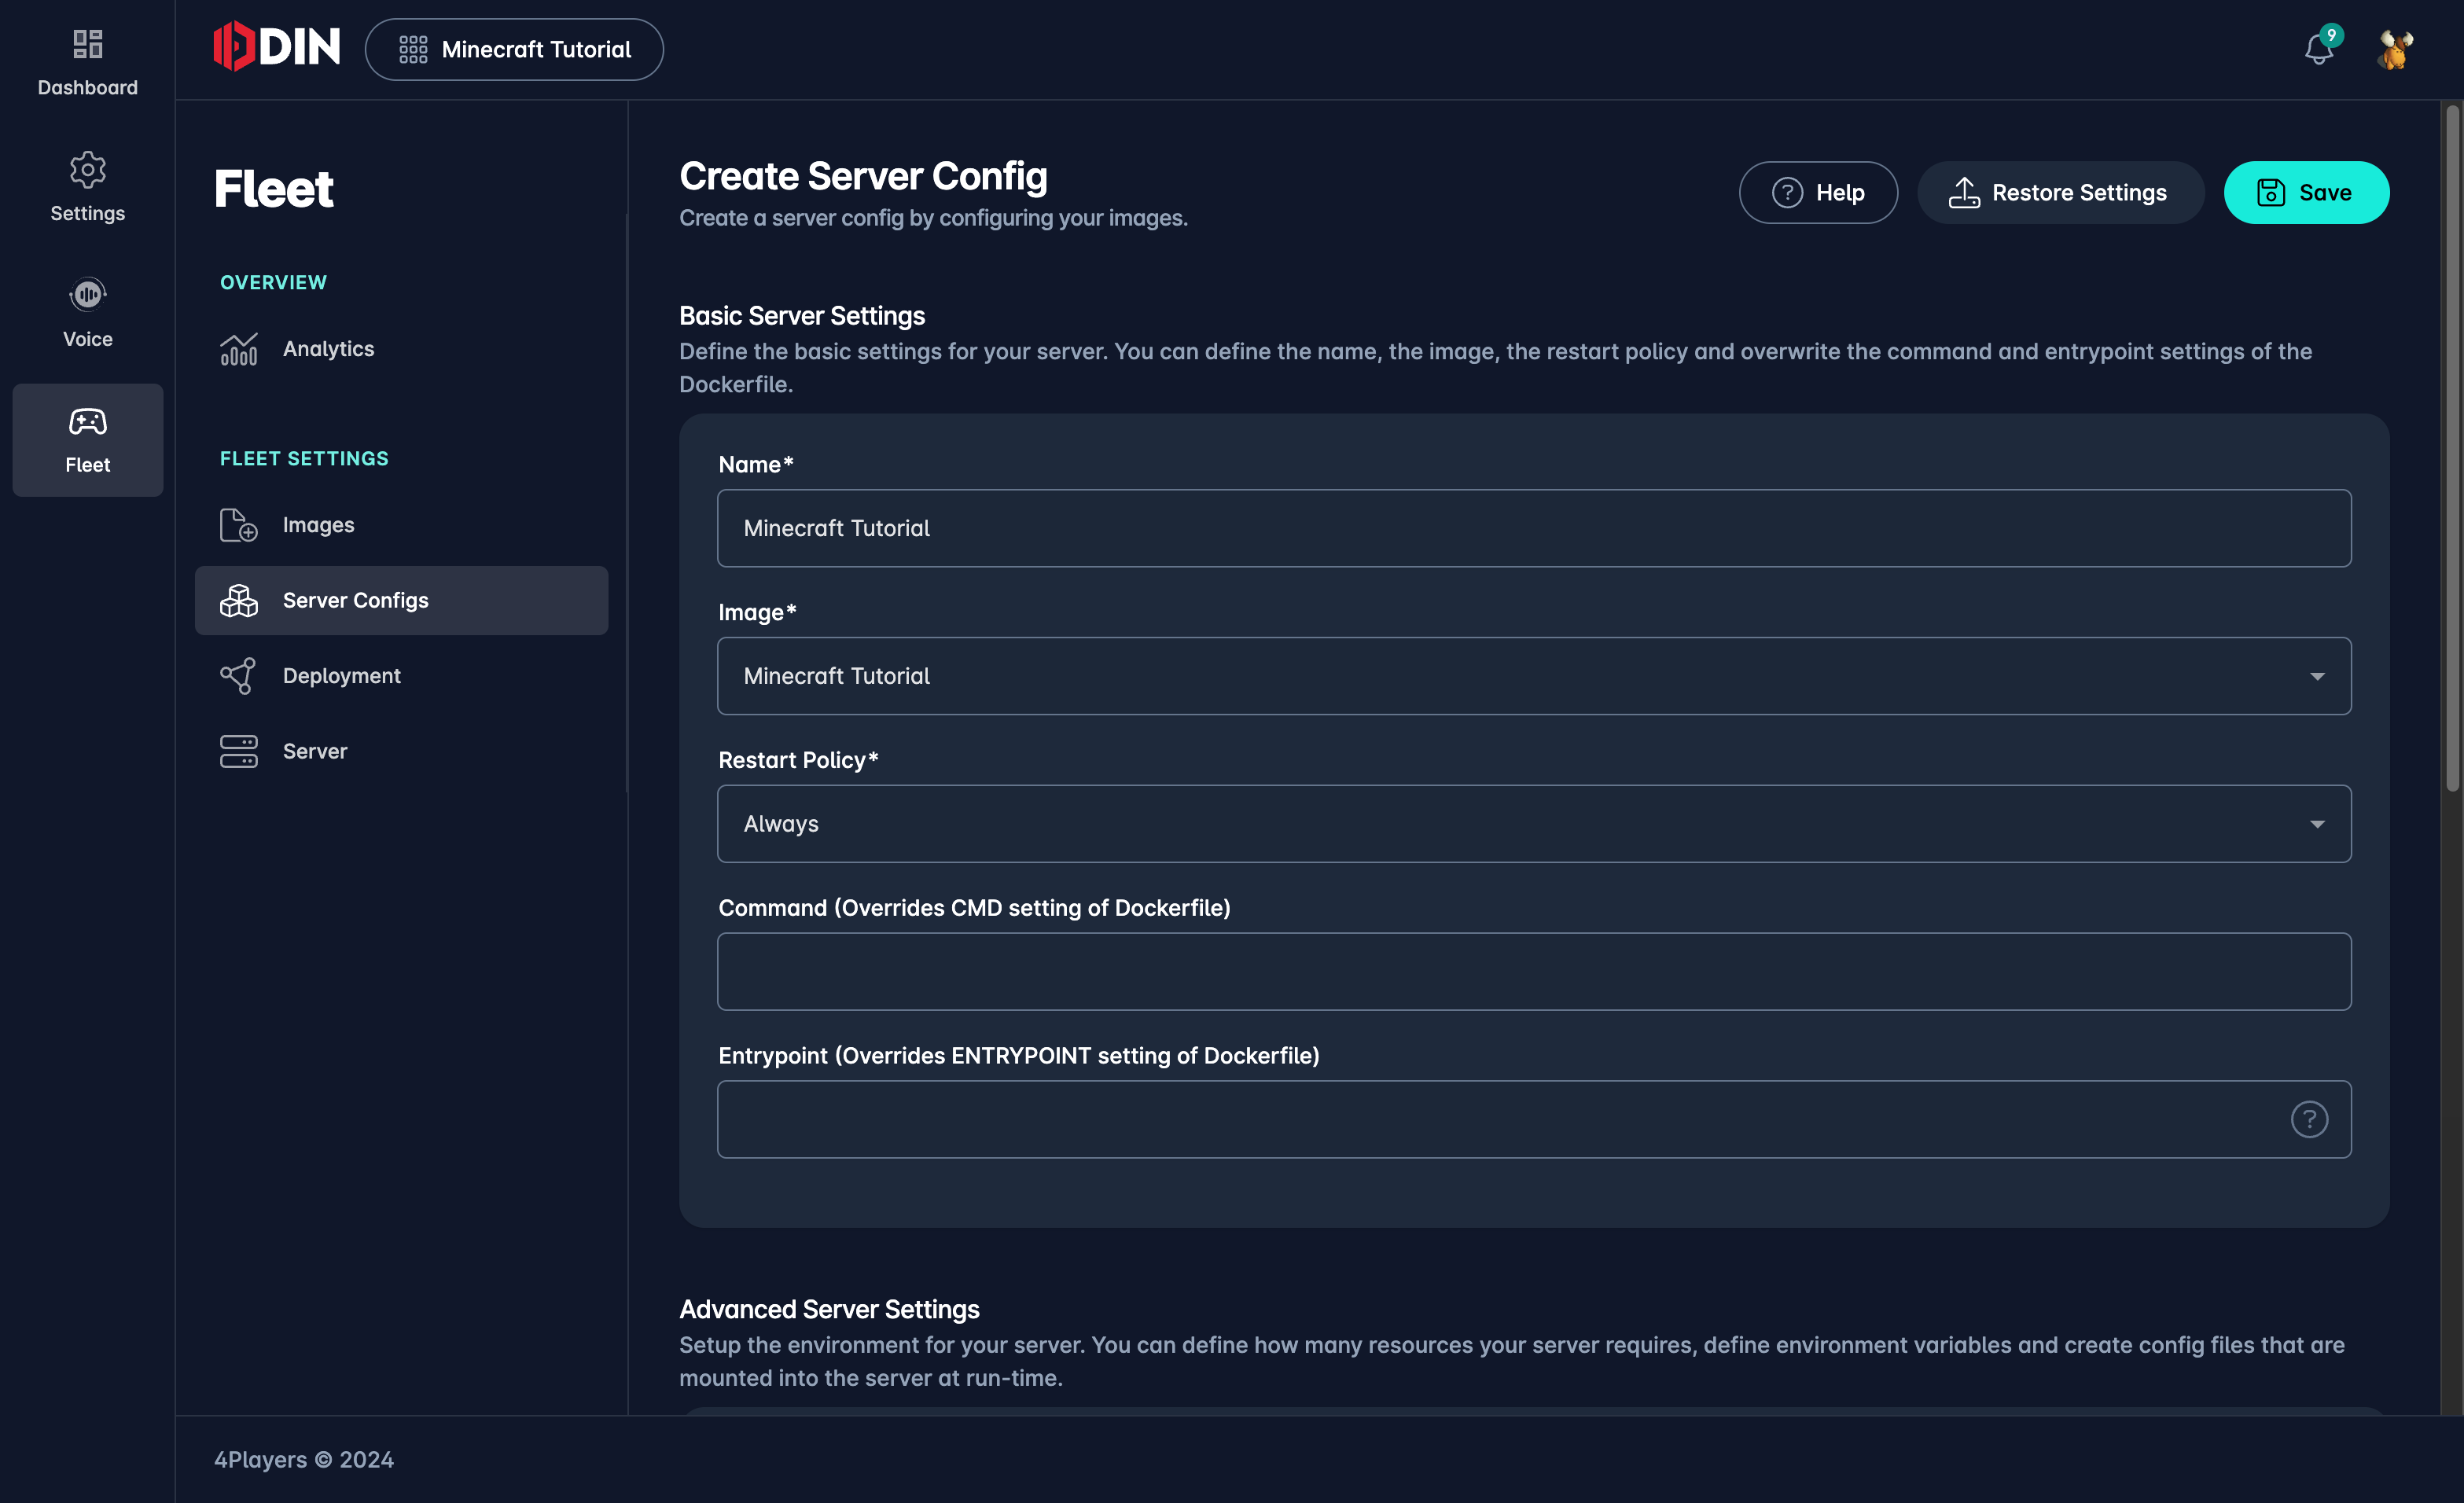
Scrolling down a bit, you'll see a block with tabs and quite a lot of settings. We will go through them one by one.
Ports
Setting up ports is very important if your server should be reached from the public internet. Within the container,
which encapsulates the gameserver from everything else, you can define which ports should be exposed to the outside
world. In this case, we need to expose the Minecraft port 25565, and it needs to be TCP.
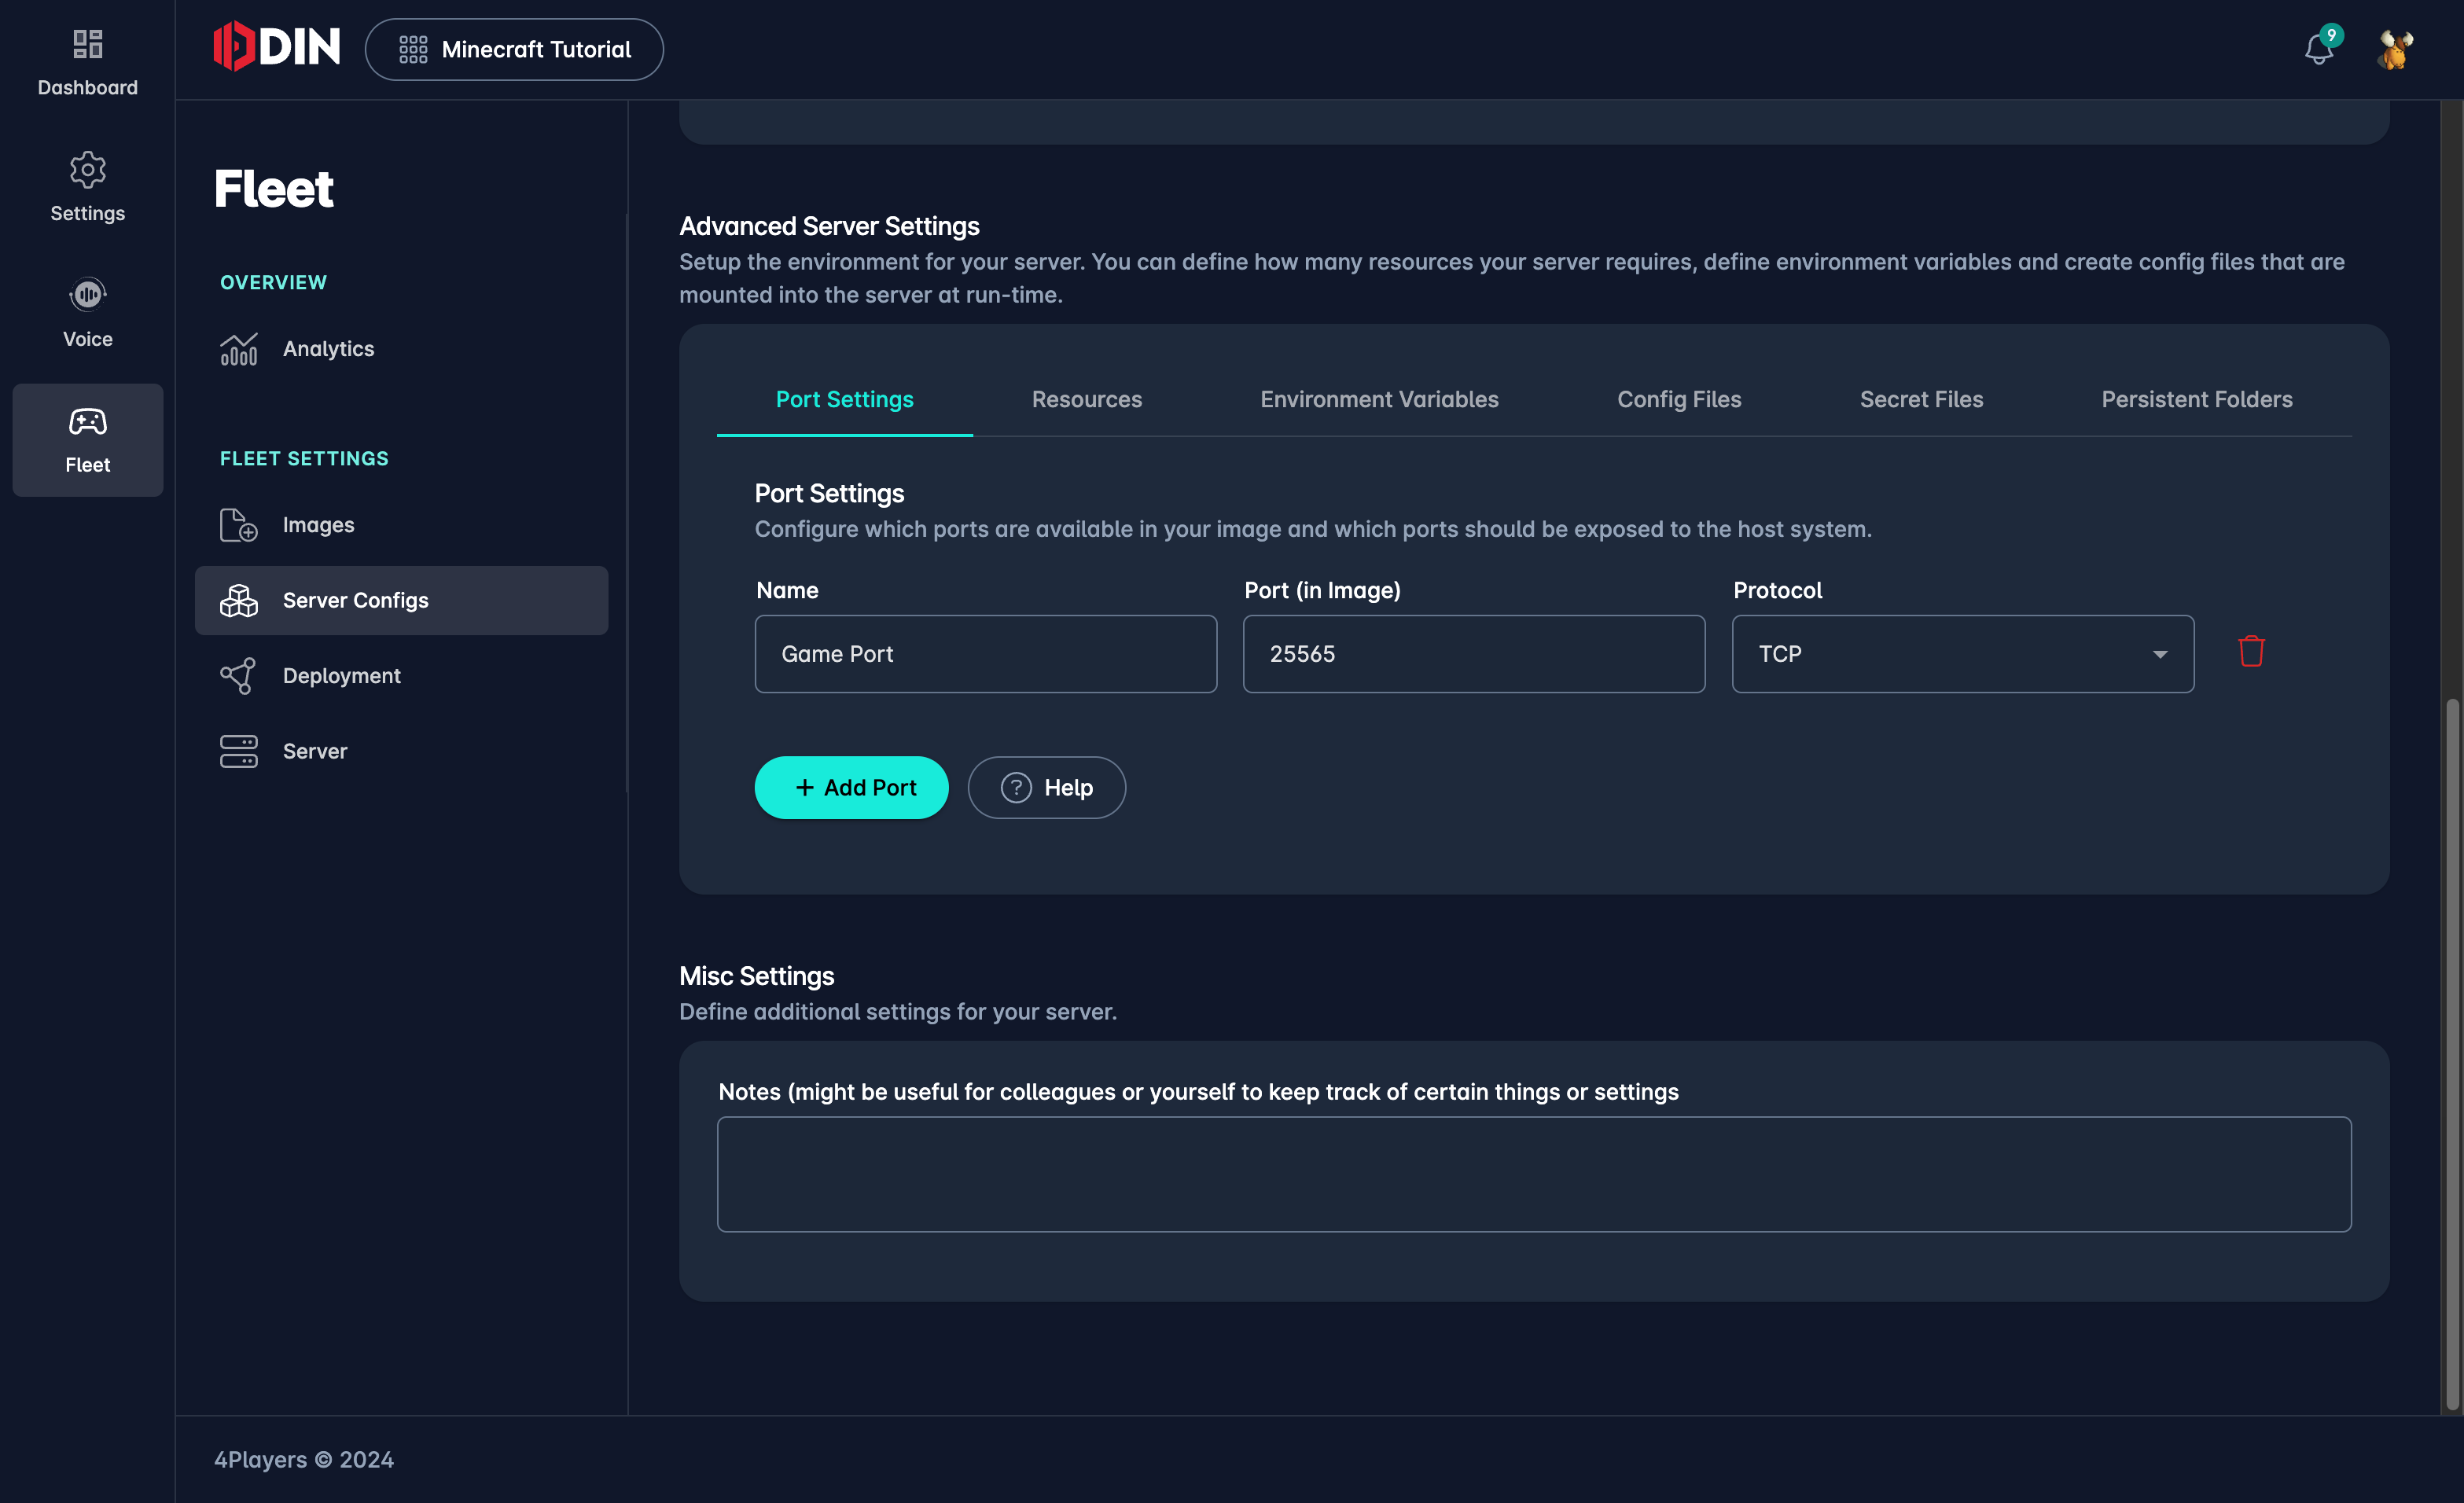
For every port that you define here, our runtime will assign an available port and map that to the internal port. This way, you can run multiple gameservers on the same machine without port conflicts.
This diagram shows what's going on under the hood. It shows multiple containers (i.e., gameservers running in docker containers) and how they are mapped to the public internet. Container 4 has two ports described in the server config, and as such, two ports are published to the internet.
Resources
In the next tab, we need to define the resources that we want to allow this gameserver to consume. This is very important as it defines how much of the underlying machine the gameserver can use. For Minecraft, a Small tier with 1 CPU and 2 GB RAM is enough. If you're unsure what to choose, we suggest starting with a higher tier, run the server through its paces, and then check the stats (described later) to see the peak usage of the server. You should always choose a tier that has a bit of spare capacity but not too much. If you have too much, you're wasting money. If you have too little, the server might be slow or even crash. We'll do an experiment in another guide.
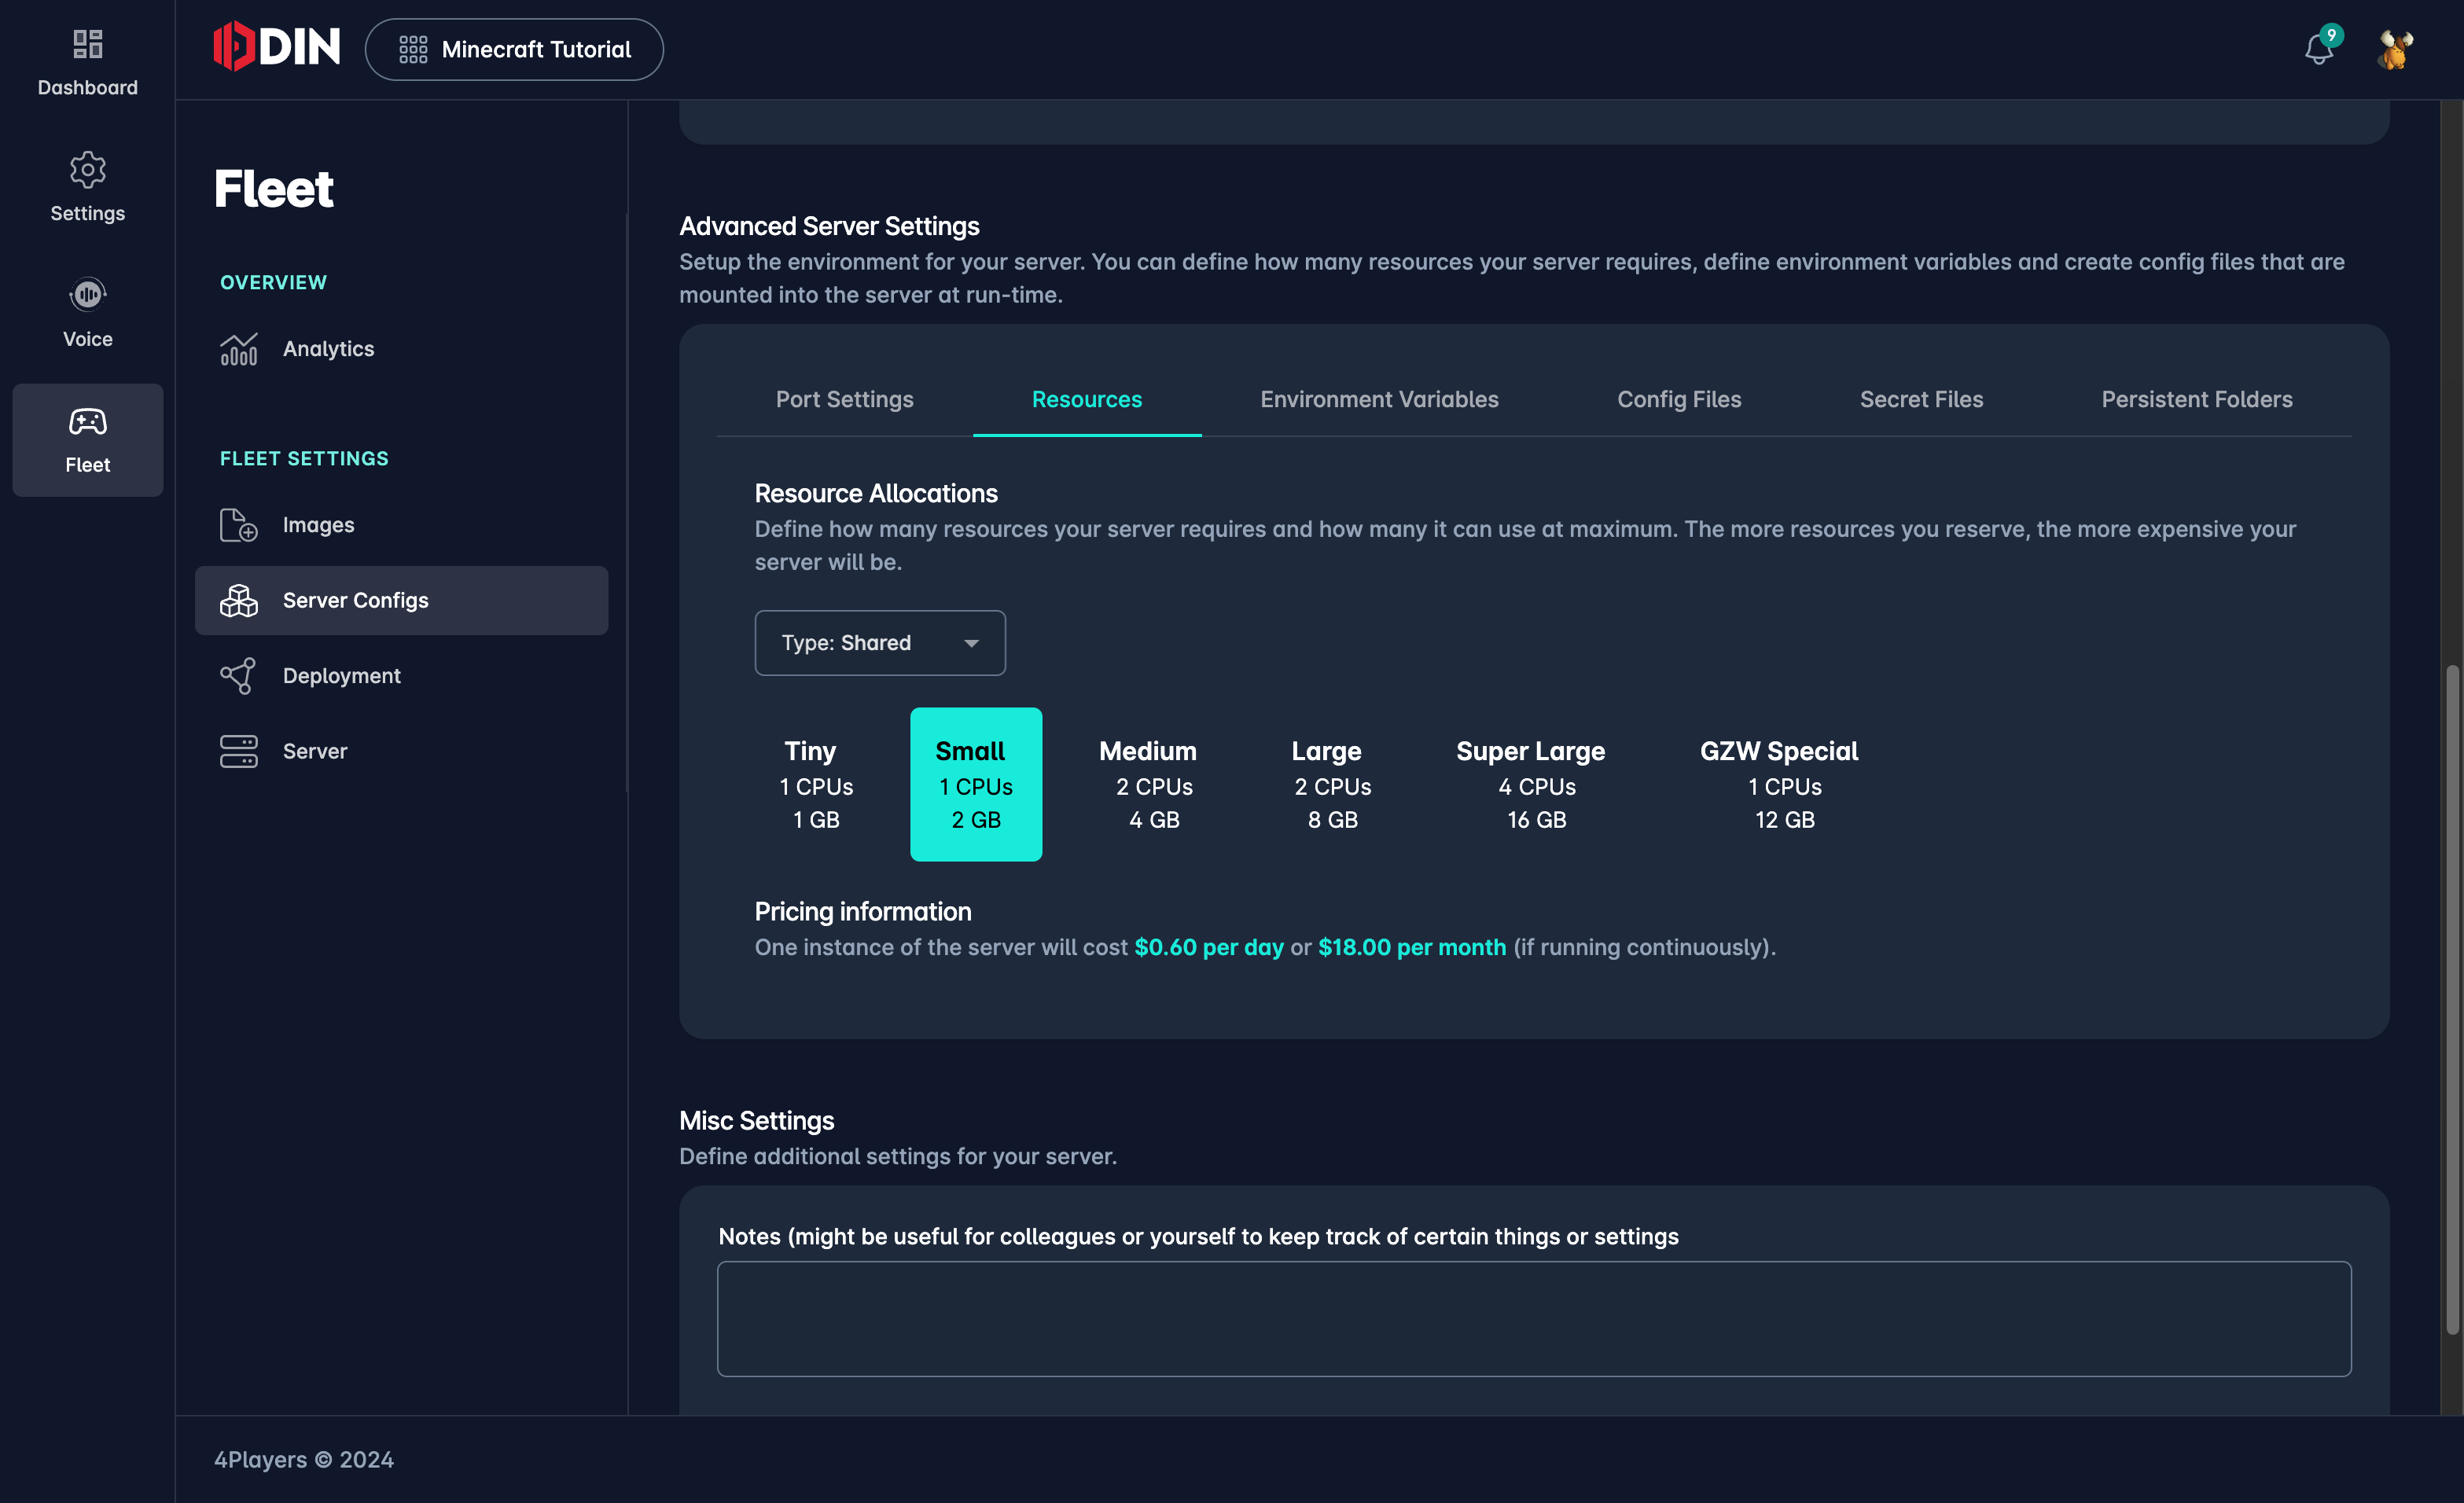
We have two types of resources: Shared and Dedicated. Shared resources are shared between all gameservers on the machine. Our backend tries to minimize the "noisy neighbour" problem, but that is not always easy to do. If you decide to use shared resources, we might "overbook" the machine a bit. This means that we might assign more resources to the gameservers than the machine actually has. This is not a problem as long as the gameservers don't use all the resources at the same time. If they do, the machine might become slow, and the gameservers might crash. This is why we have dedicated resources. If you choose dedicated resources, the resources are reserved for your gameserver, and no other gameserver can use them. This is more expensive but also more reliable.
Environment Variables
The next very important part is the environment variables. Many gameservers are configured via environment variables,
including Minecraft. While only one is required: EULA, we've defined a few more here to show the flexibility of server
configuration. For instance, we set the DIFFICULTY to hard. You might have another server config that is soft,
allowing you to deploy different server configurations with different settings.
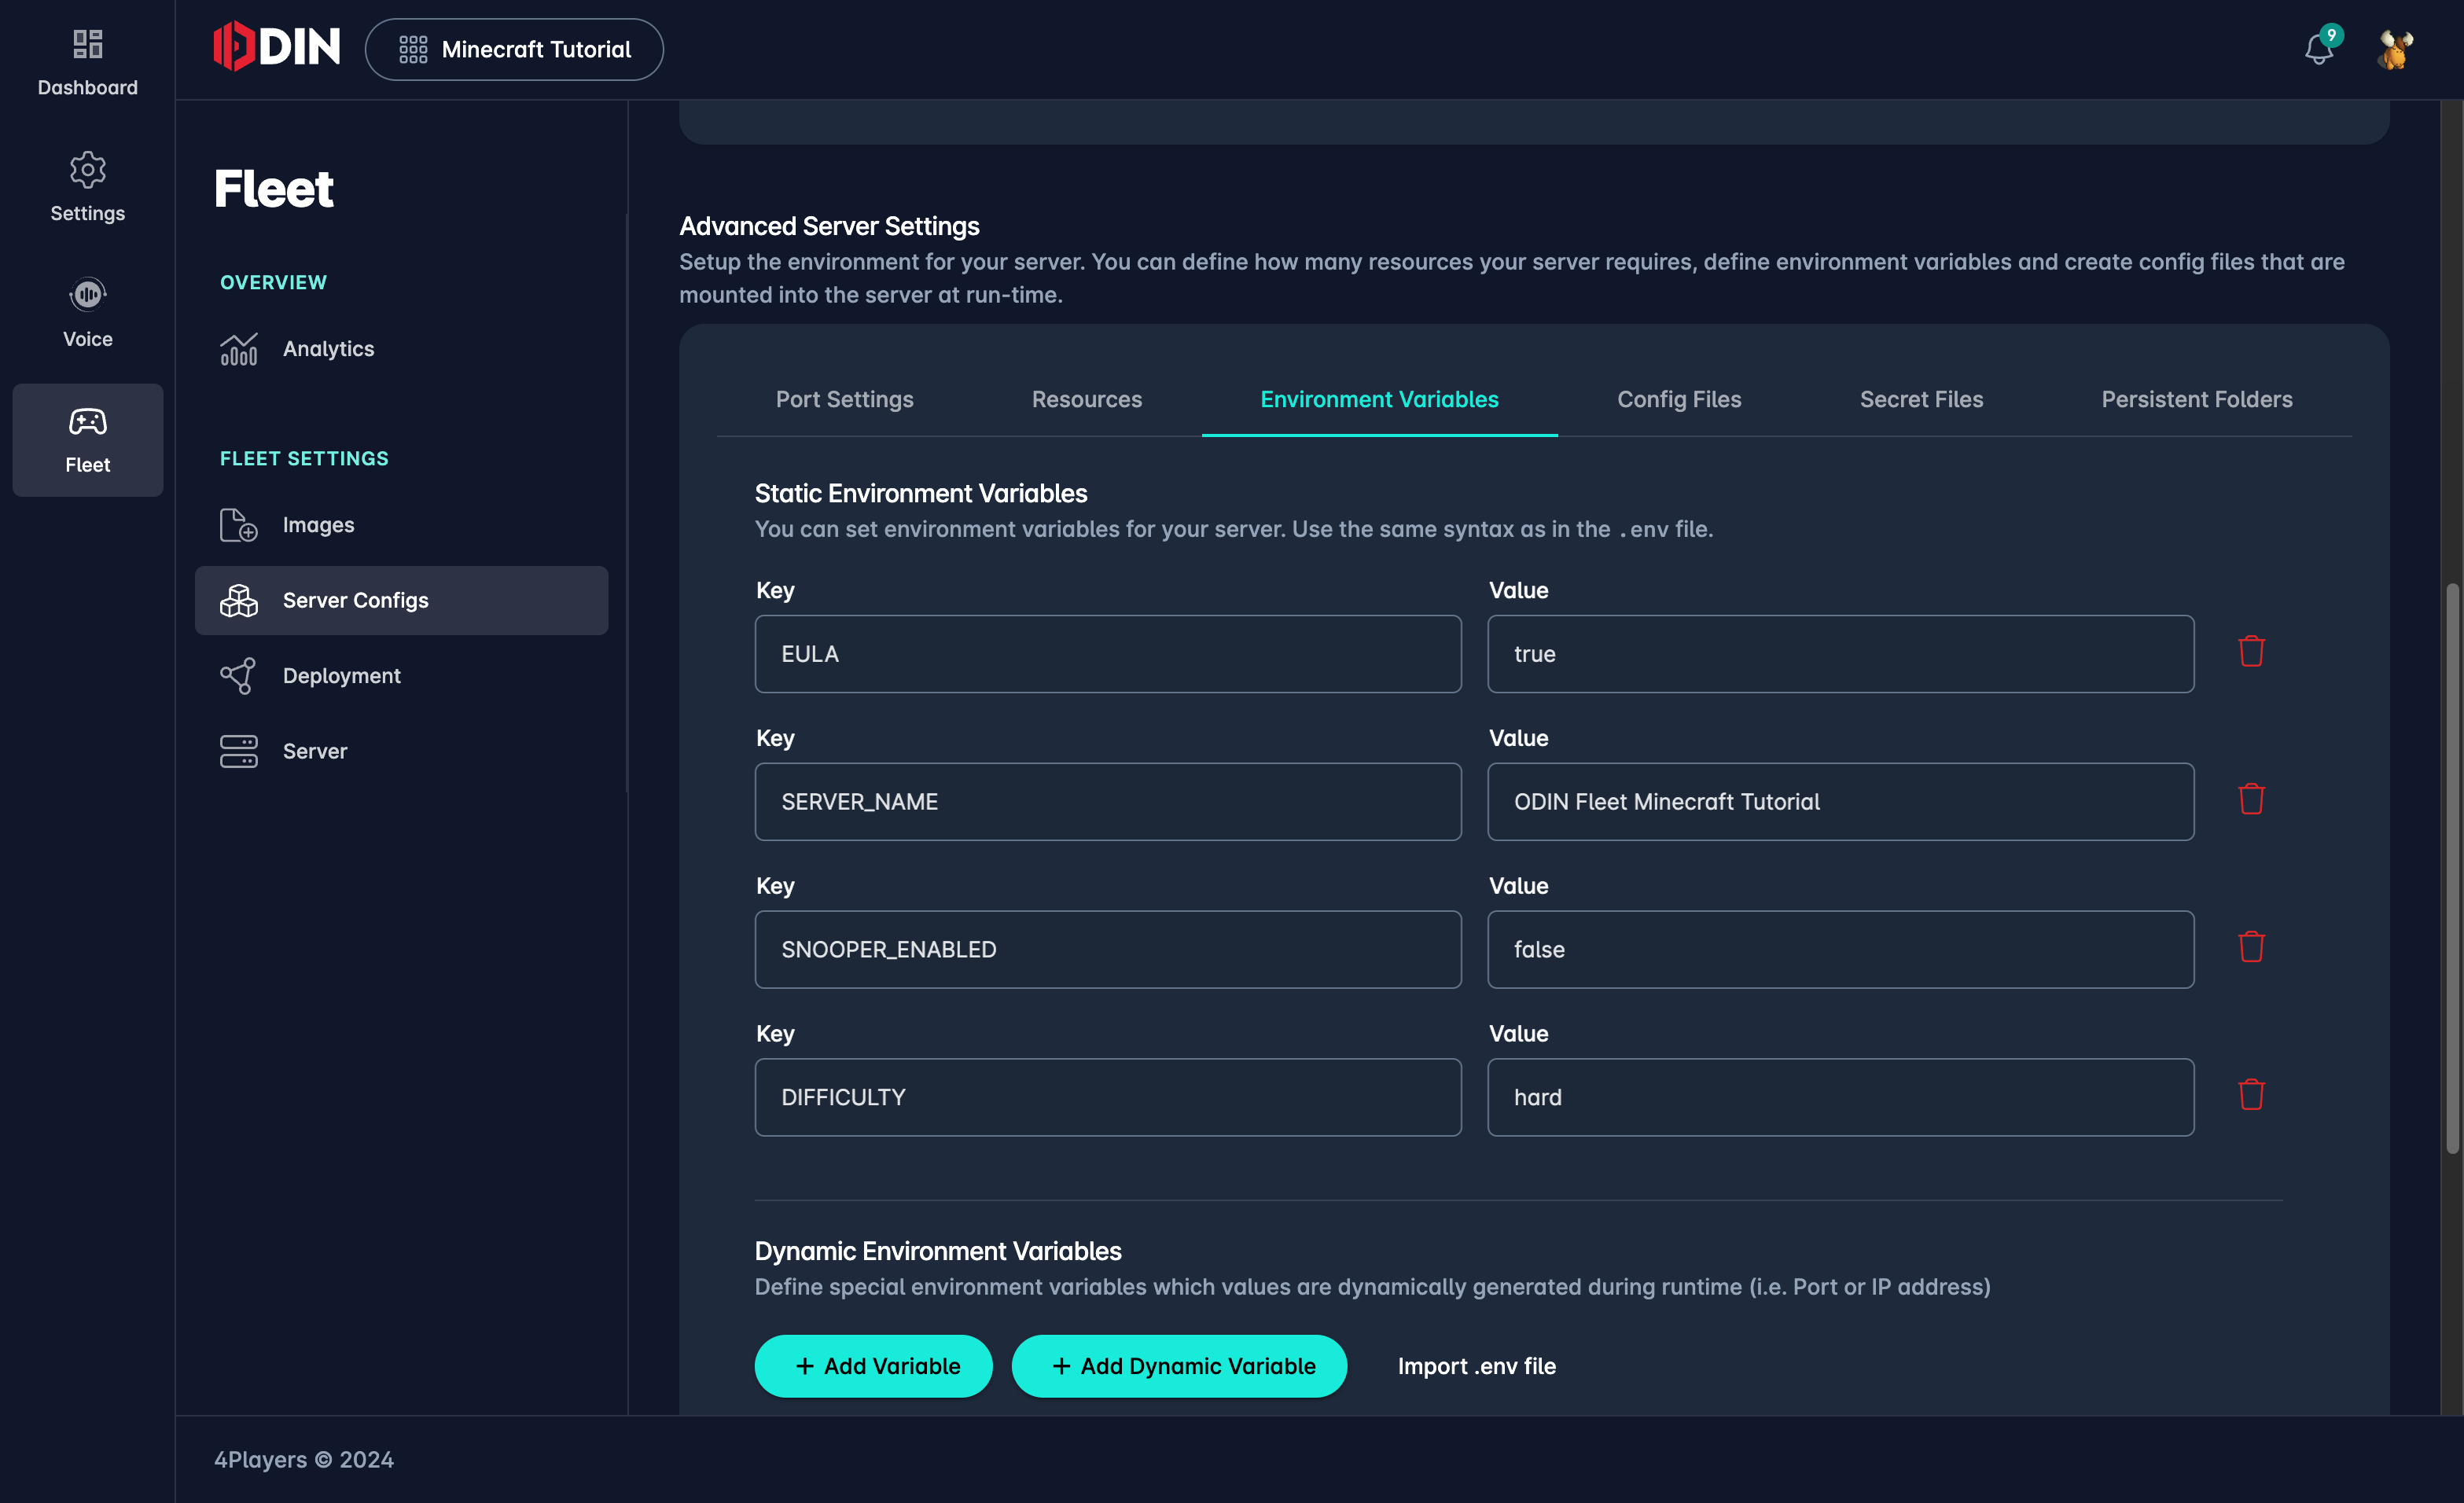
There are two types of variables:
- Static: These variables have a fixed value. This is the most common type.
- Dynamic: These variables are calculated at runtime and can be powerful, especially for things like telemetry or dynamic connections.
Config Files
In Minecraft's case, you might not need config files, but many games allow configuration via files rather than environment variables. You can define the content of the config file in the Dashboard, and it will then be mounted into the specified path and filename in the container.
Secret Files
Similar to config files, secret files contain sensitive data like passwords or API keys. These files are encrypted for security and mounted in the same way as regular config files.
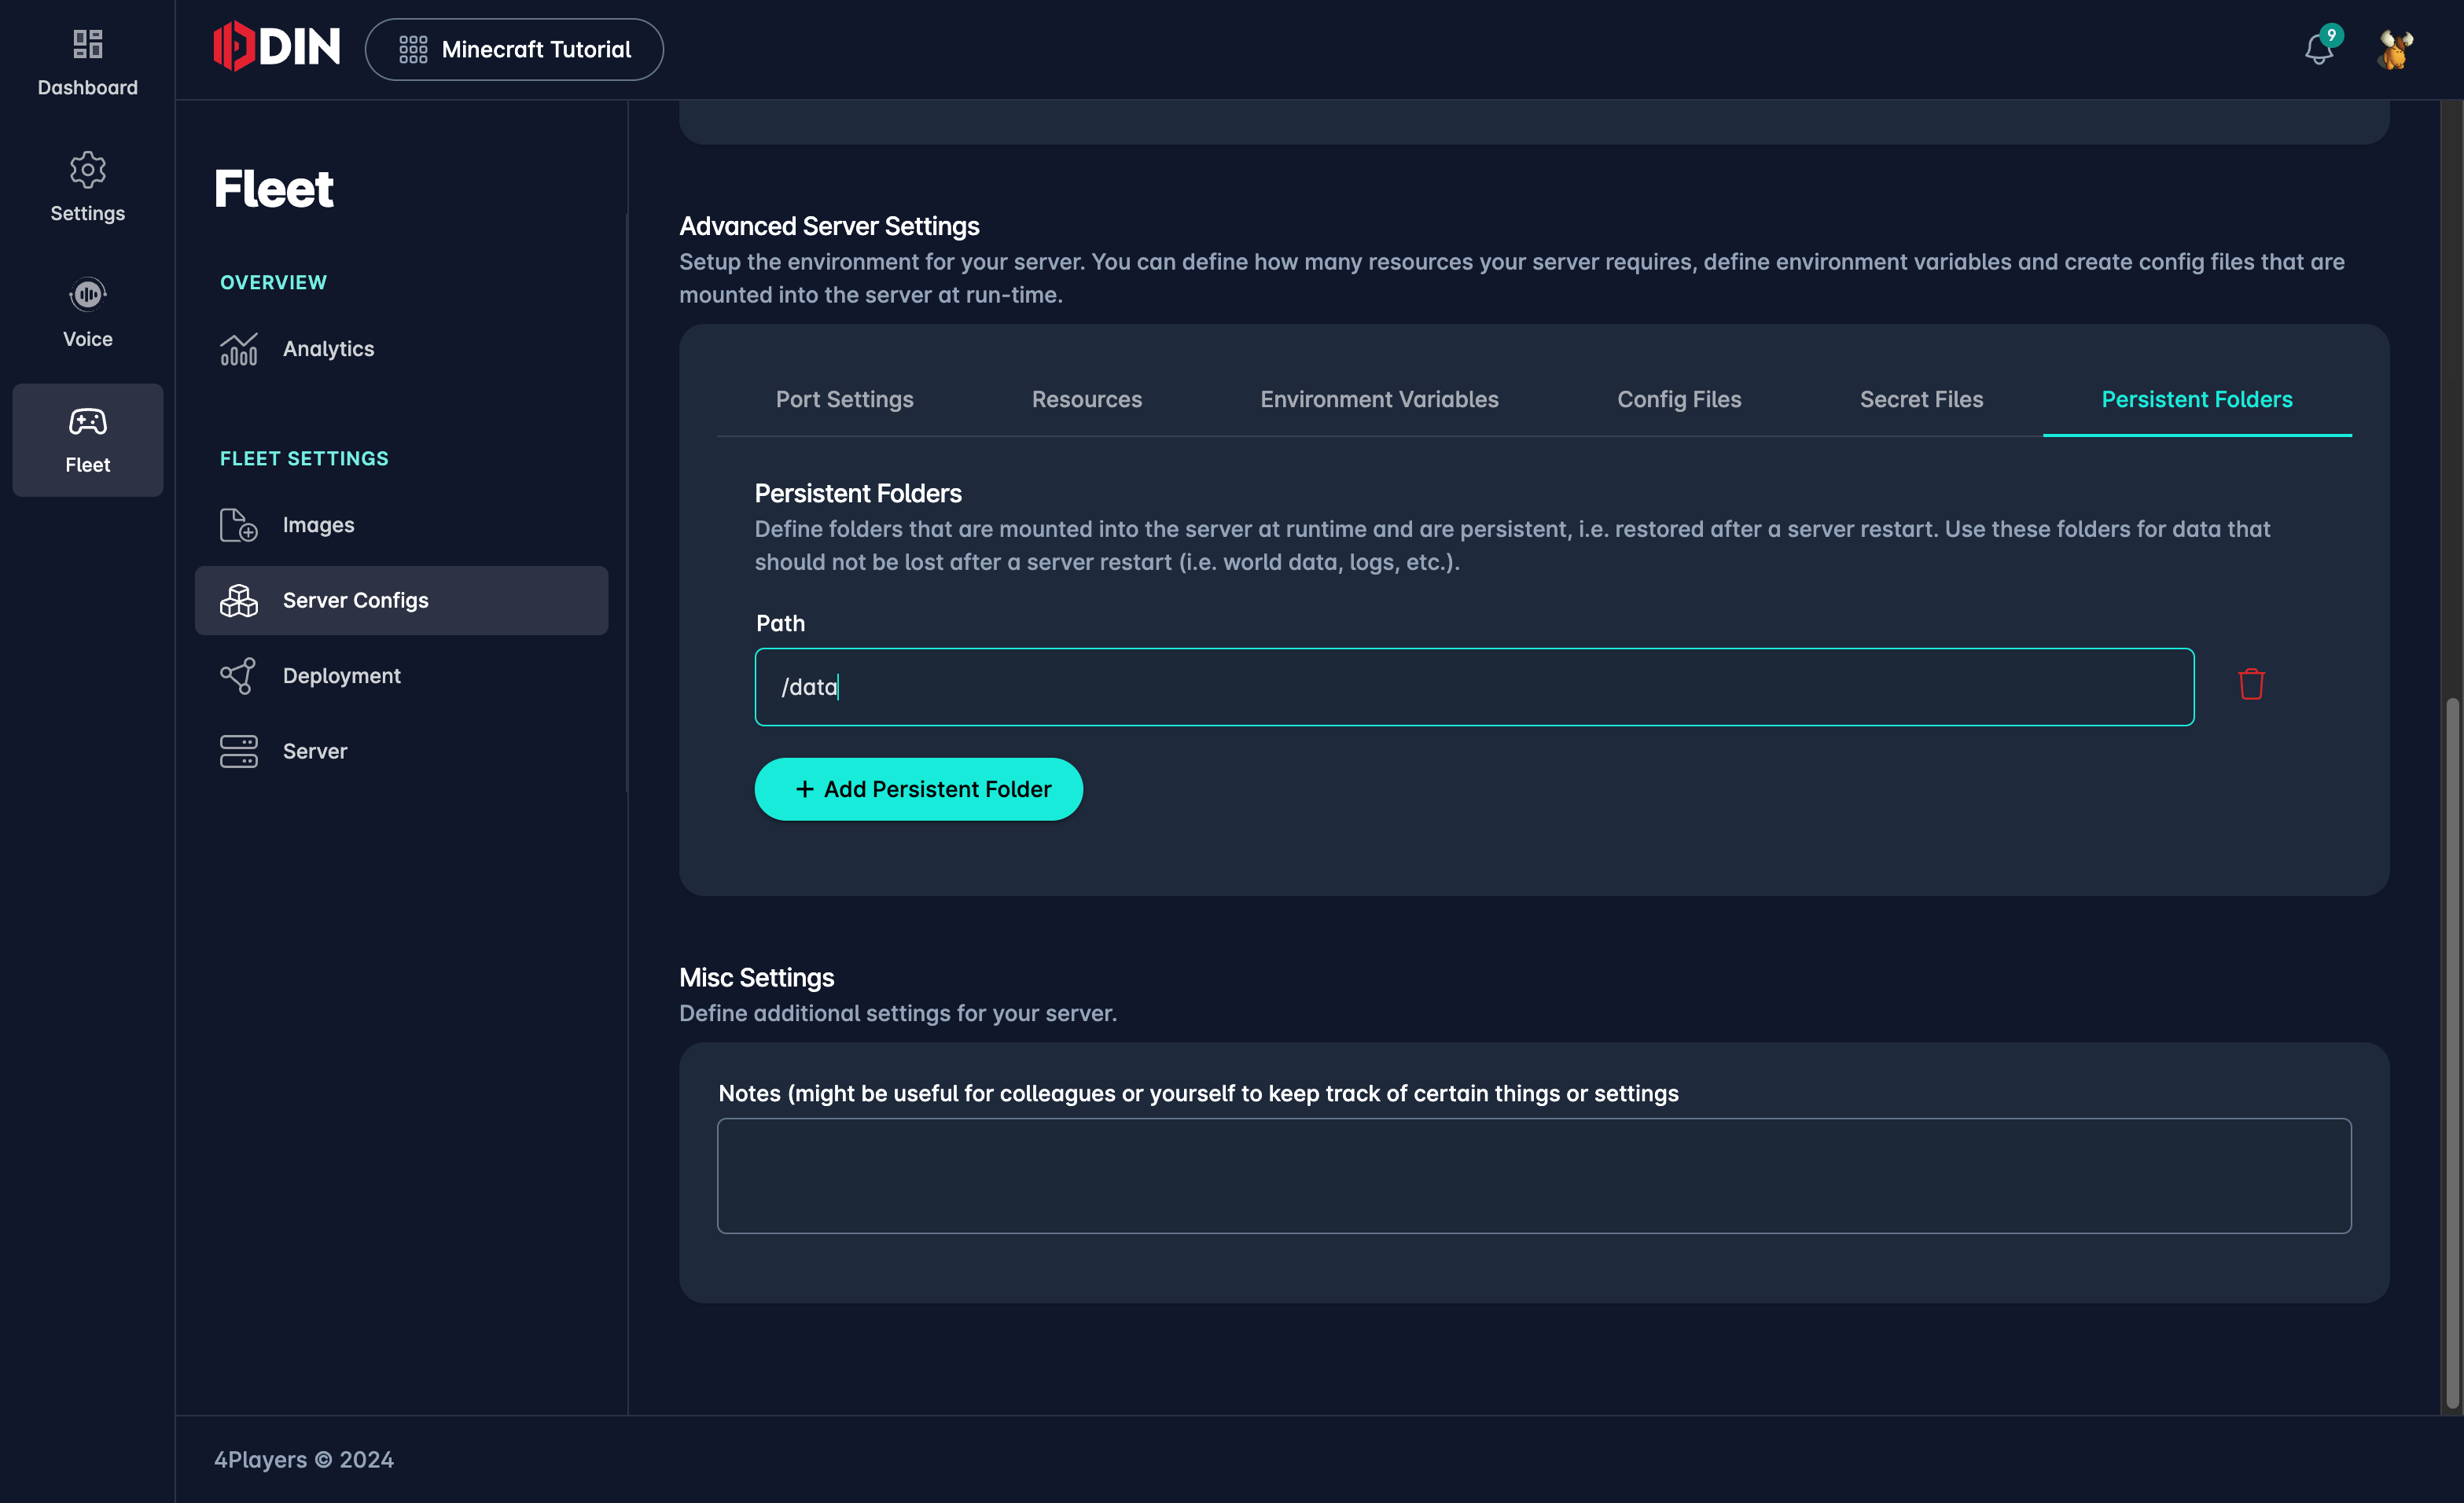
Mounts
Minecraft is a stateful server, meaning it stores data on the disk, which is important not to lose. Here, we mount a
volume to the /data folder in the container, ensuring the data is stored on the host machine rather than the
container, which could be deleted at any time.
Saving and moving on
Click Save (scroll up) to save the server config. Next, we can deploy our configured server to the world.
Creating a Deployment
Navigate to Deployments on the left side. You'll notice a world map showing all available deployment locations. Click on Add Deployment to start the process.
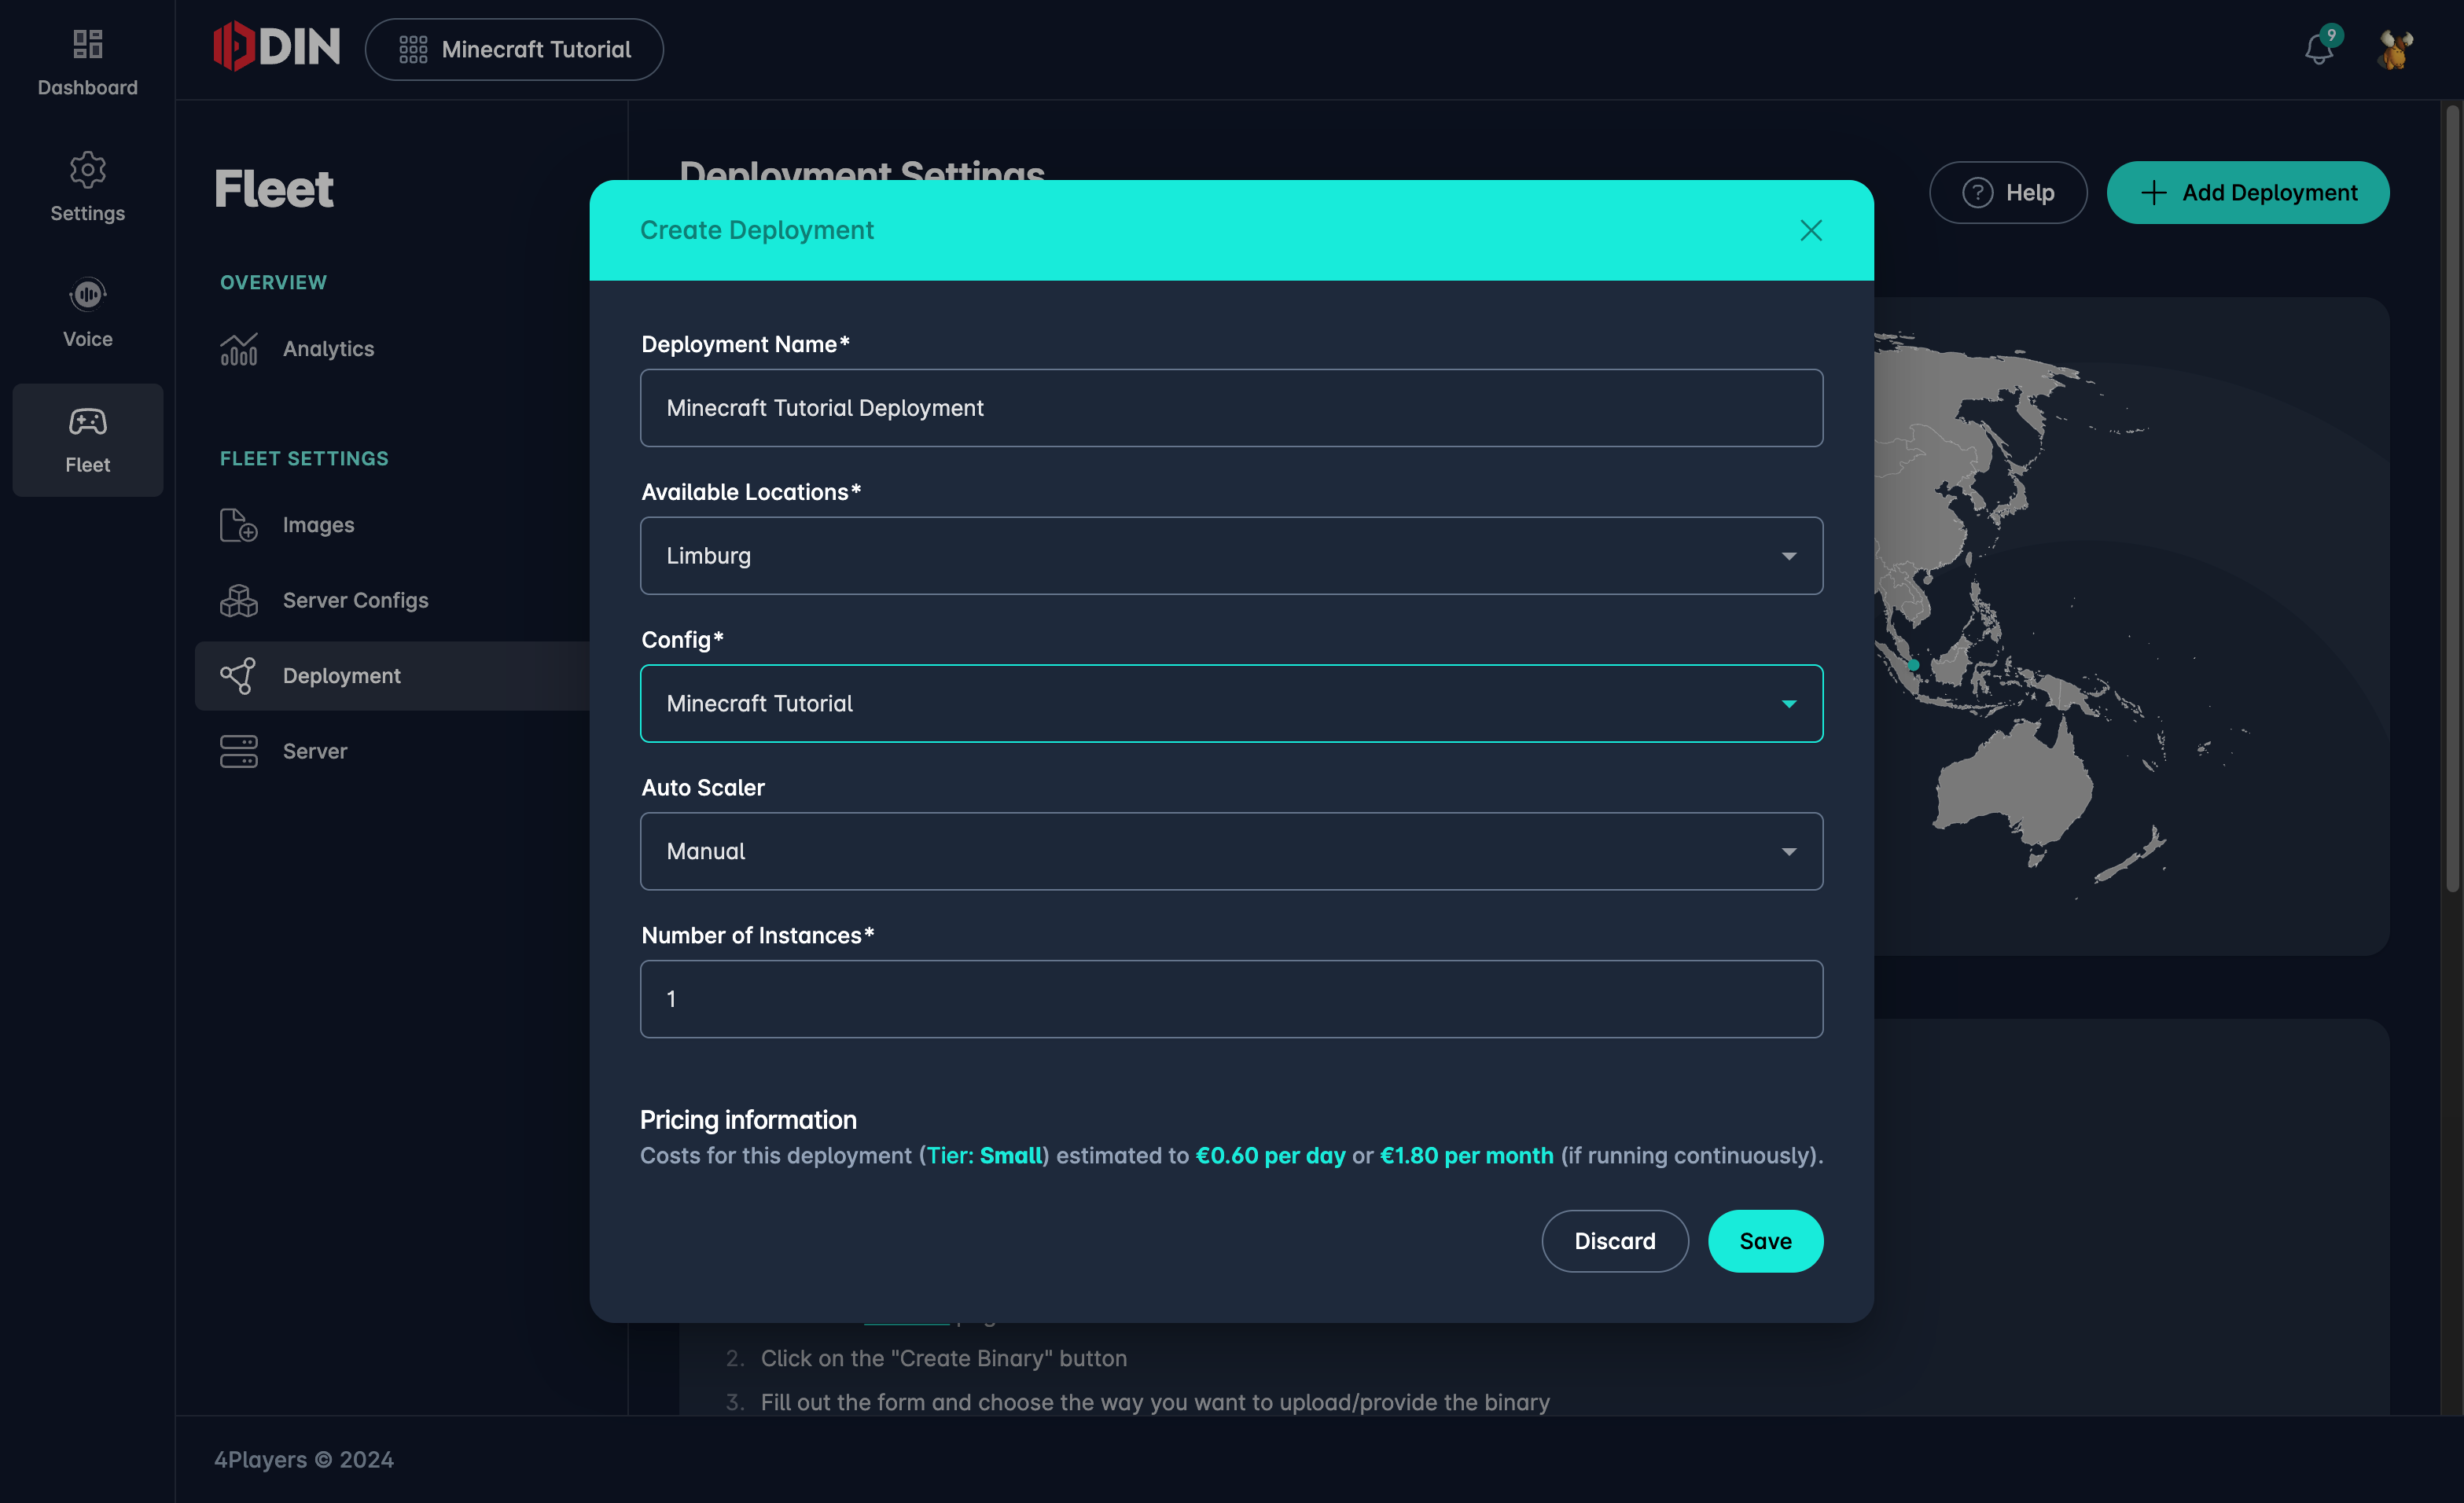
You'll need to enter a few details:
- Name:
Minecraft Tutorial(This is the name of the deployment to track it) - Location:
Limburg(Choose the location to deploy the gameserver) - Config:
Minecraft Tutorial(This is the server config created earlier) - Num Instances:
1(The number of servers to deploy)
When creating a deployment, a cost estimation is displayed based on the resources you've chosen. This is only an estimation, and actual costs may vary. You can also track costs in the dashboard.
After saving your deployment, the screen updates to show the newly created deployment.
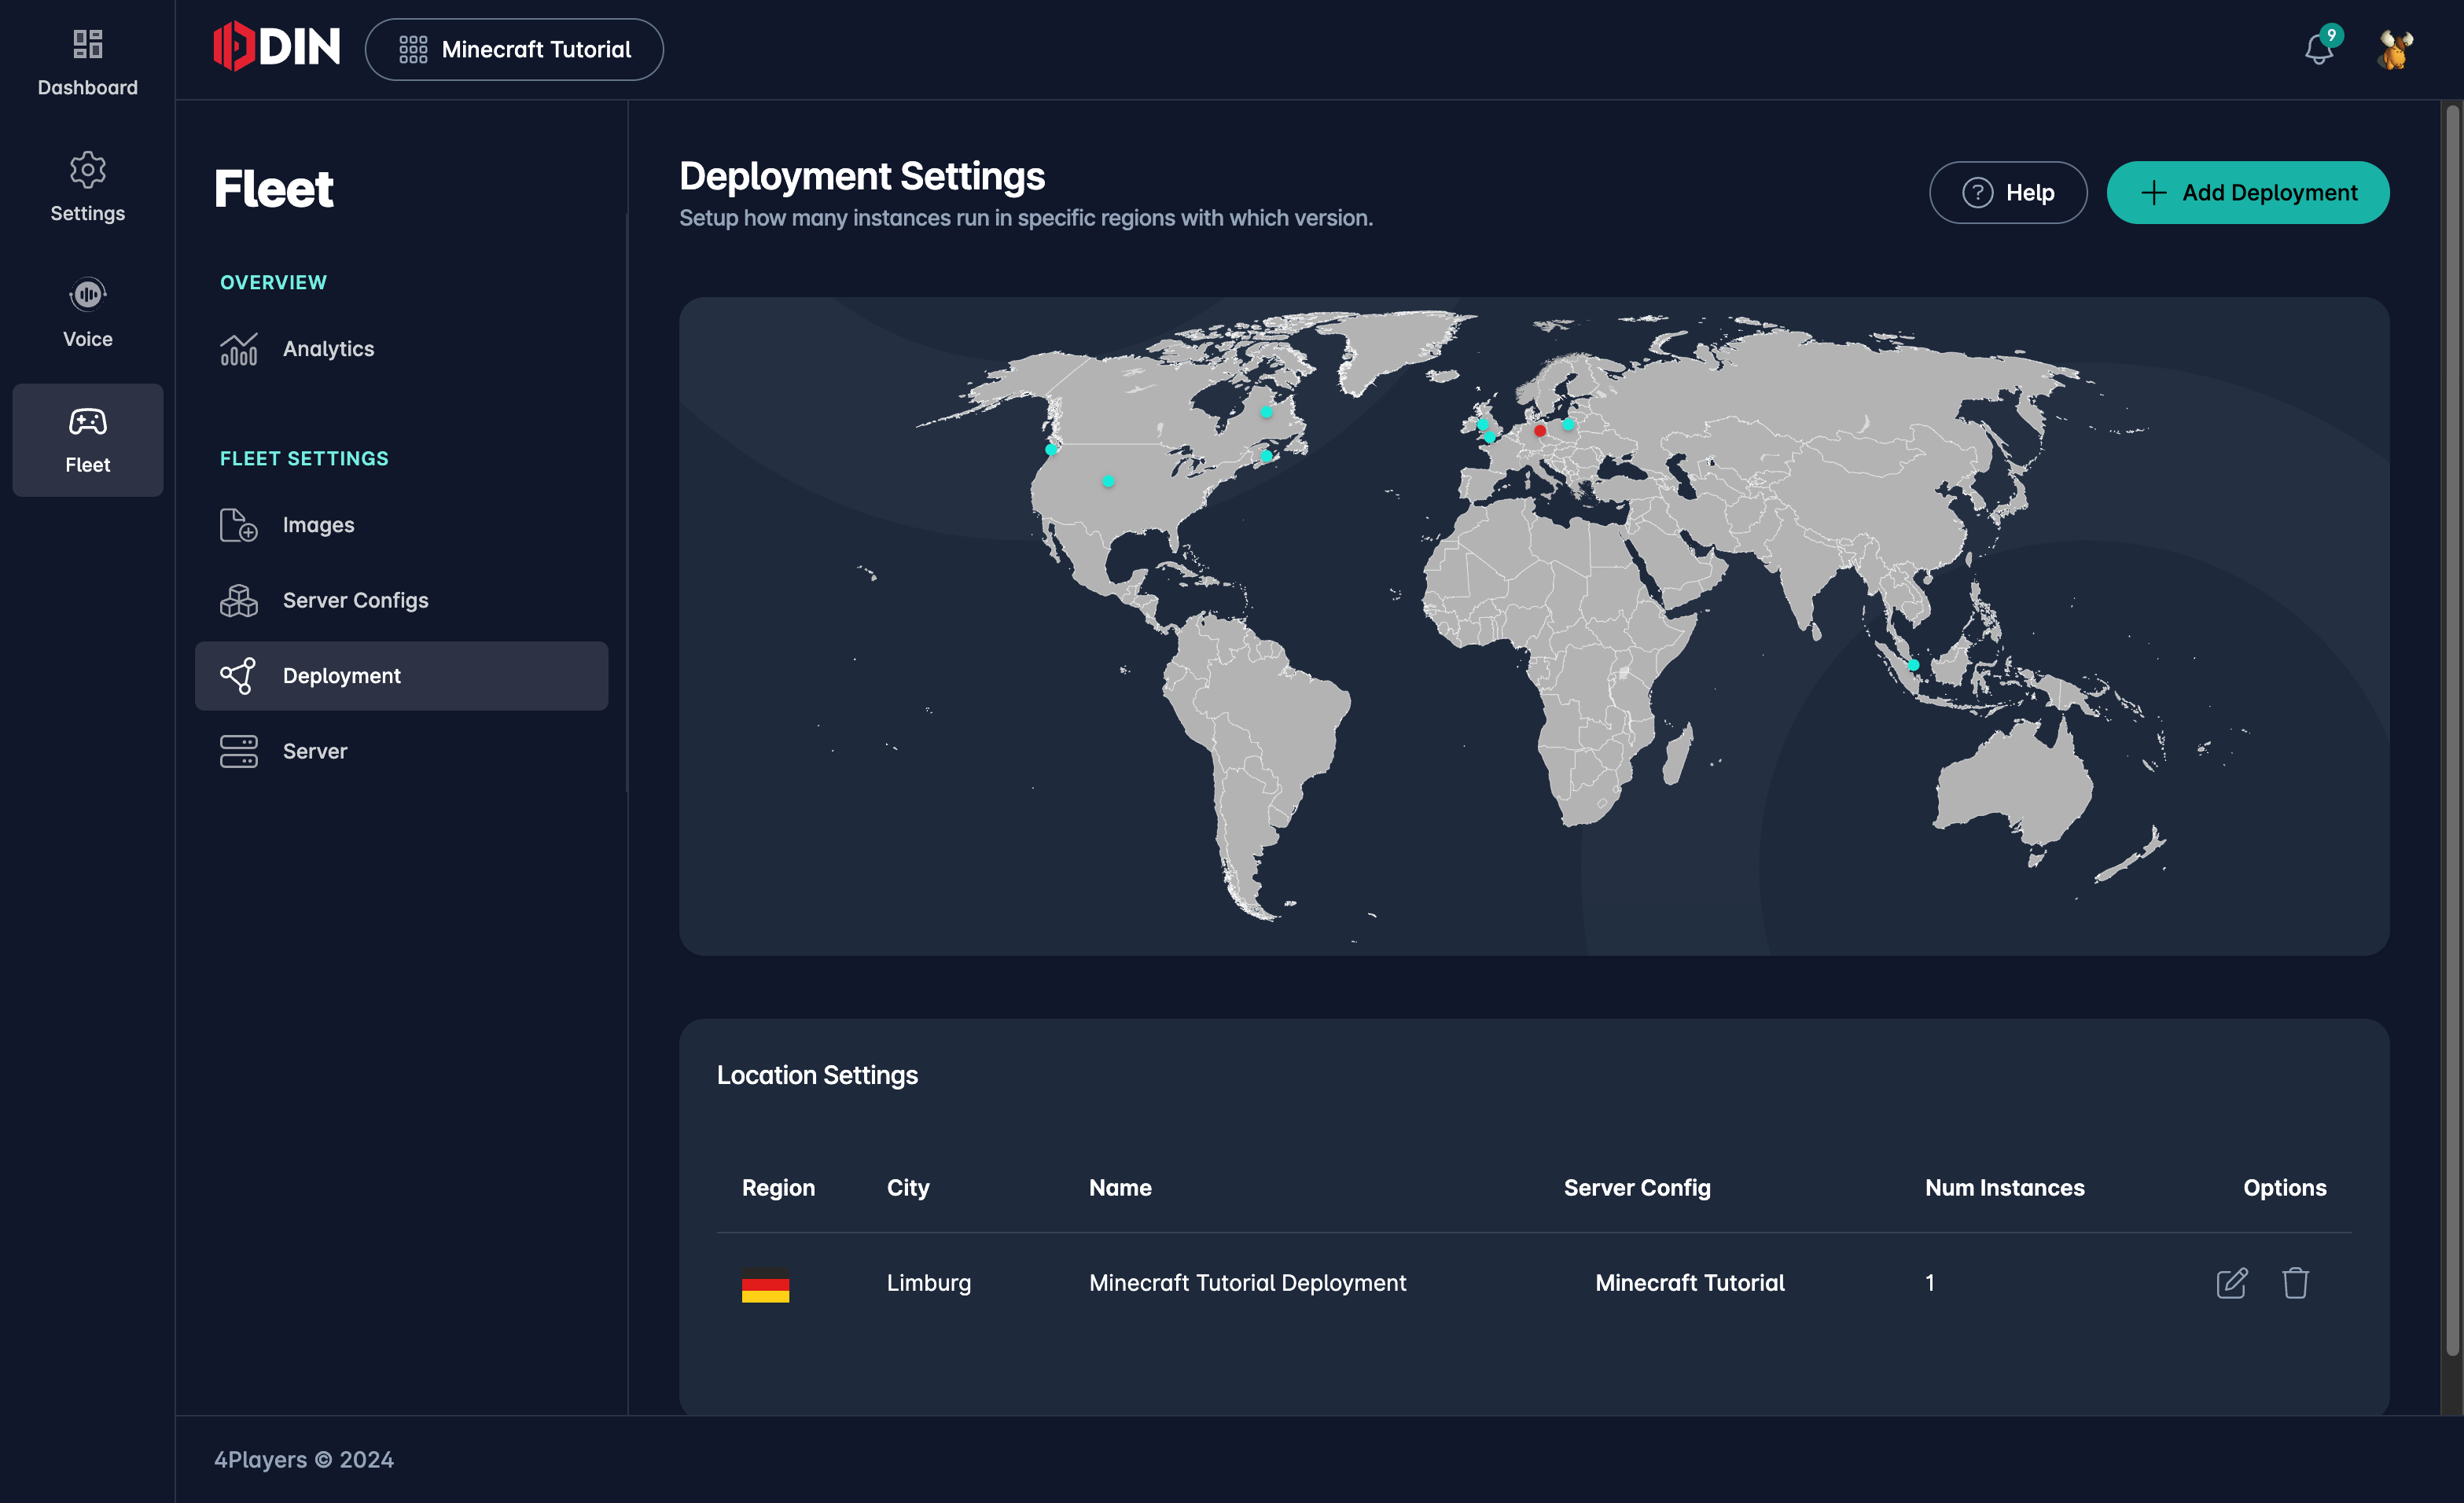
ODIN Fleet takes care of the rest. Thanks to the Always restart setting, the server requires no babysitting or manual restarts—ODIN Fleet will handle everything automatically.
Monitoring
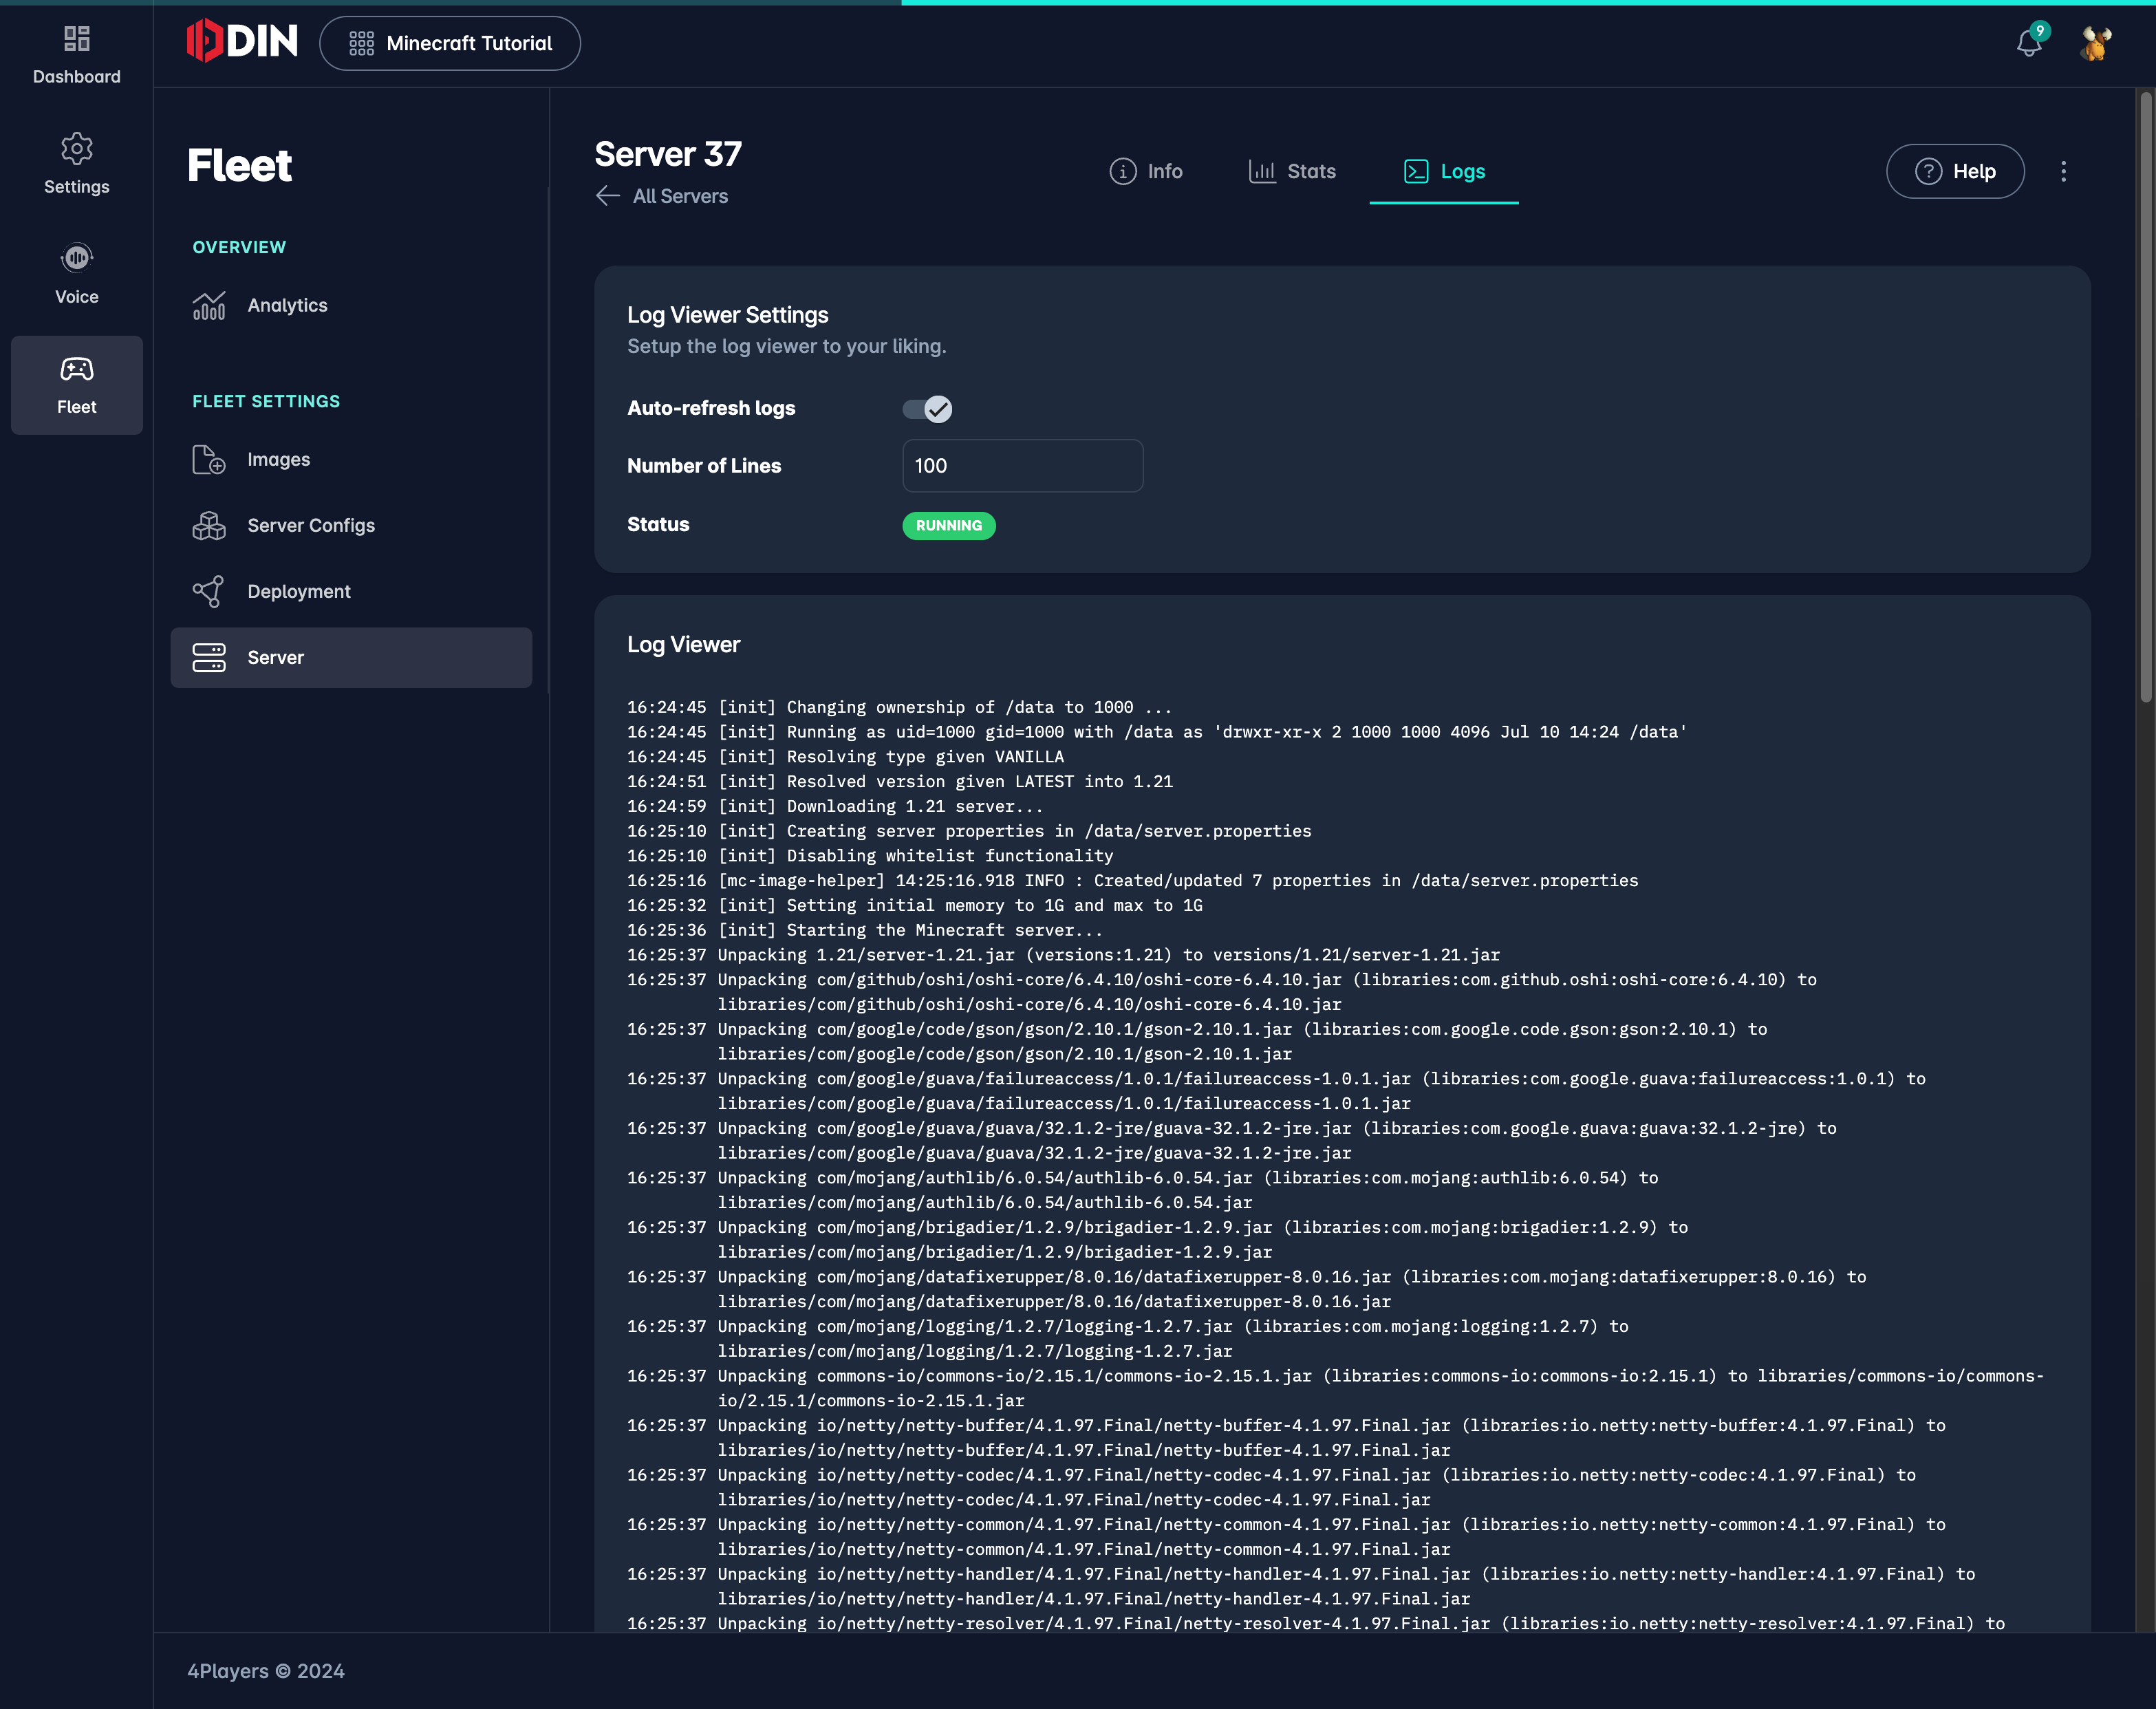
You can monitor your deployment in the dashboard, view logs, monitor resources, and create backups of the persistent folders.
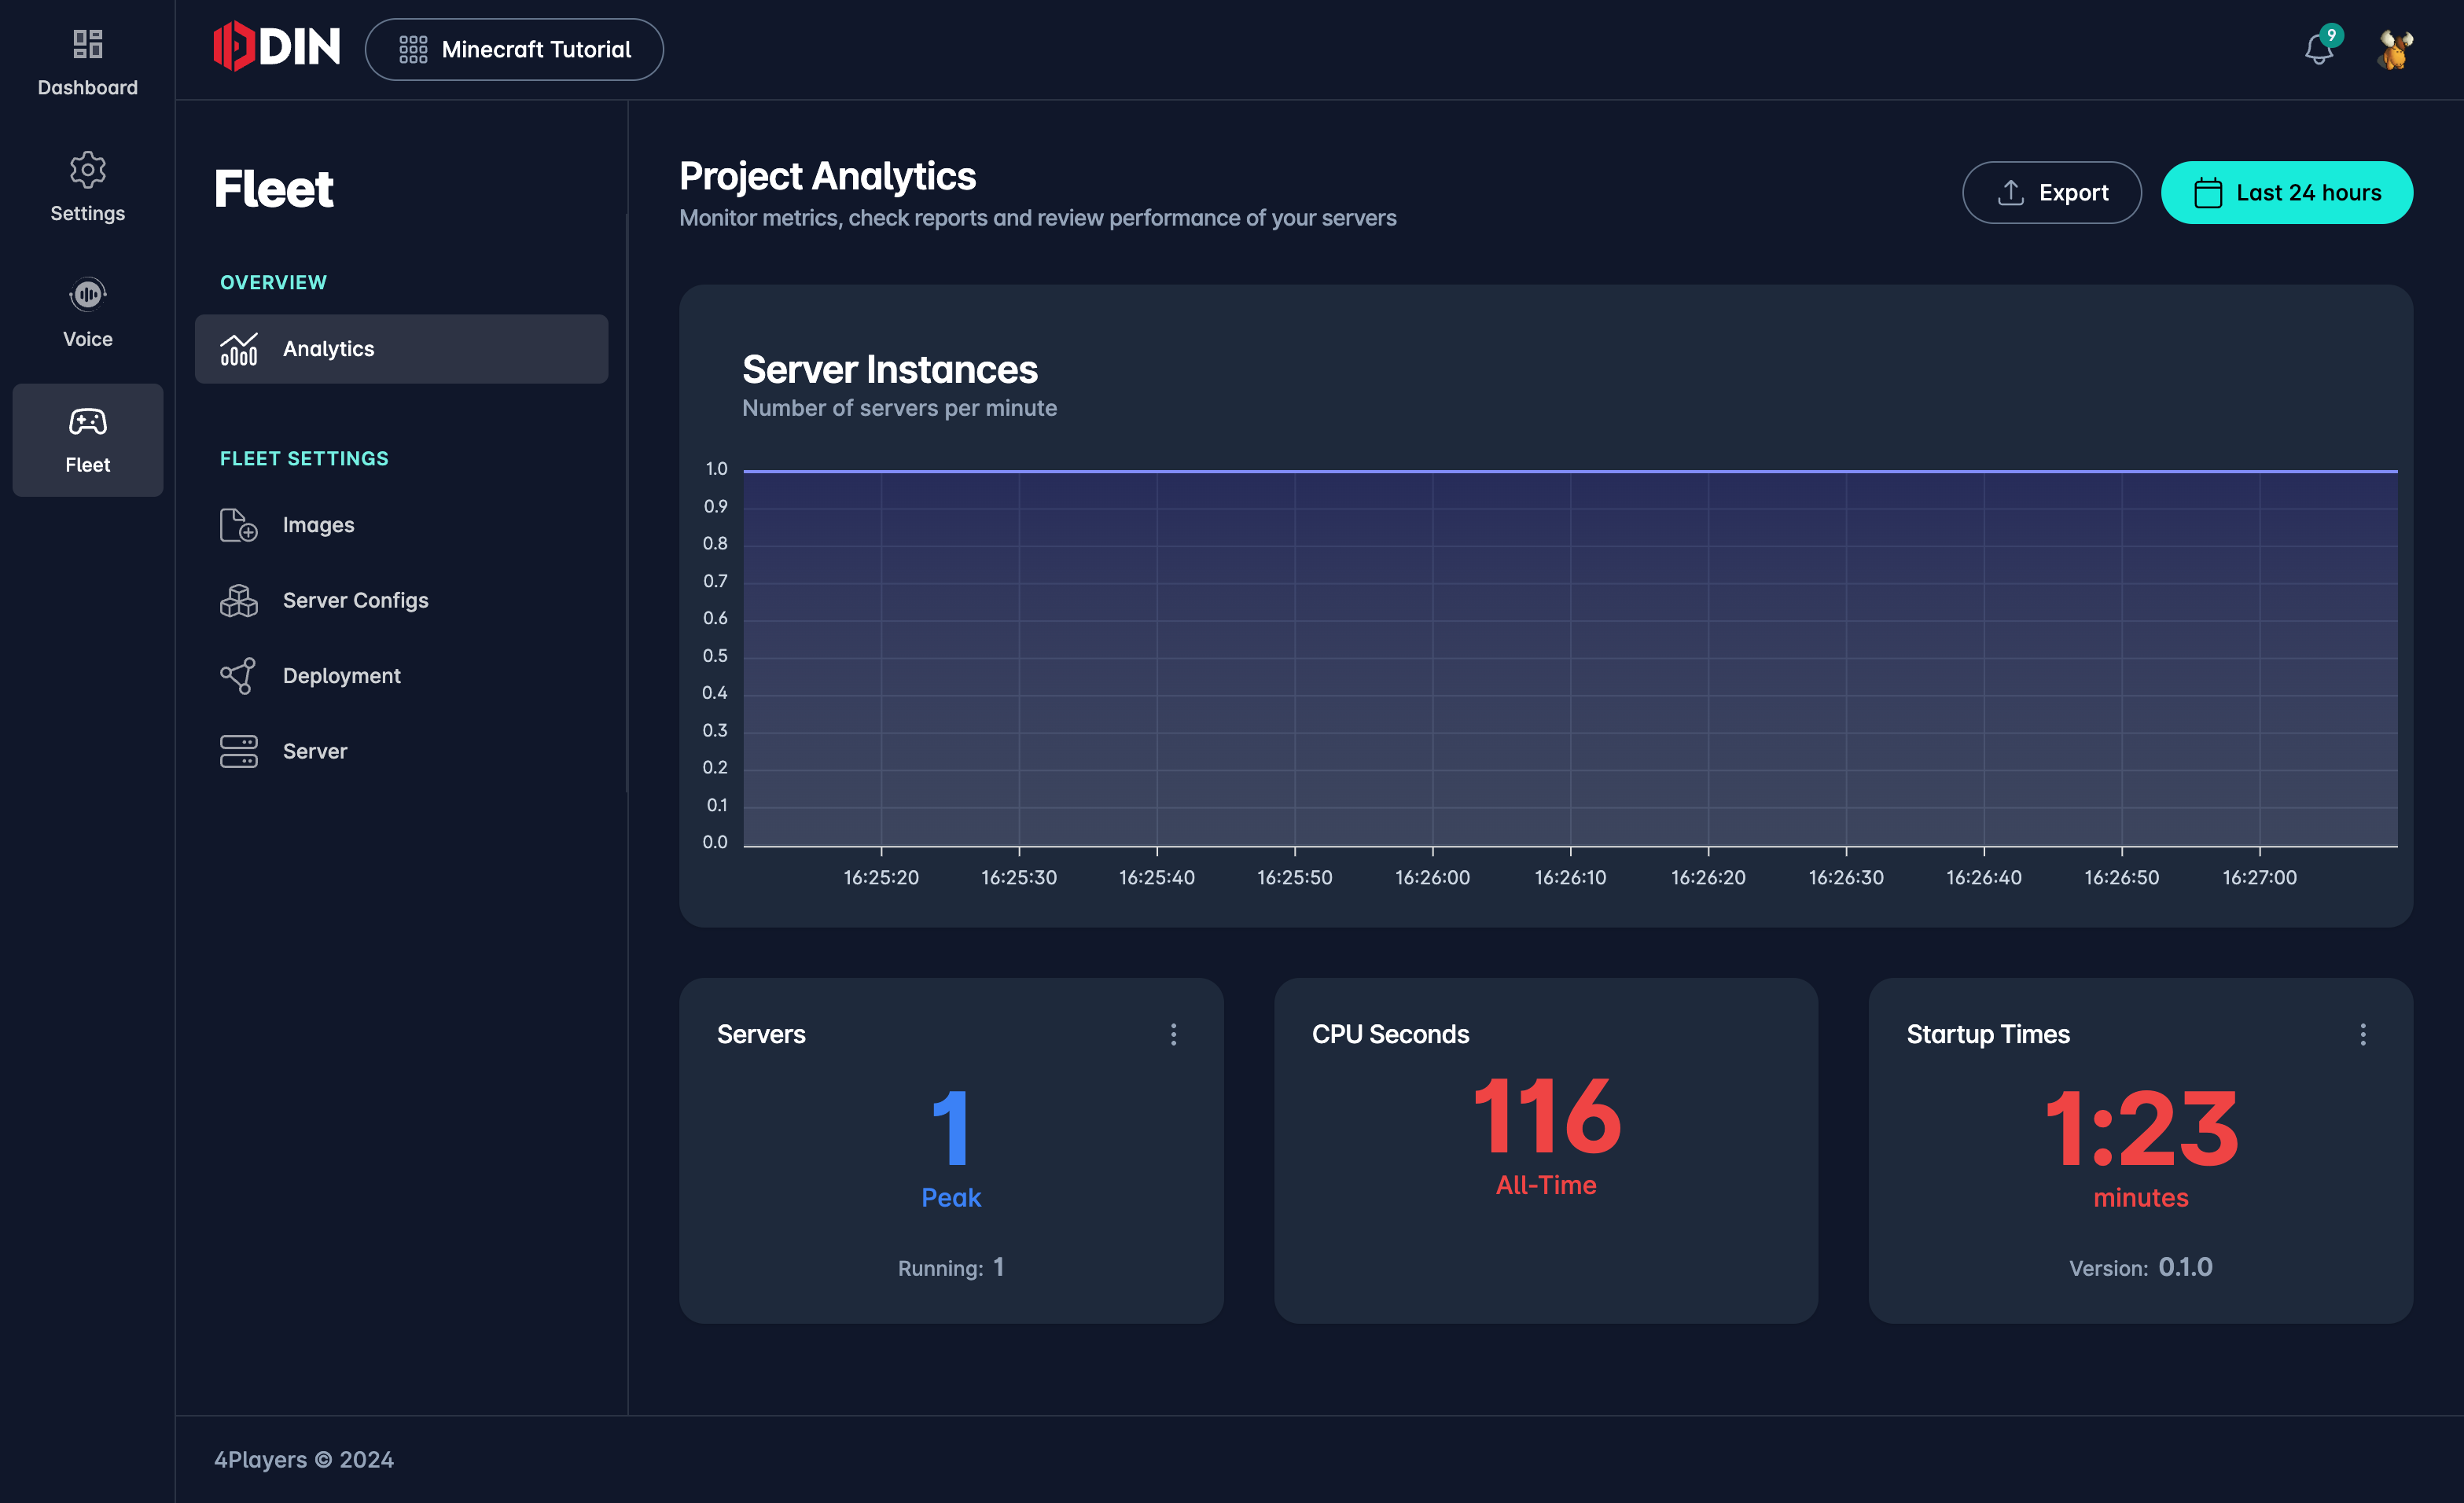
Navigate to Analytics to see how many servers ran during the billing period. This is an easy-to-use cost control, tracking peak server usage per day.
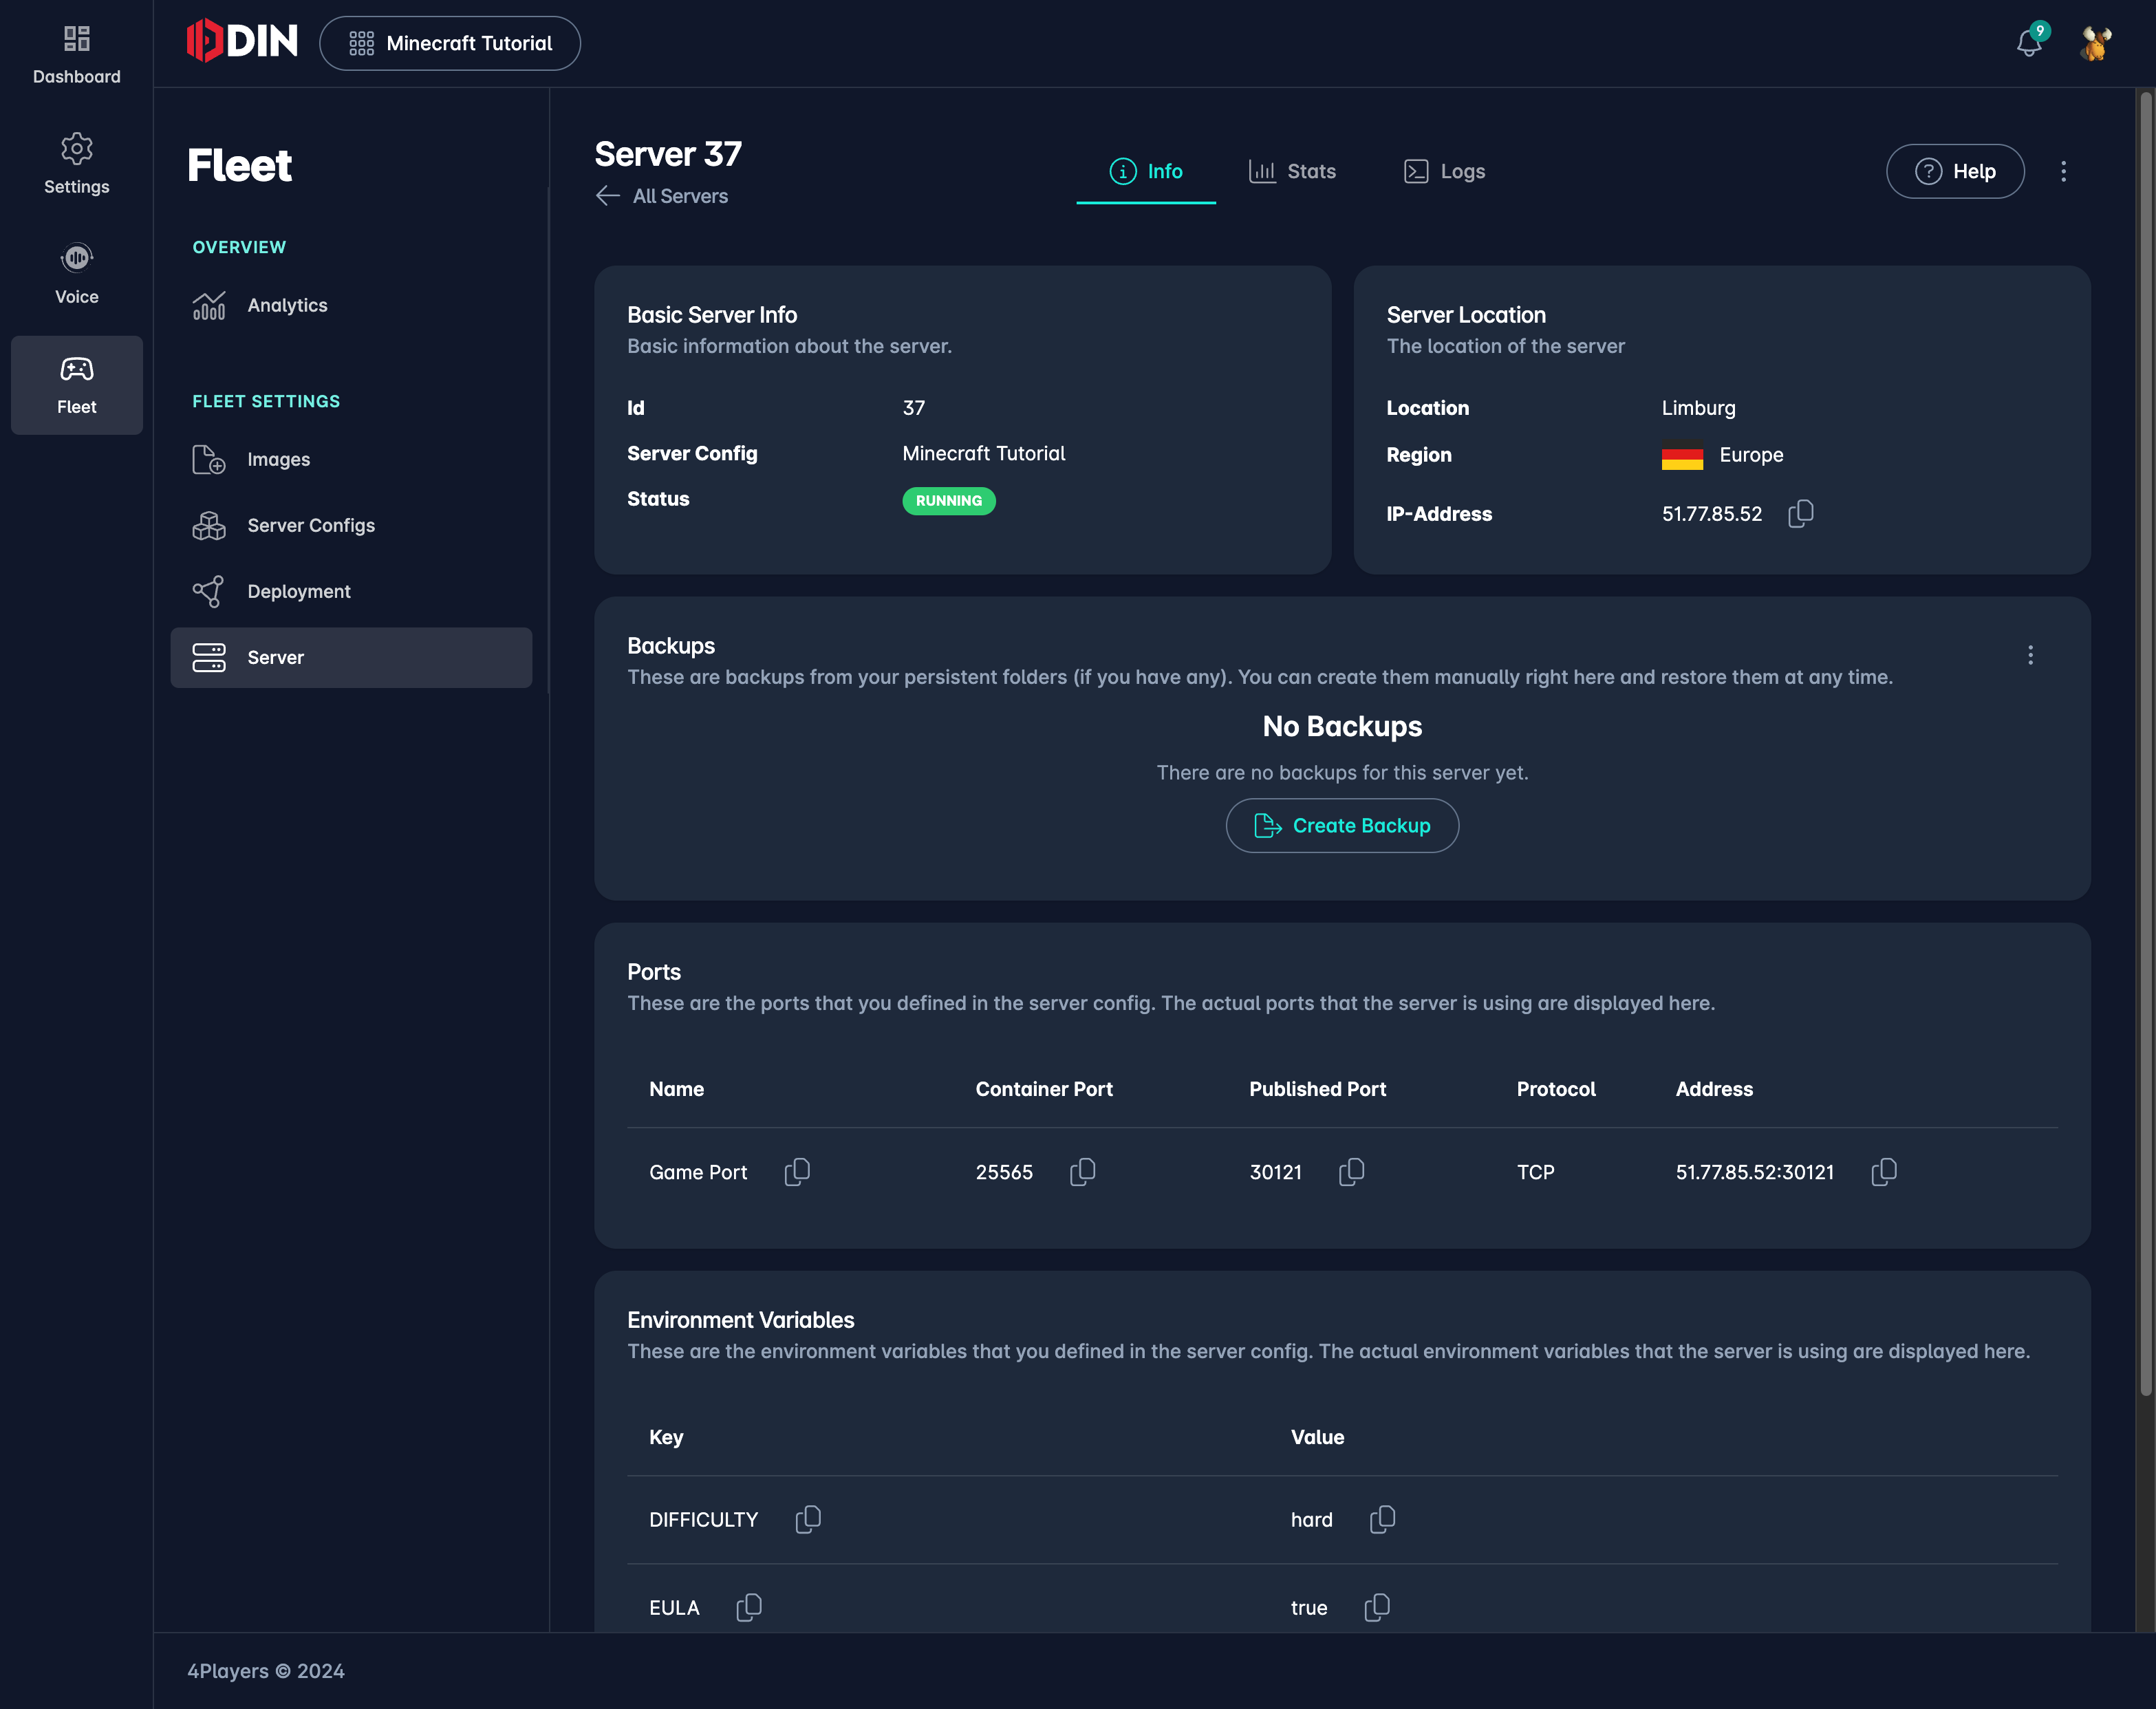
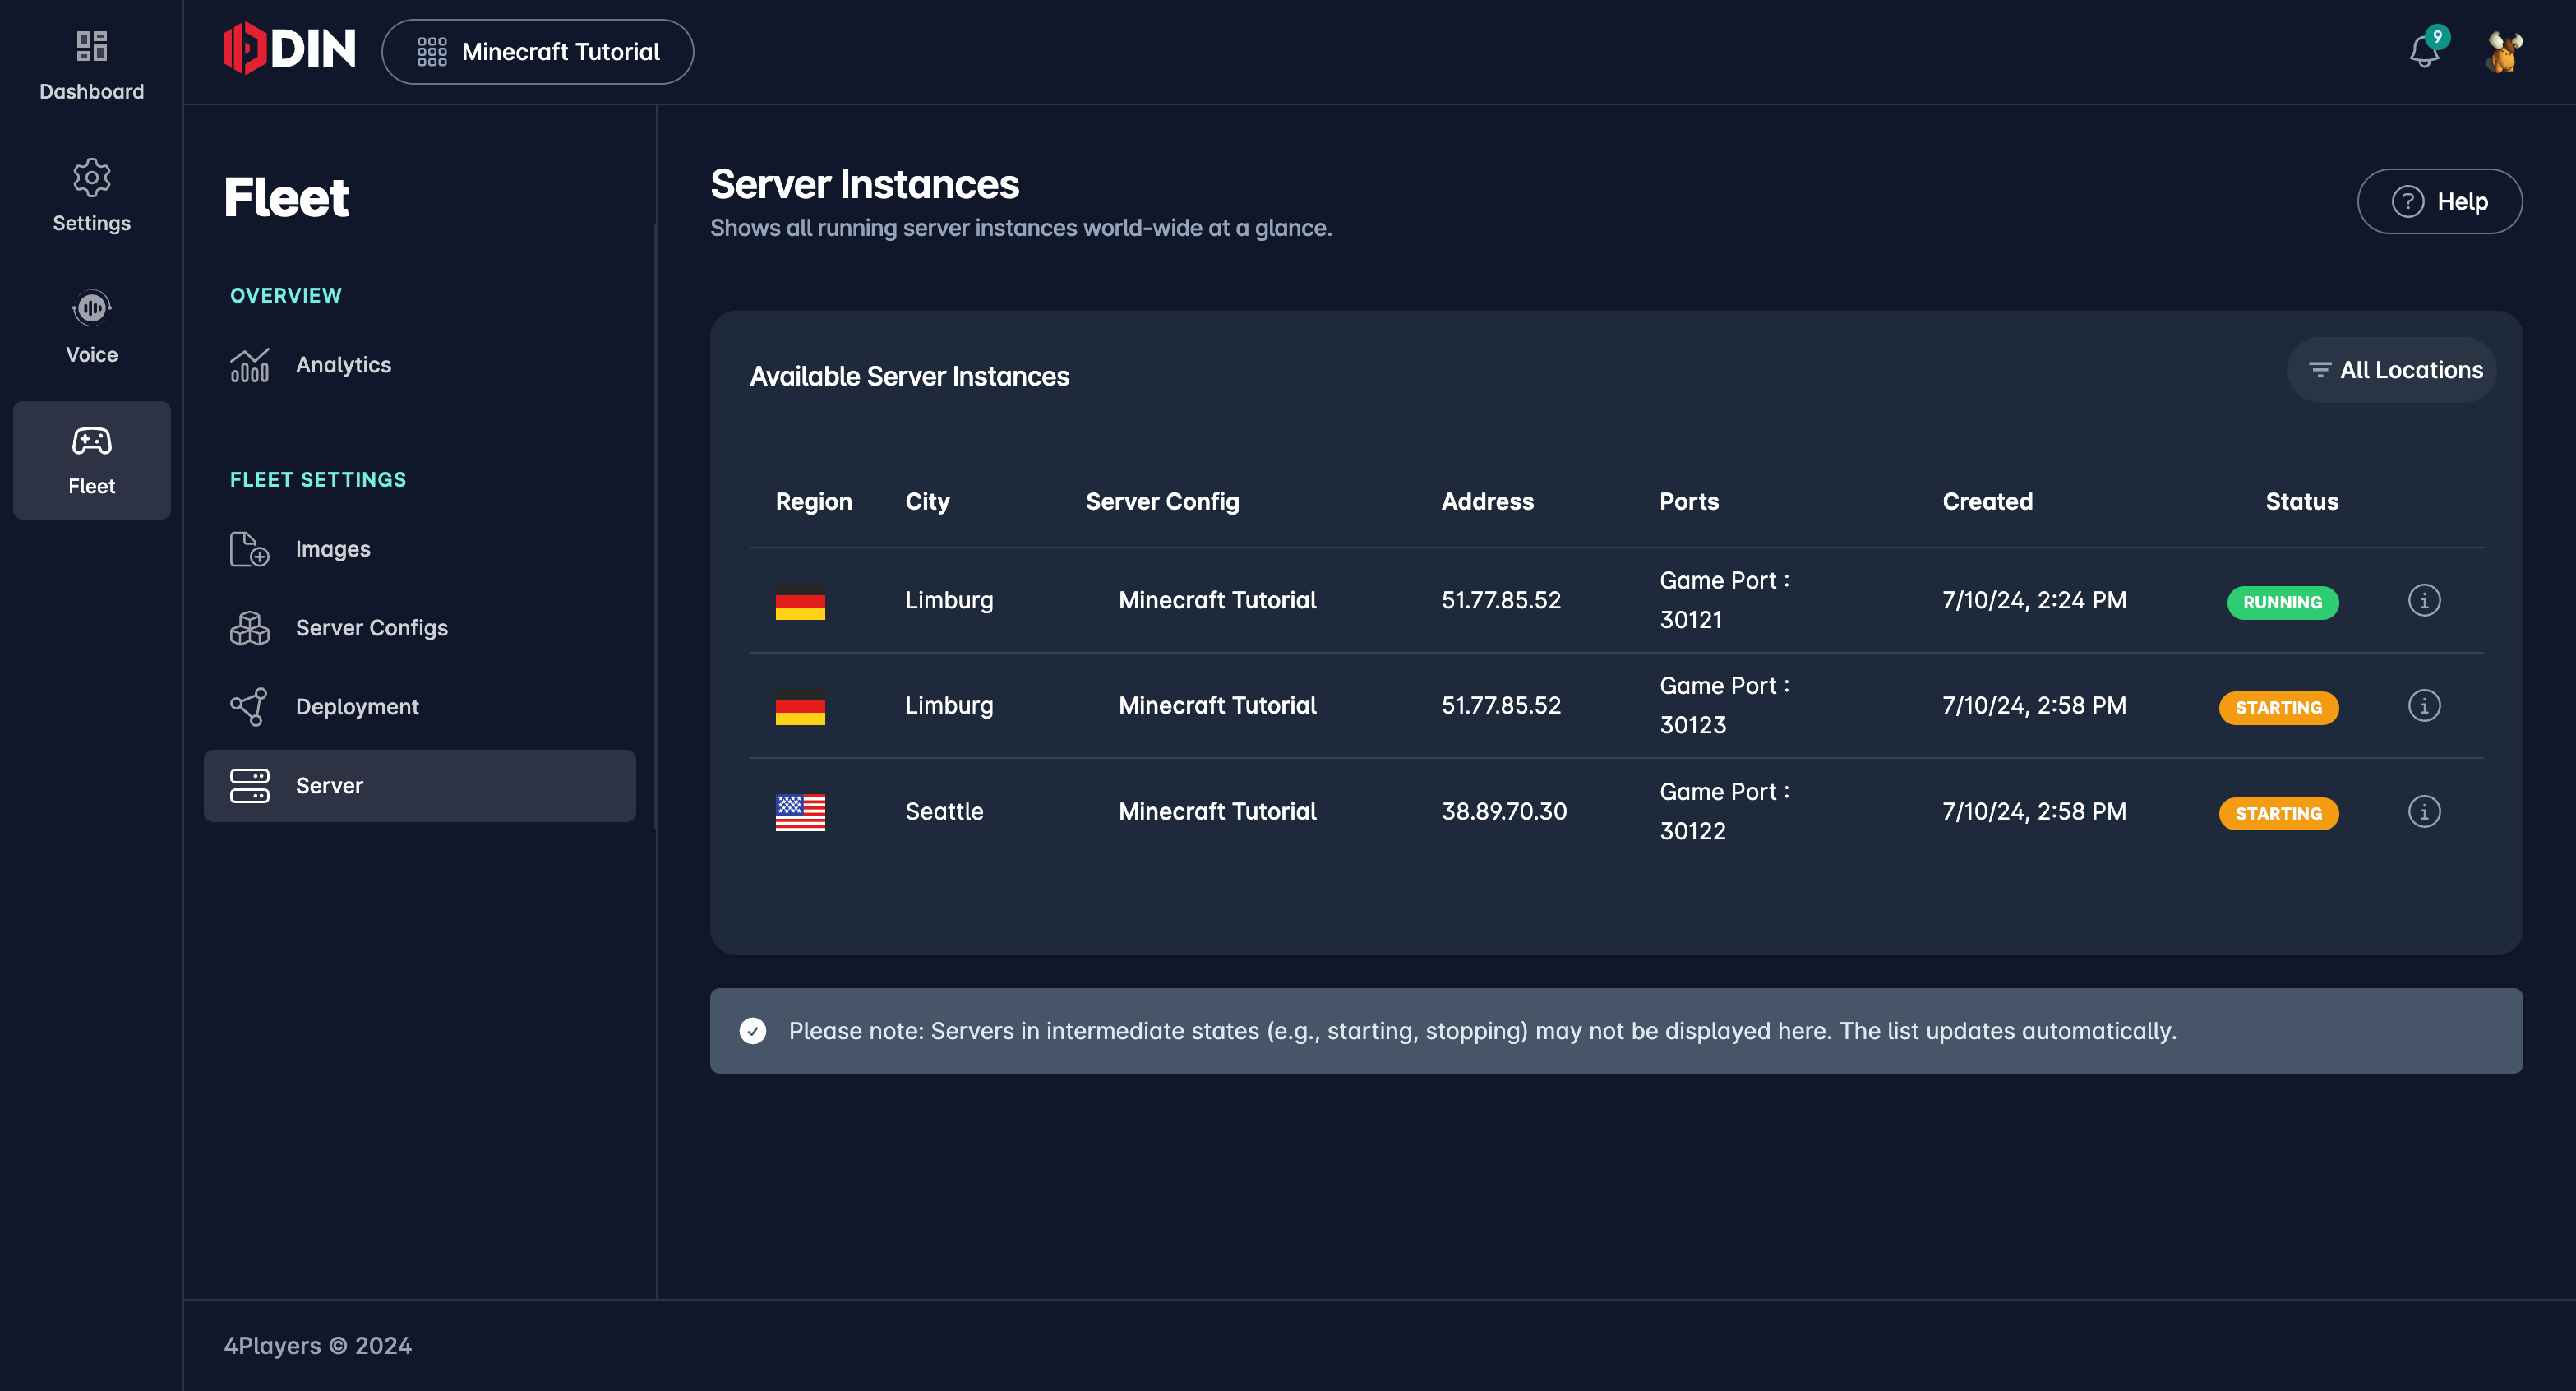
Click Servers on the sidebar to view running servers from all deployments. Click the info icon (i) on the right
side of the list for more detailed server information, including logs, resources, environment variables, and mounts.
Checking server stats
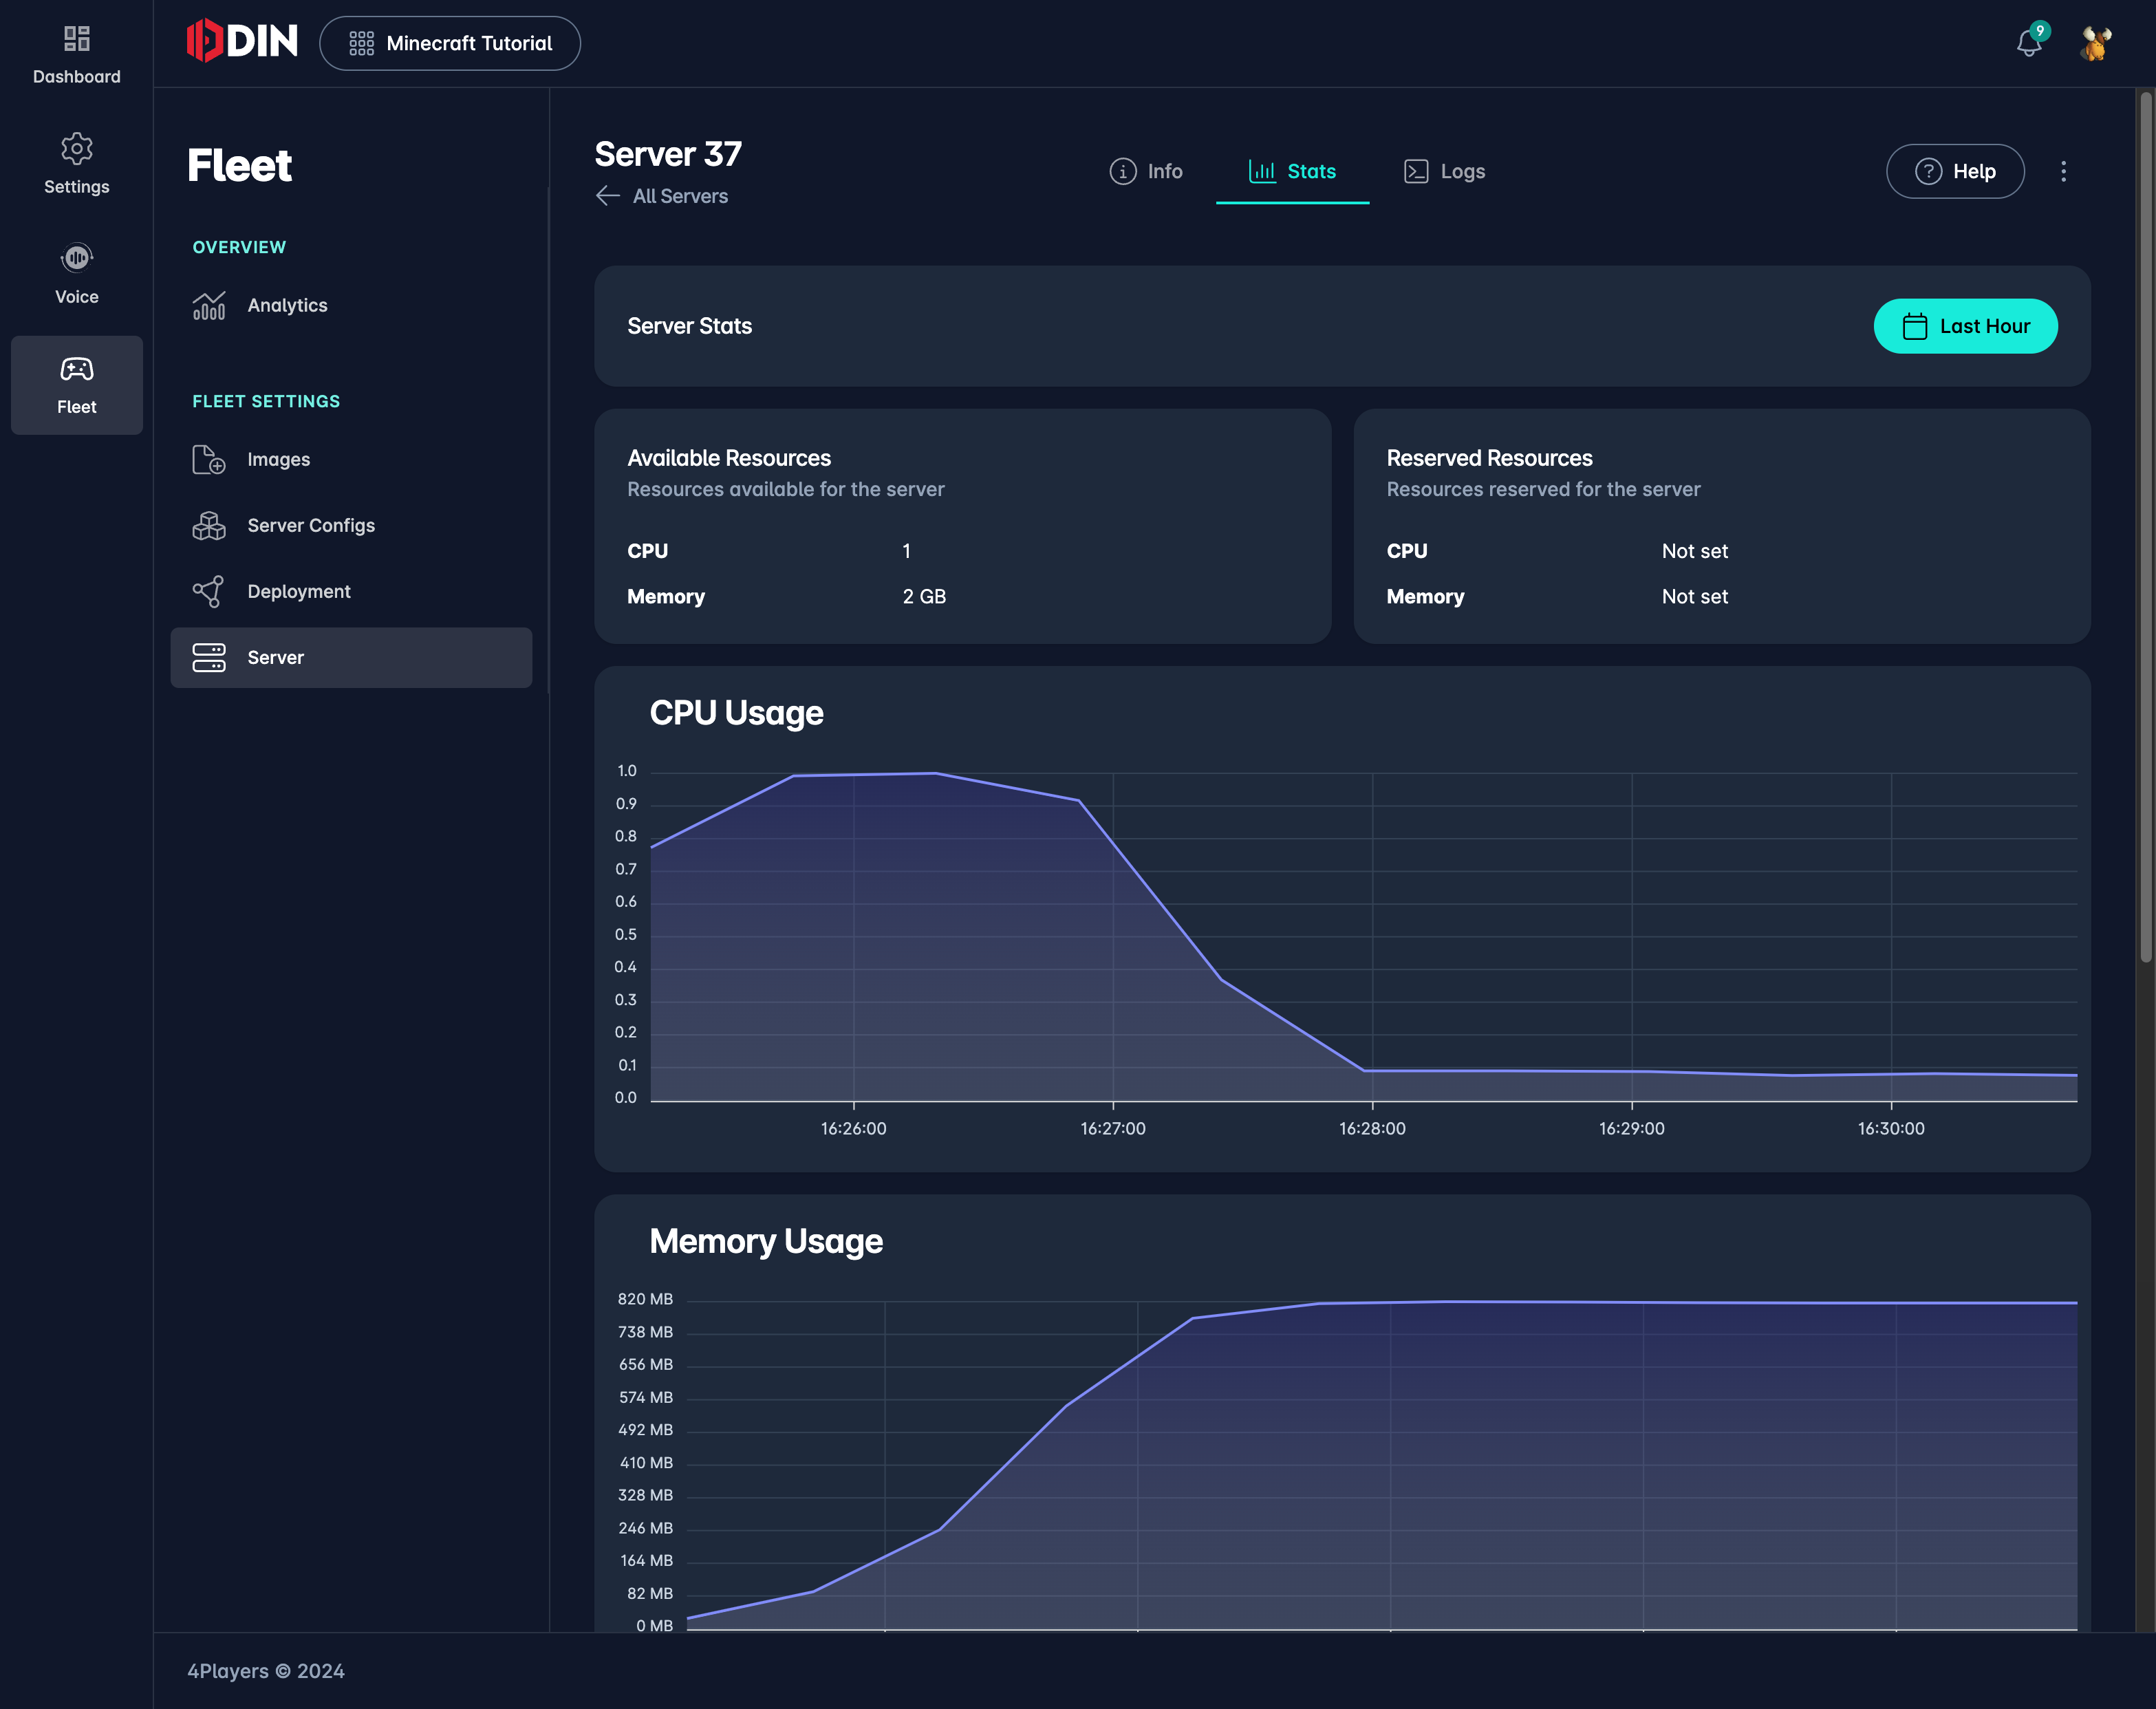
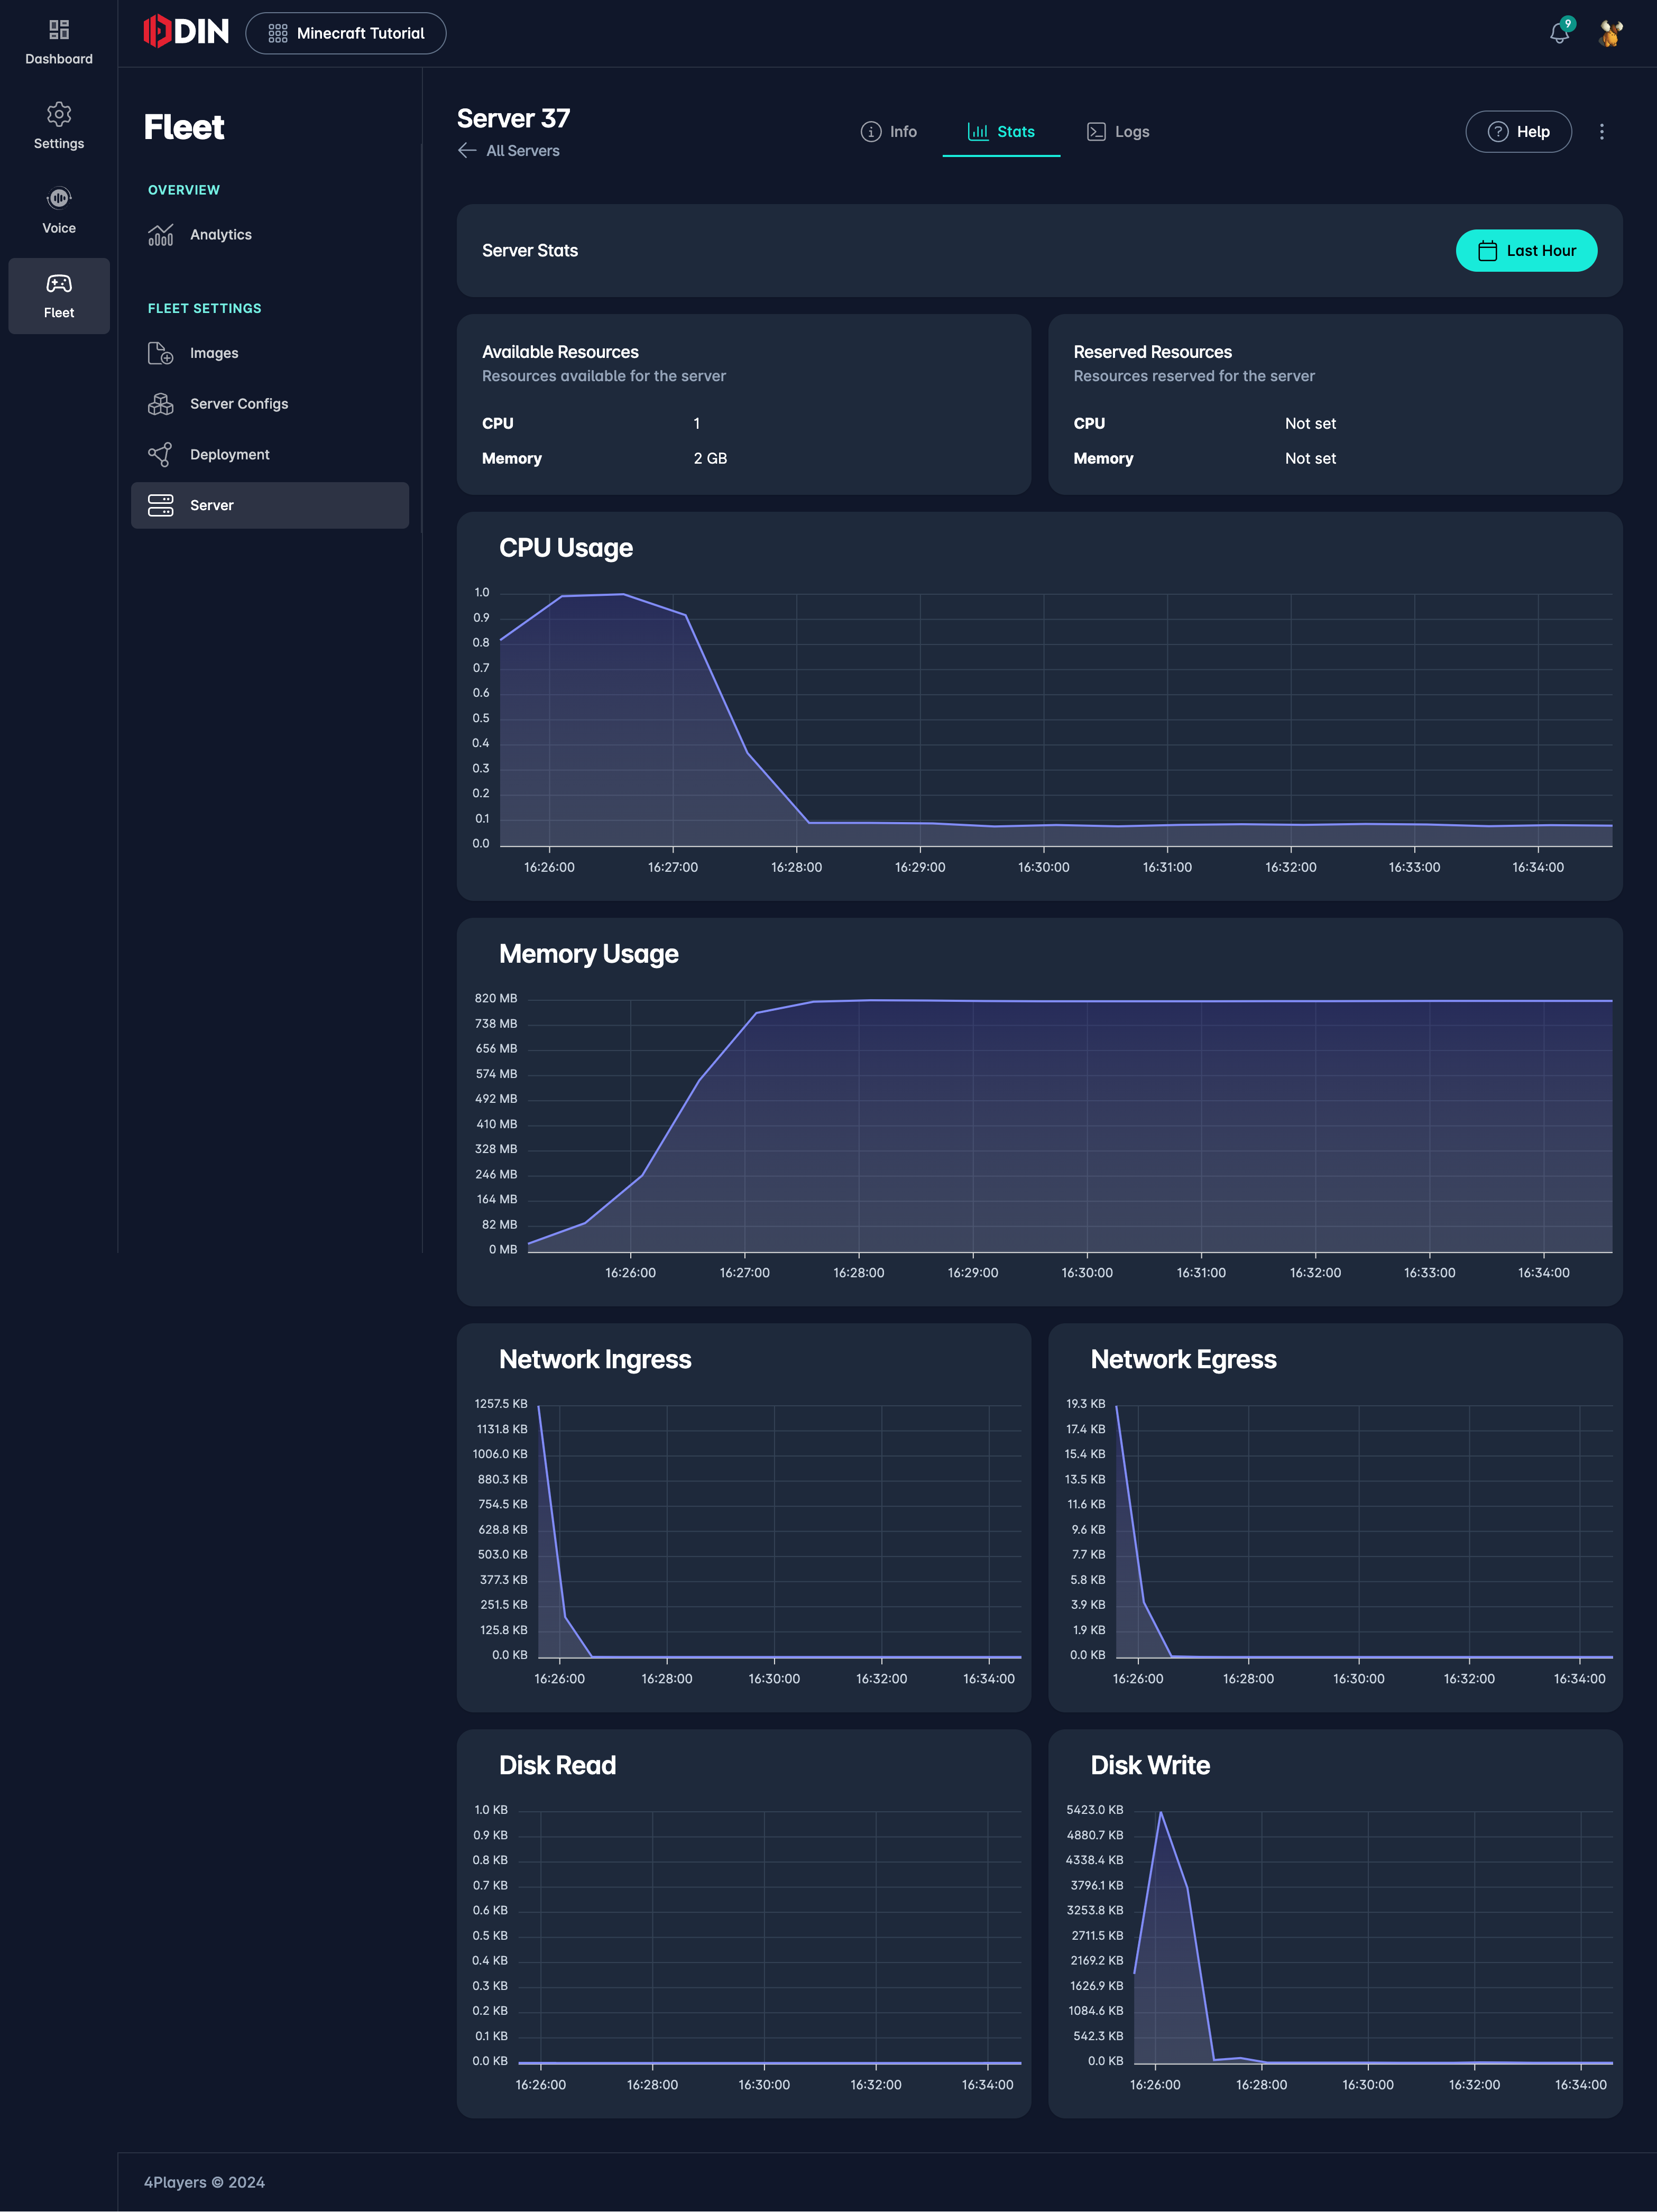
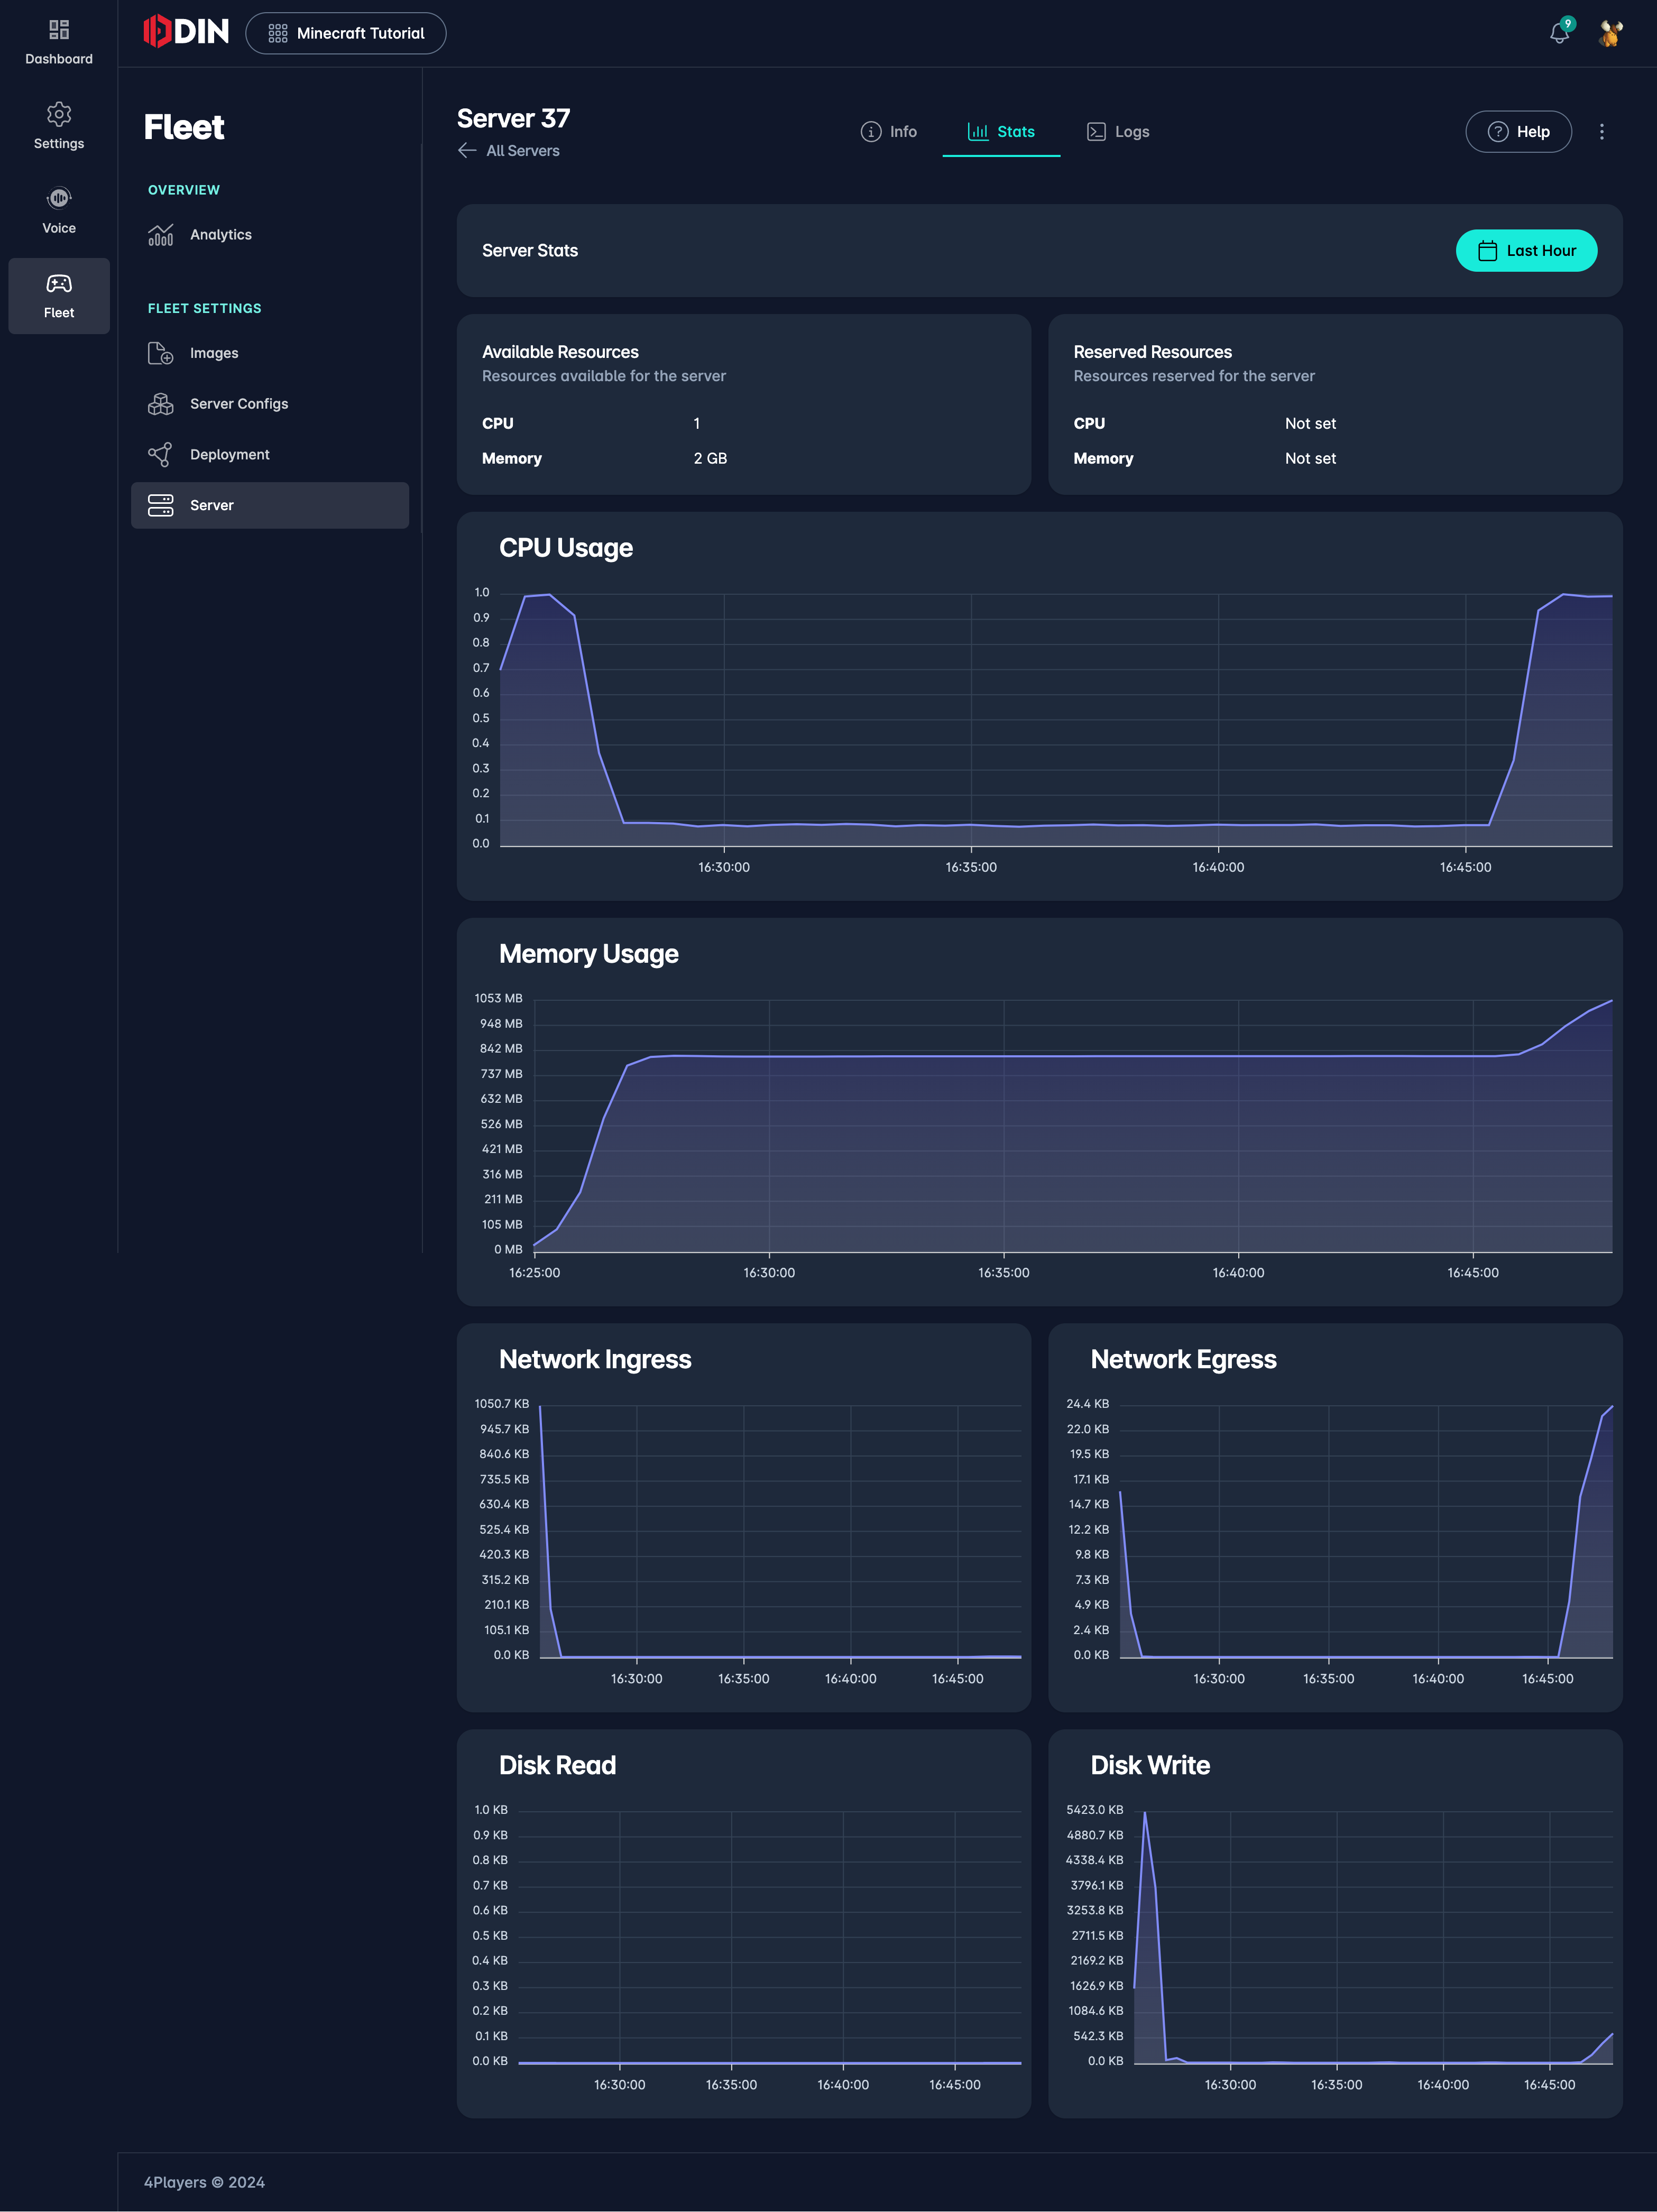
Click on the Stats tab to see server resource usage, including CPU, Memory, Disk, and Network usage. This helps determine if the server is running smoothly or needs adjustments.
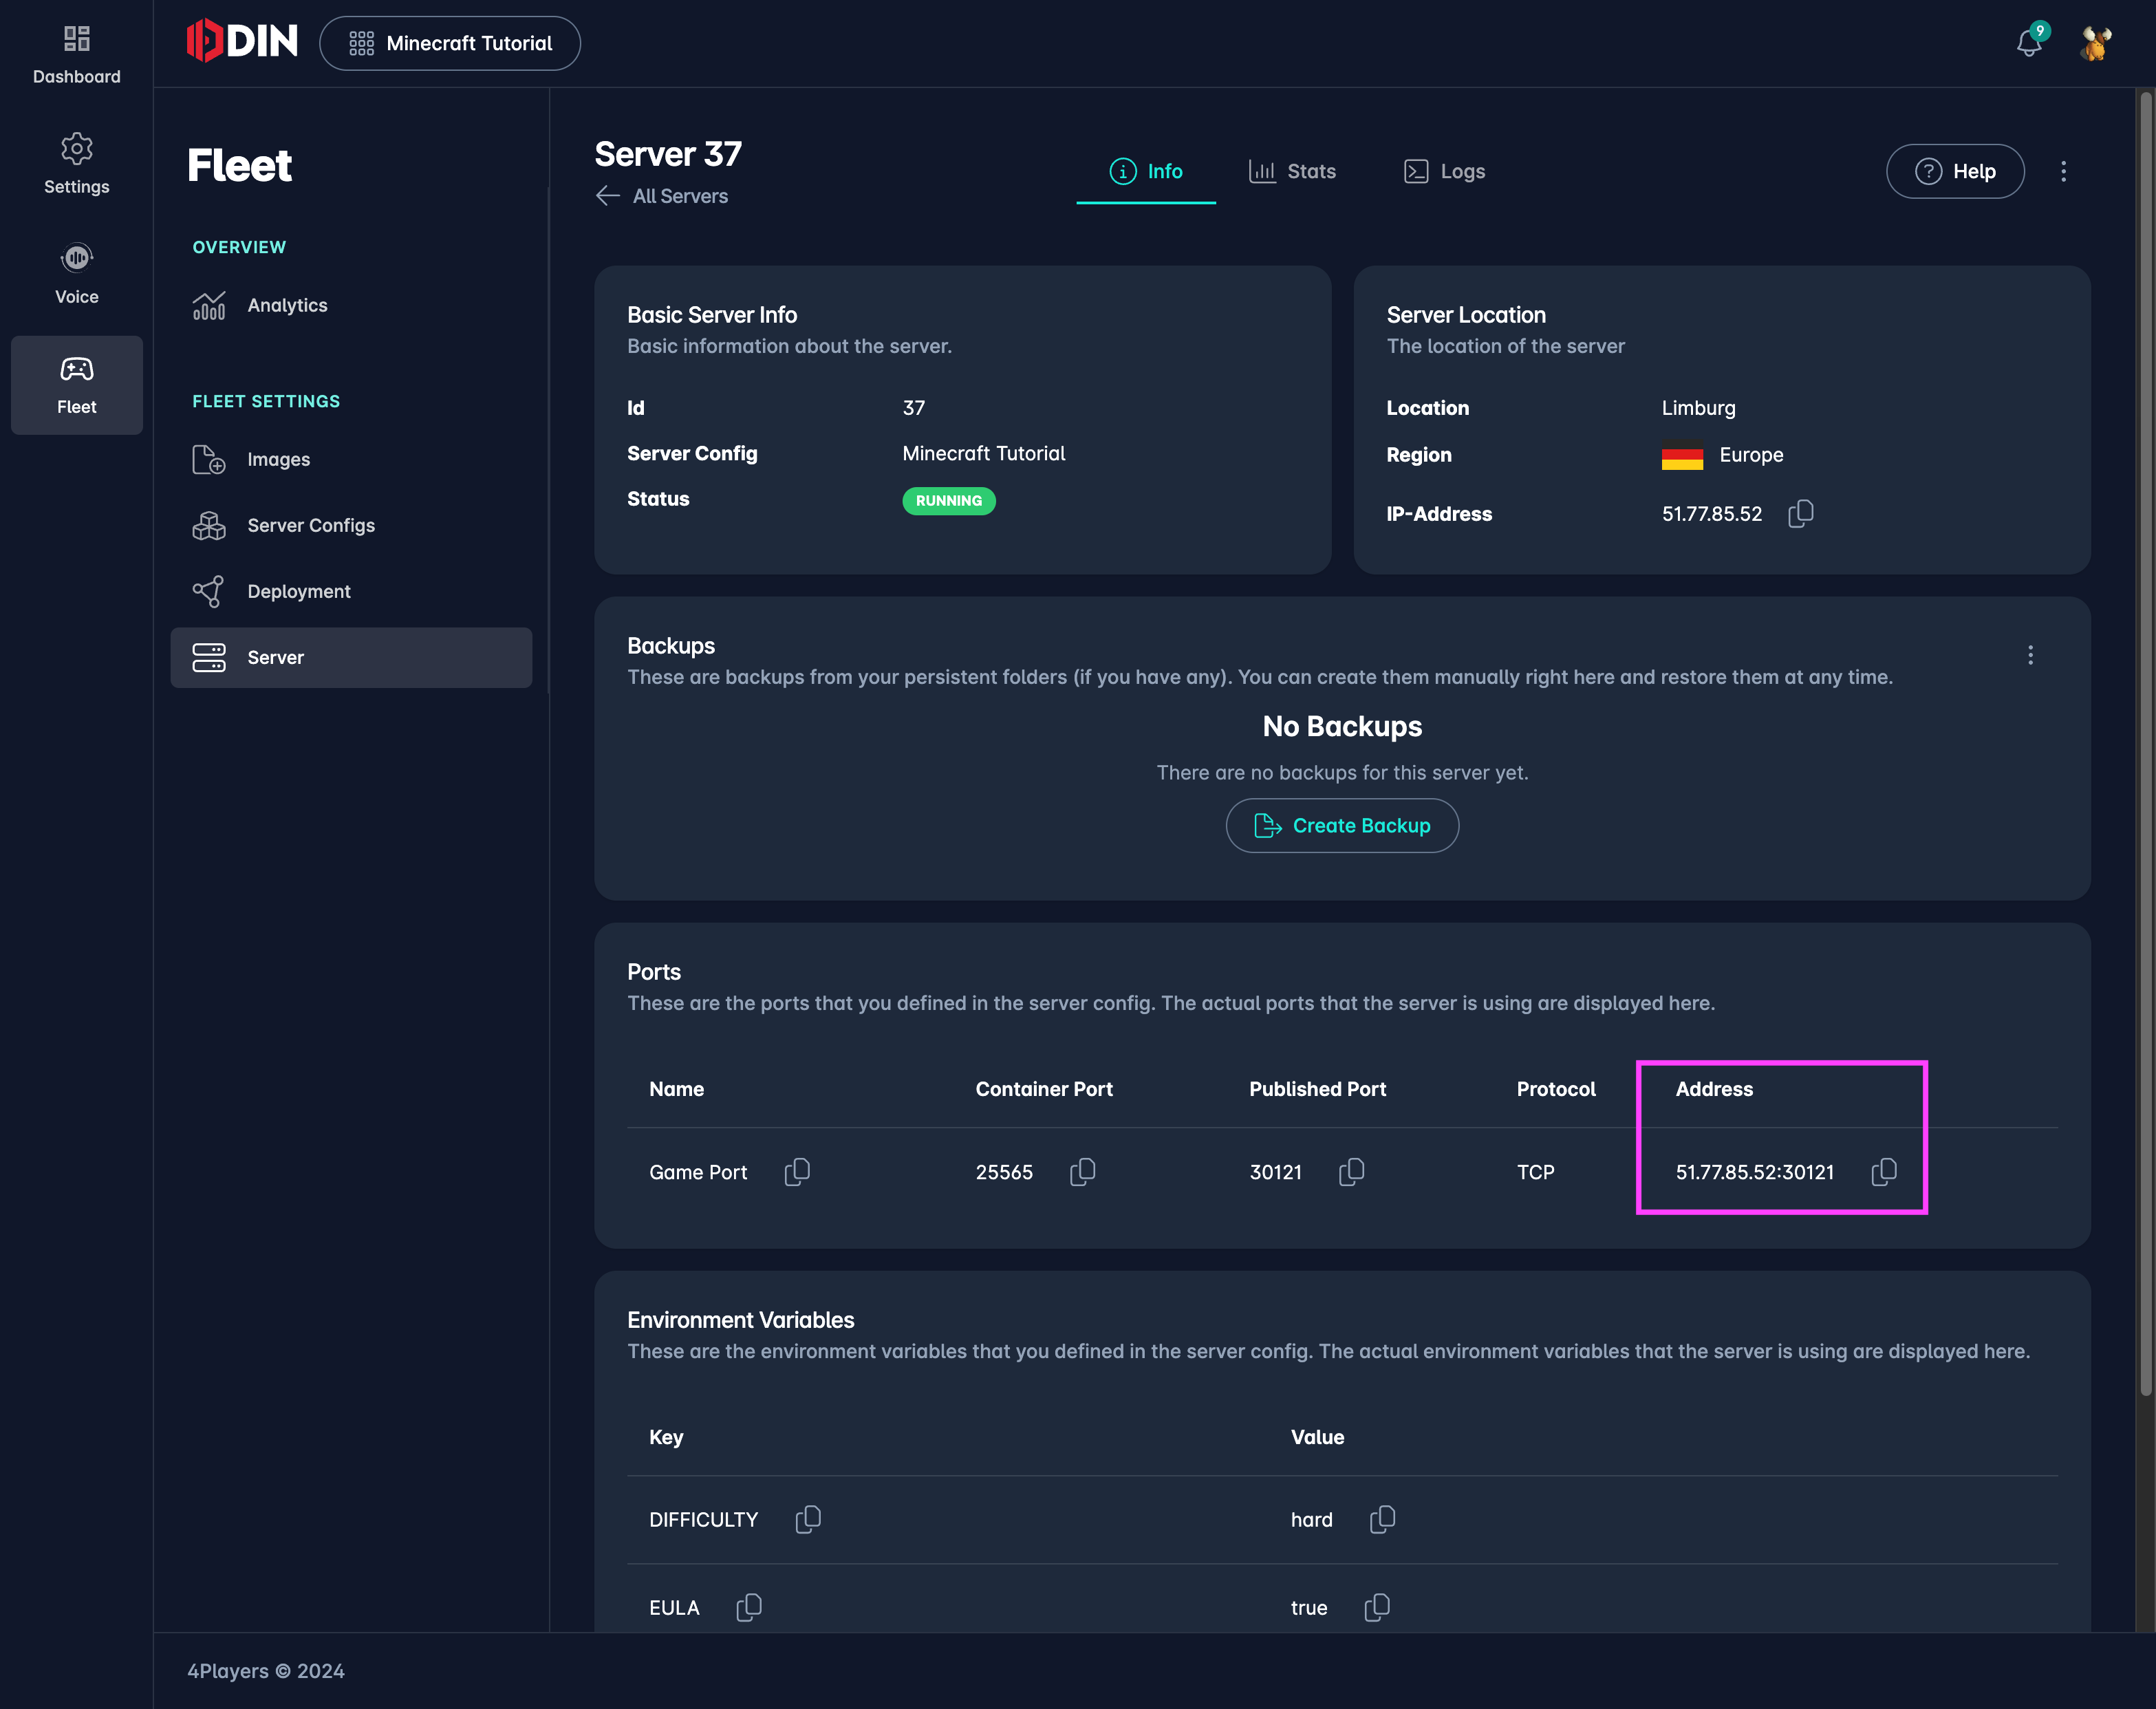
Connect to the Minecraft server by using the IP address and port listed in the Info tab.
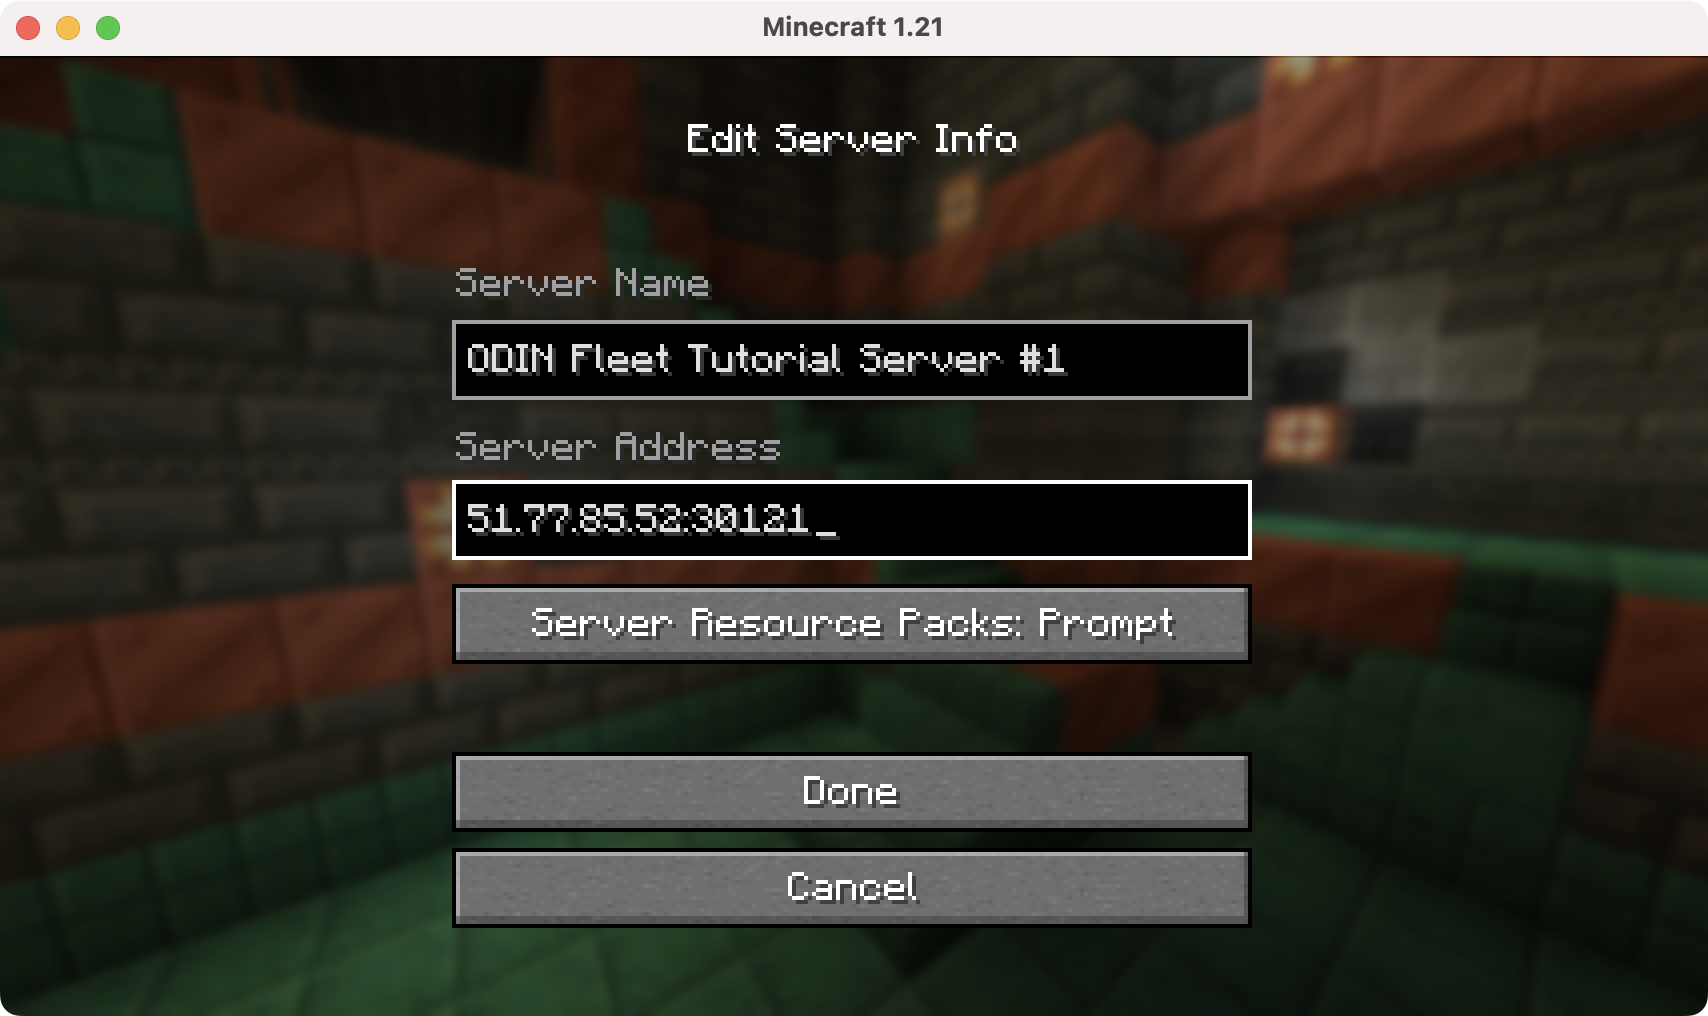
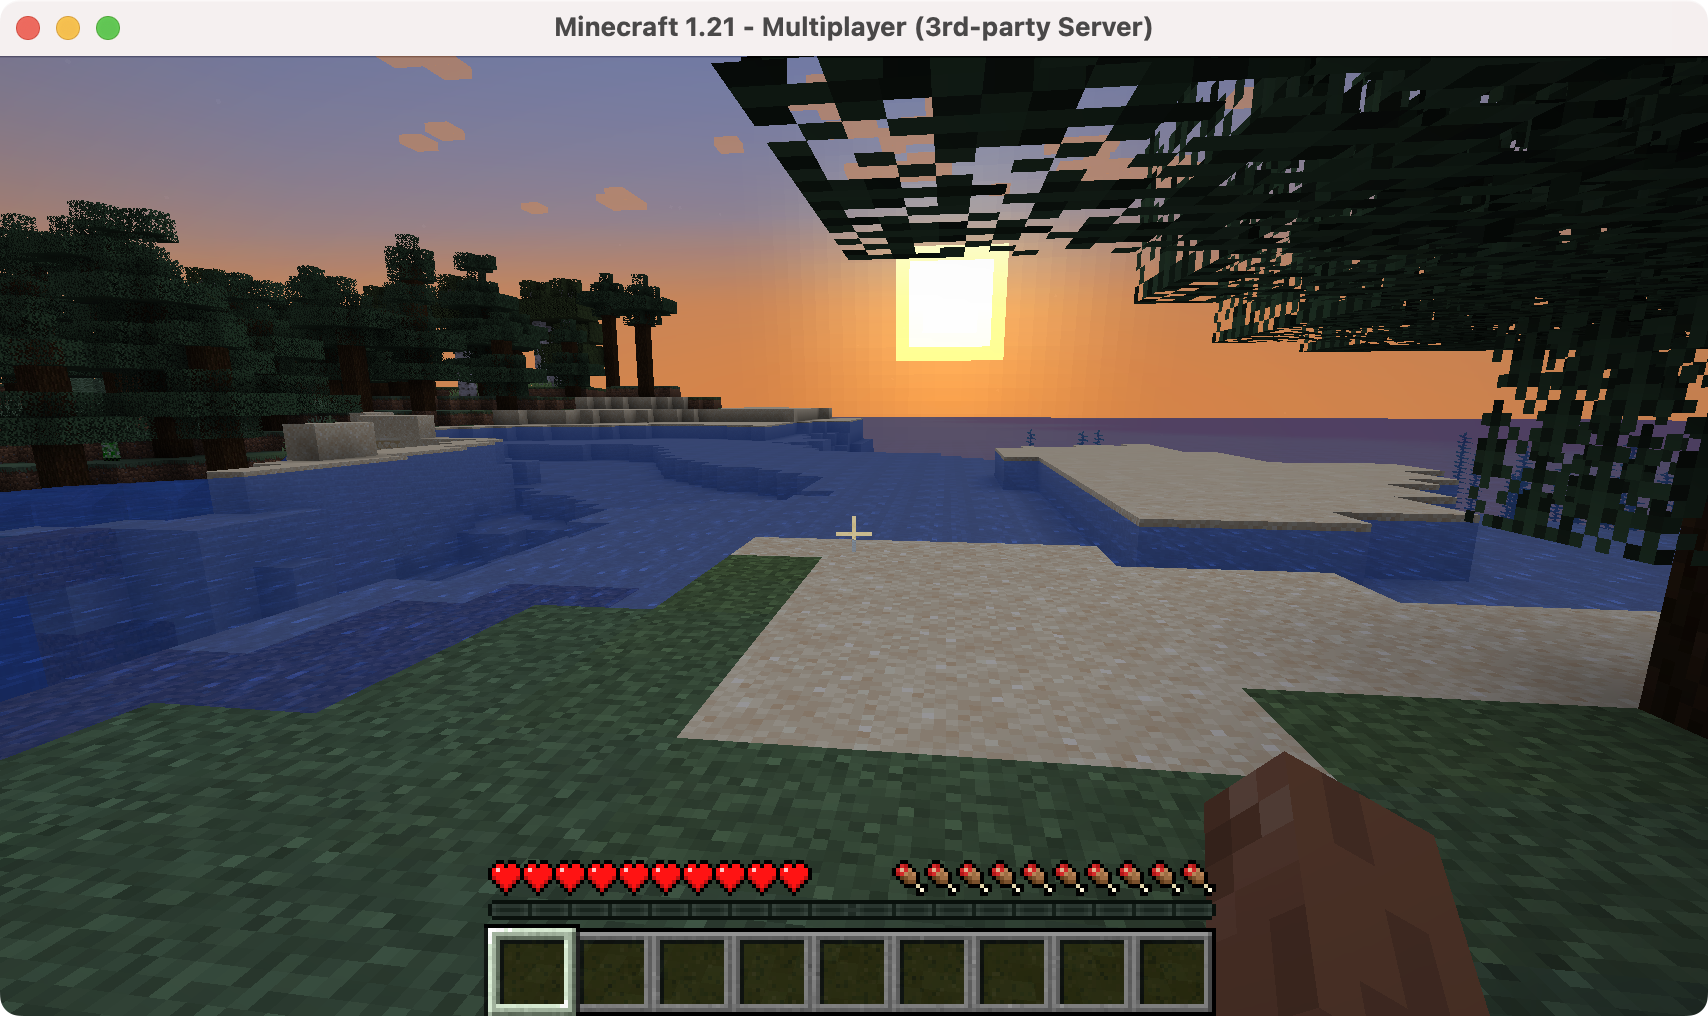
In the Minecraft client, choose Multiplayer and click Add Server. Enter the IP and port from the server information.
After adding the server, you'll see it in the list:
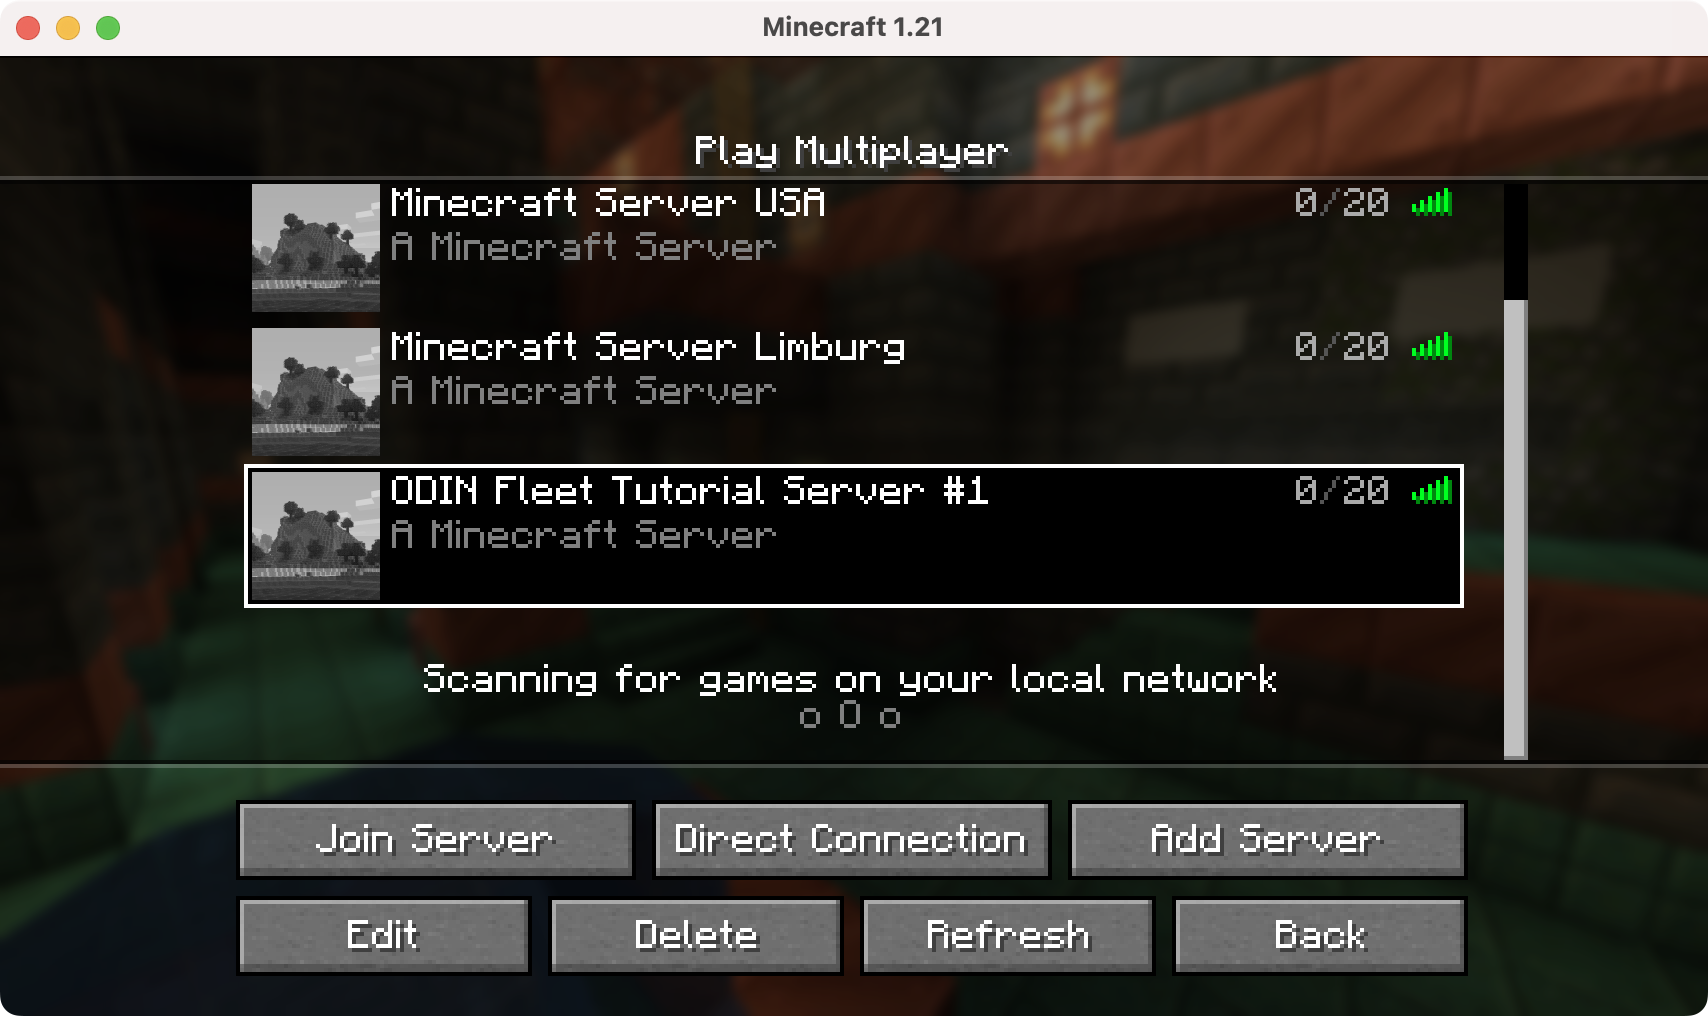
Click Join Server to start playing.
Checking server stats again
After some gameplay, revisit the Stats tab to see updated resource usage:
Scale Up or Down
To scale up, edit the deployment to increase the number of instances. You can also add servers in new locations, like Seattle.
Cost Control
Navigate back to Analytics to see the increased number of instances and updated cost estimates.
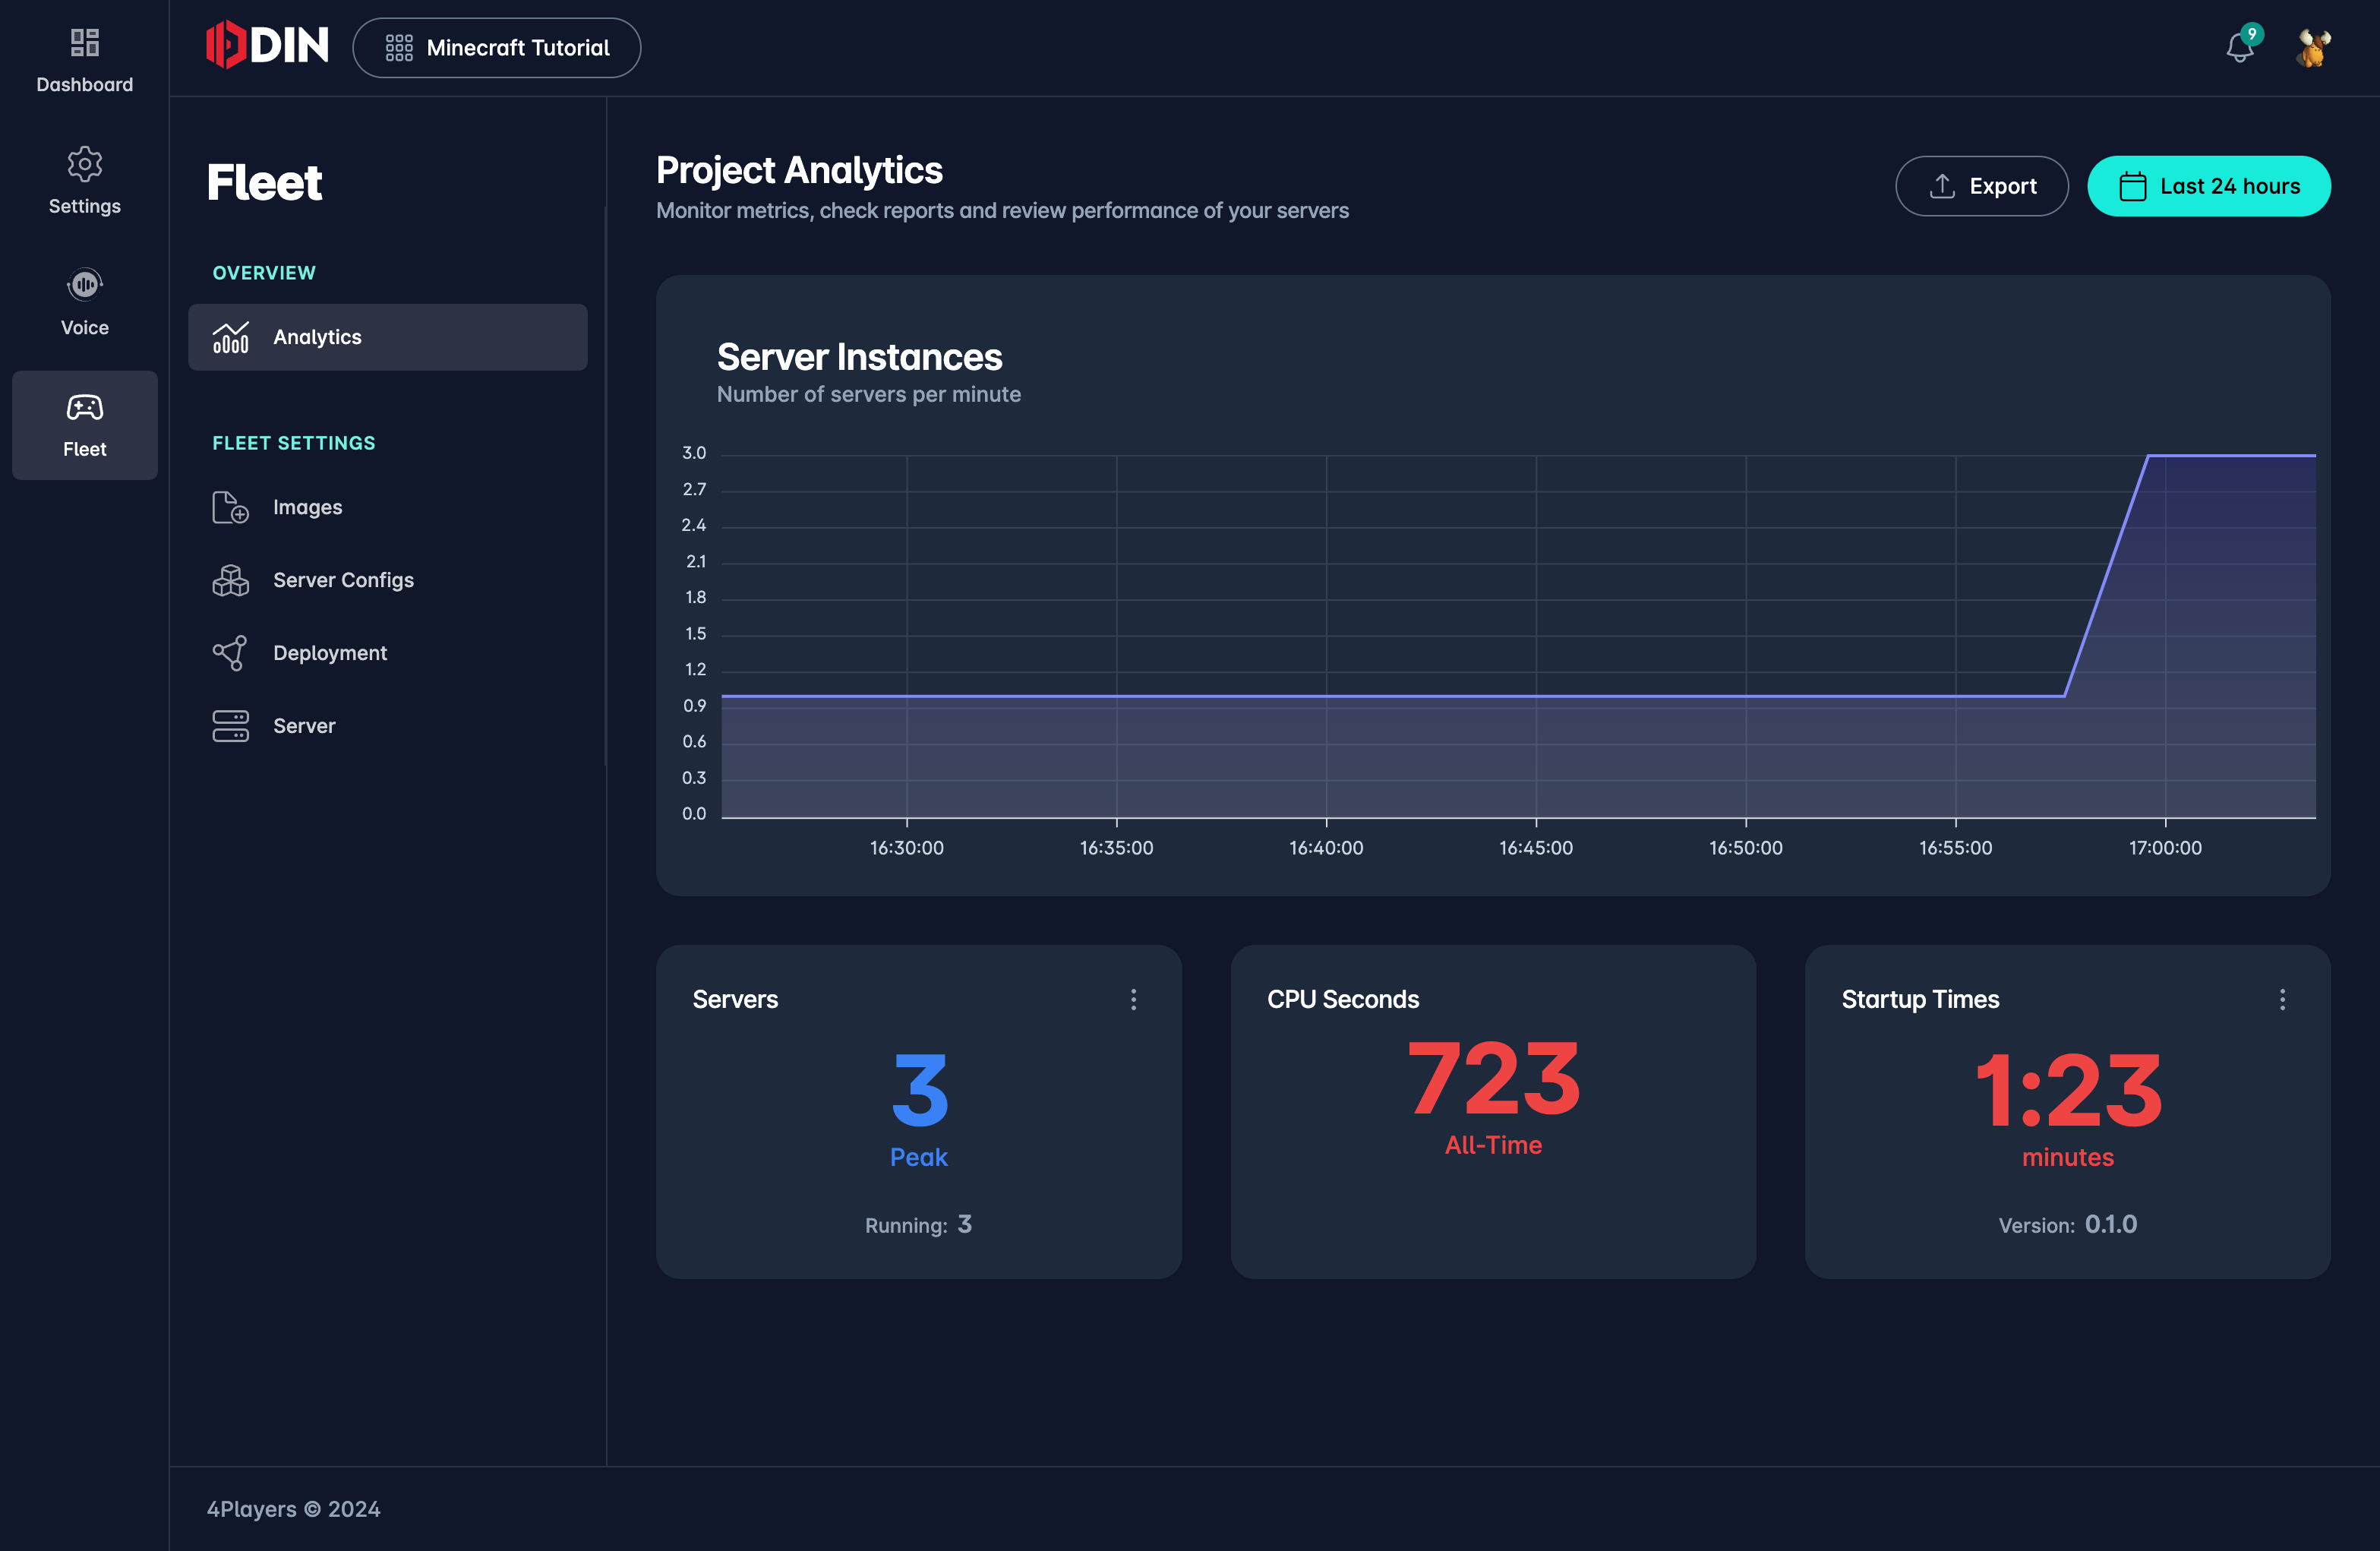
ODIN Fleet provides transparent cost control, with no hidden fees. You only pay for the servers you use.
Clean Up
To clean up, navigate to Deployments and remove the deployments. This will stop the servers and remove all associated resources.
Next Steps
Now that you've deployed a Minecraft server, you can experiment with different configurations, locations, and automation via the API or CLI.