High Level API
The ODIN Unity SDK provides prefabs and components that allow you to quickly embed voice chat into your game or application with ease.
This manual covers the high-level API and the prefabs provided with the SDK. For a more in-depth understanding of the low-level API, please refer to the Low Level API.
Getting started
Please read the manual to get started with the ODIN Unity SDK. It will guide you through the process of setting up the ODIN Unity SDK in your project.
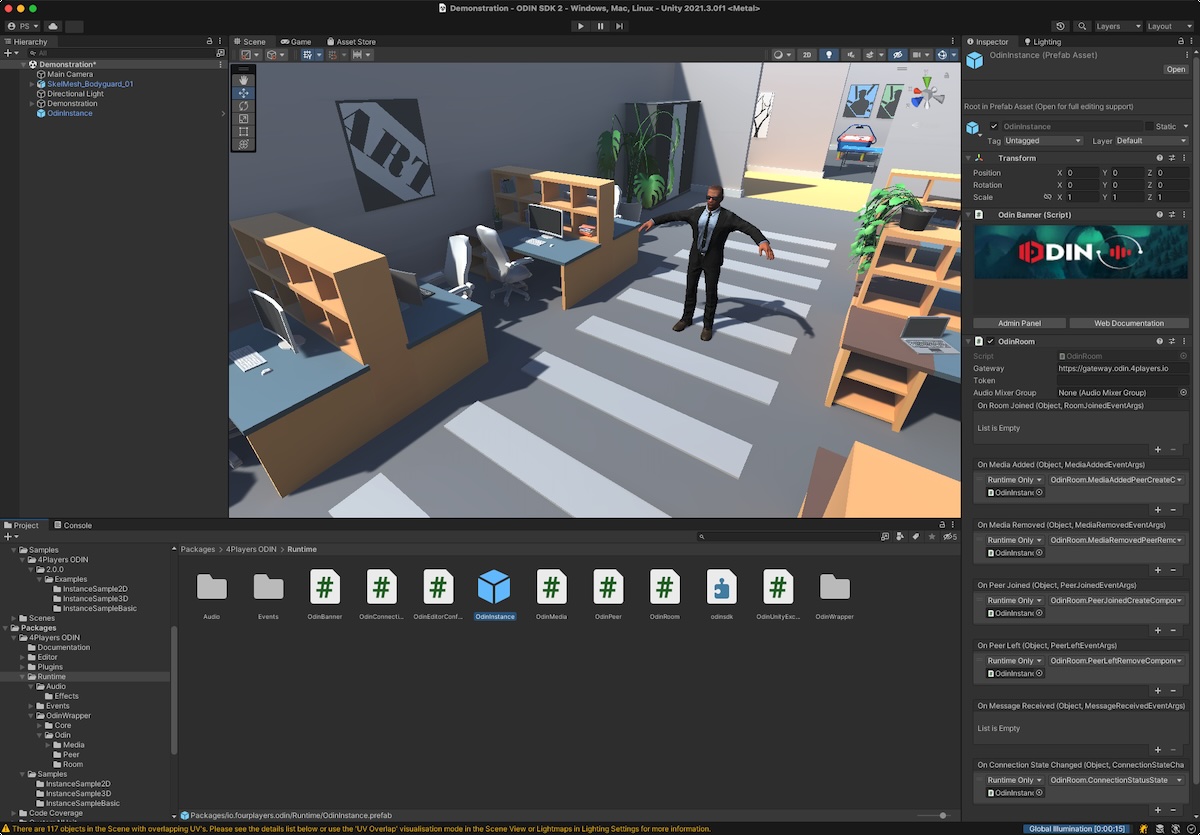
Once you have the Unity SDK installed, you can start using the prefabs and components provided with the SDK. The first
prefab you need to add to your scene is the OdinInstance prefab that you find in the
Packages/io.fourplayers.odin/Runtime/ path.
OdinInstance prefab
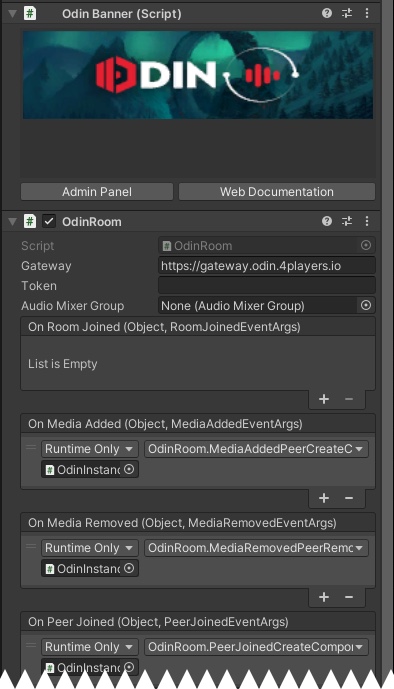
Once you have added the prefab to your scene, it will look like this (cut off at the bottom to save space):

It consists of the following components:
OdinBanner: Eye candy and useful links to our developer documentation and the admin panel.OdinRoom
: This is the main component that handles communication with ODIN servers and provides easy-to-use delegates and events to customize the experience.
OdinRoom component
Switch to scriptingThe OdinRoom

Properties
| Property | Description |
|---|---|
| Gateway | The base URL of the gateway. If you are using our hosted solution, leave it as is. Otherwise, adjust the URL if you are hosting it yourself. |
| Token | For testing purposes, set a token when joining the room — typically used for debugging. |
| Audio Mixer Group | Set a mixer group for audio effects that are automatically added to each voice chat audio source added to the scene. |
| OnRoomJoined | Subscribe to this Unity event in one of your components to handle the OdinRoom.OnRoomJoined event. |
| OnMediaAdded | Subscribe to this Unity event in one of your components to handle the OdinRoom.OnMediaAdded event. |
| OnMediaRemoved | Subscribe to this Unity event in one of your components to handle the OdinRoom.OnMediaRemoved event. |
| OnPeerJoined | Subscribe to this Unity event in one of your components to handle the OdinRoom.OnPeerJoined event. |
| OnPeerLeft | Subscribe to this Unity event in one of your components to handle the OdinRoom.OnPeerLeft event. |
| OnMessageReceived | Subscribe to this Unity event in one of your components to handle the OdinRoom.OnMessageReceived event. |
| OnConnectionStateChanged | Subscribe to this Unity event in one of your components to handle the OdinRoom.OnConnectionStateChanged event. |
This component already handles basic 2D non-spatial voice chat events by default:
-
OdinRoom.OnPeerJoined
-
OdinRoom.OnPeerLeft
-
OdinRoom.OnMediaAdded
-
OdinRoom.OnMediaRemoved
-
OdinRoom.OnConnectionStateChanged
You can subscribe to additional events in your own components or customize the default handler as needed.
OdinMicrophoneReader
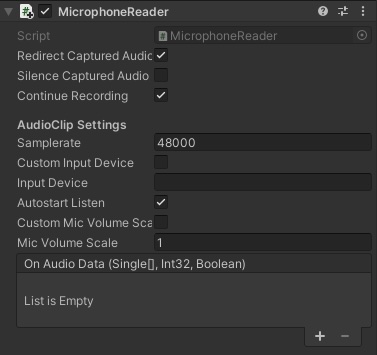
The OdinMicrophoneReader

Properties
| Property | Description |
|---|---|
| Redirect Captured Audio | Automatically sends captured audio to ODIN servers (default). Disable this option for special handling in rare situations. |
| Silence Captured Audio | Mutes audio, so no data is sent to ODIN servers (default is disabled). |
| Continue Recording | Automatically overwrites previous audio when the available buffer is full. Disable only in rare use cases. |
| Custom Input Device | Enables selecting a specific input device instead of the system default. |
| Input Device | Set the name of a specific input device to use. Requires enabling the Custom Input Device setting. |
| Autostart Listen | Automatically starts microphone capture upon Start. |
| Custom Mic Volume Scale | Enable to manually set the microphone volume scale in the Mic Volume Scale field. |
| Mic Volume Scale | Sets a volume scale factor for the microphone (requires enabling Custom Mic Volume Scale). |
| OnAudioData | Subscribe to this Unity event to handle the OdinMicrophoneReader.OnAudioData event, triggered when new audio data is available. |
Joining a room
After adding the prefab and configuring events, you need to join a room to start voice chat.
Every user in the same room can hear and talk to each other. You can join multiple rooms, but users only communicate with others in the same room.
To join a room, set the OdinRoom.Token OdinRoom
Tokens are usually generated by your backend to authenticate users and provide the necessary room information. Do not generate tokens in the frontend or client, as it exposes your secret keys. See Access Keys in ODIN for more information. Check our Generating Tokens example for how to generate tokens using a simple Node.js script.
Creating a token for testing purposes
To test ODIN without setting up your own backend, you can create a token in the Unity Editor for testing purposes:
You can create a test access key for up to 25 users in the component below:
Testing the setup
Press Play in the Unity Editor to test the basic ODIN integration. The OS will ask for permission to use the microphone. Deploy the build to a colleague or another machine to test the voice chat integration.
Alternatively, use our free Web Client. Open the Web Client in a browser, set the same access key and room name, and talk to your Unity client. Find a guide on using the Web Client here.
You should now have basic non-spatial 2D voice chat. New GameObjects are created for peers in the room (with an
OdinPeer
Implementing 3D spatial voice-chat
To implement 3D spatial voice chat, two key changes are needed:
- Set the
spatialBlend
of theAudioSource
to 1.0 (3D sound). - Attach the
OdinPeer
component (and subsequentOdinMedia
objects) to a moving GameObject(typically representing the player).
Map ODIN’s user IDs to game-specific connection IDs by using the user data object when joining a room. This allows you to attach voice data to the correct player or avatar.
Check our Unity Mirror Integration guide for a detailed example of 3D spatial voice chat implementation.
Mixing 2D and 3D voice-chat
In some games, you may want to mix 2D non-spatial with 3D spatial voice chat. For example, players in a “world” room could have 3D spatial voice chat, while players in a “radio room” could use 2D voice chat for team communication.
To achieve this, create two OdinRoom
Next steps
Now that you understand the high-level API of the ODIN Unity SDK, you can begin implementing your own voice chat solution. Explore the scripting API for additional functionality.
Switch to scripting