Unreal Engine game server deployment to ODIN Fleet
ODIN Fleet is a container-based orchestration platform tailored for multiplayer games. This guide covers how to create a dedicated server executable from your game and deploy it to ODIN Fleet.
Prerequisites
- Before starting, make sure you have a working Unreal Engine 5 project with multiplayer logic, this guide will use the project from the Odin Minimal Samples repository for illustration - but you can use any other multiplayer project as well.
- You will also need an active 4Players account, you can create one here if necessary: [https://console.4players.io/].
- Also make sure that you have access to a Docker Image Registry. Using Docker Hub might be comfortable, because it integrates well with ODIN Fleet and also Docker Desktop, which we will use later in the guide. You can use any other registry as well, though.
- You need to work either on a Windows (Windows 10, version 2004 or higher, or Windows 11) or Linux machine to compile a Linux distributable, which is recommended for ODIN Fleet. While this guides assumes Windows as your OS, all steps can be done on Linux analogously.
- Lastly you need a working installation of Visual Studio, compatible with your Unreal Engine version, to compile the Unreal Engine and your project.
Building a Dedicated Server Distributable
To start we will first have to create a server executable from your Unreal project. This is an executable of your Unreal Engine Game that leaves out all modules that are unnecessary for a dedicated server, because it should run headless ( i.e. without graphics output). This will save resources on the server while running - no GPU is needed, the start up is faster, and less space is taken on hard disk drives and container repositories.
Building the Unreal Engine from Source
In order to be able to build a server executable of your Unreal Project, you need to build it with a source-built version of the Unreal Engine. First download the source code of the Unreal Engine, a detailed guide is provided Epic Games. Once done, follow Epic Games official guide for in-depth steps on building from the engine from source for all operating systems. Building might take some time, depending on the configuration of your hardware setup. Lastly, make sure that you build the version of the engine that you created the project with.
Switch Unreal Engine version to Source-Built
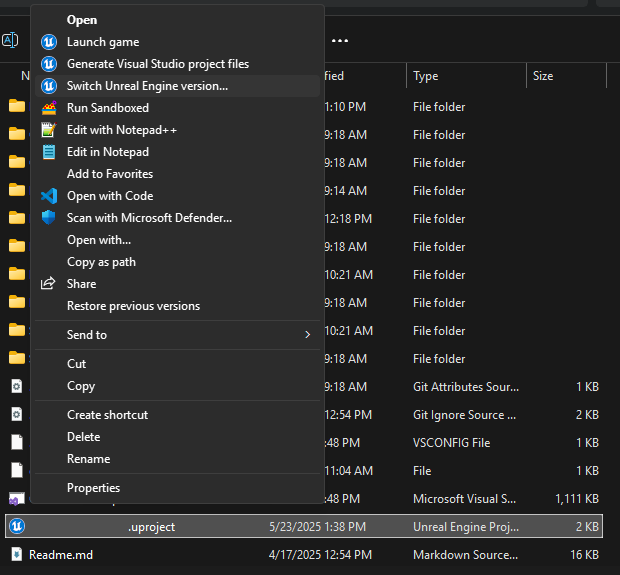
Once the build has been created you need to associate it with your Unreal project. Go to the folder of your project and
right-click the .uproject file. In the context menu, select Switch Unreal Engine version.... In the newly opened
window you need to select Source Built at <path to your engine> to select the Unreal Engine that you have just created
from source.
Configuring the Project for Dedicated Server Builds
In order to build your project as a dedicated server executable you will need to make some changes to your Unreal project.
Add code to your project
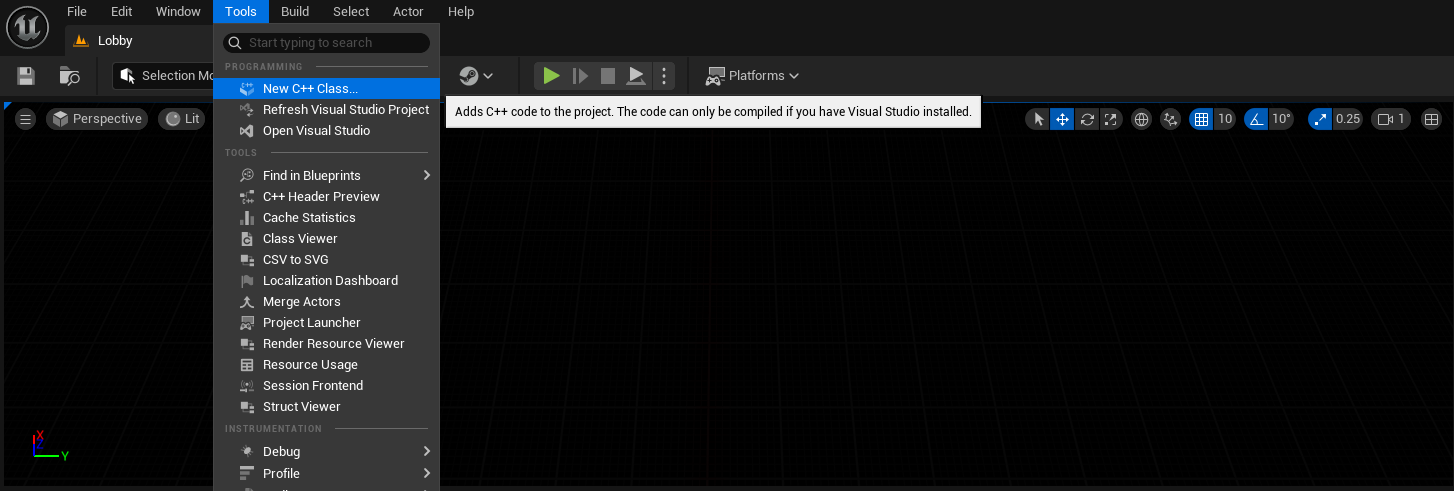
If not already done, you will need to convert your project to a C++ project. To do this, you will need to open the
Unreal Editor and then in go to the menu bar and Tools->New C++ Class.. and create any C++ class derived from any
other class. The Editor will now create Visual Studio Project files and open the solution.
Add a Server Build Target
Next you need to create a new Target file with a server configuration. In your project folder, navigate to /Source,
copy the <YourProject>.Target.cs file and Name it <YourProject>Server.Target.cs. Open the file and make these two
adjustments:
- Change the class name and constructor likewise from
<YourProject>Targetto<YourProject>ServerTarget - Change the line
Type = TargetType.Game;toType = TargetType.Server;
The file should look something like this now:
Again, go to the .uproject file, open the context menu and this time Generate Visual Studio project files.... Now
you can build this project as a dedicated server.
For Windows: Installing the Linux Cross-Compile Chain
As mentioned before, it is recommended to distribute the server as a linux executable. Unreal Engine supports a cross-compile chain for Windows to Linux - so if your development machine is running Windows, you can still build the server executable without having to run VMs or containers.
Epic provides a guide on Cross-Compiling on their documentation of using Linux for development. Download the correct version of the cross-compile toolchain for your Unreal Engine version and install it - after installing quickly verify in a command prompt:
echo %LINUX_MULTIARCH_ROOT%
If that returns a path to your linux toolchain, you are good to go to build the server executable.
(Cross-)Compile the Dedicated Server for Linux
Now it is time to finally build your dedicated server executable. Open a command prompt and run this command:
If you're building on Linux natively, replace the .bat with .sh.
Your result should be something like:
/YourOutputFolder/LinuxServer/YourProject/Binaries/Linux/YourProjectServer
Creating a Docker Image
Now it is time to create a Docker image that you can then reference in your ODIN Fleet Application. For this you will need to define a docker file, that starts with a suitable image and adds the necessary layers containing your executable. Afterwards we will build the image, tag it and push it to a docker registry. Make sure that you have a registry in place - an easy way is to create a Docker account and use DockerHub - at the time of writing free accounts have one private repository and unlimited public ones available.
Install Docker Desktop
In order to use Docker on your local machine you can download Docker Desktop which contains all necessary tools and a convenient UI. After downloading and installing, you can start up the application and login to your Docker account. Now, when you push a docker image, the Docker Engine can push using your Docker credentials - accessing your DockerHub registries.
For Windows: Enable WSL (Windows Subsystem for Linux) or Hyper-V
To build and run containers with Linux under a Windows machine, you need to install WSL (Windows Subsystem for Linux) first. This is done easily by opening a Command Prompt and running this command:
This is all you need to run Linux in your Docker installation. You can find more detailed information, e.g. on how to configure WSL in its documentation.
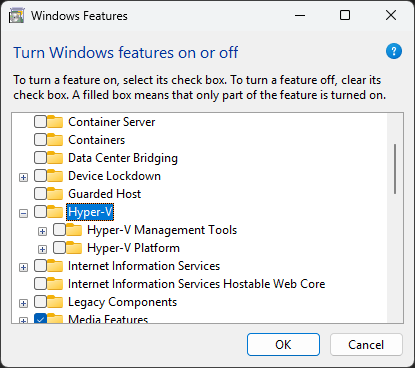
Alternatively, you can run Docker on a Hyper-V backend. This requires you to enable Hyper-V first. Your machine needs to
fulfill certain requirements which can be found
in Microsoft's Hyper-V documentation.
If the requirements are met on your machine, you can find Hyper-V in your Windows Features in the Control Panel. Turn on
the Hyper-V platform option.
More information on installing and using Docker Desktop on Windows can be found in Docker's documentation.
Create a Dockerfile
Now we can create a Dockerfile. For Unreal Server applications we can use a light-weight Linux distribution and add the build directory to it. Taken from Unreal Containers, a community that documents how to create container images for Unreal Applications, is a docker file that builds a minimal server:
The distroless image does not provide a shell, so we need to start the server executable directly - as opposed to what Epic Games describes. Since the Unreal executable can be run on a non-root user only, we use an according image as a base.
Build the Docker Image
In the same directory as your Dockerfile you can now open a terminal/shell and run the following command to build the container image:
docker build -t yourgame-server-name .
You can double-check in the Docker Desktop UI if the image was created - open the Docker Desktop UI from the notification area, go to Images and see if your image is listed here with the name you used in the command.
Test Locally (Optional)
You can now test the container locally with docker, again in the command prompt, run:
docker run -it --rm -p 7777:7777/udp yourgame-server-name
In the Docker Desktop UI you can see in the Containers section, if it is created and started properly - here you can also show its output and check if everything is running fine or find according errors to fix.
Push to a Container Registry
Now you can tag and push the image to your container registry:
Once it is pushed we can finally jump to ODIN Fleet and configure your containers!
Deploy a Server with your Game
Create a Fleet Project on Odin
Now we can switch to ODIN Fleet, go to the 4Players Console and create an account if you have not already done so.
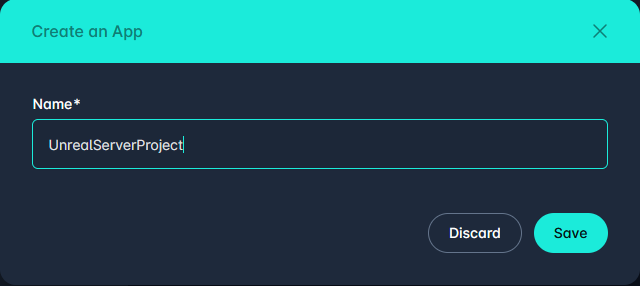
On your account's overview you can create an app and give it a name and then open it.
Reference your Container Registry
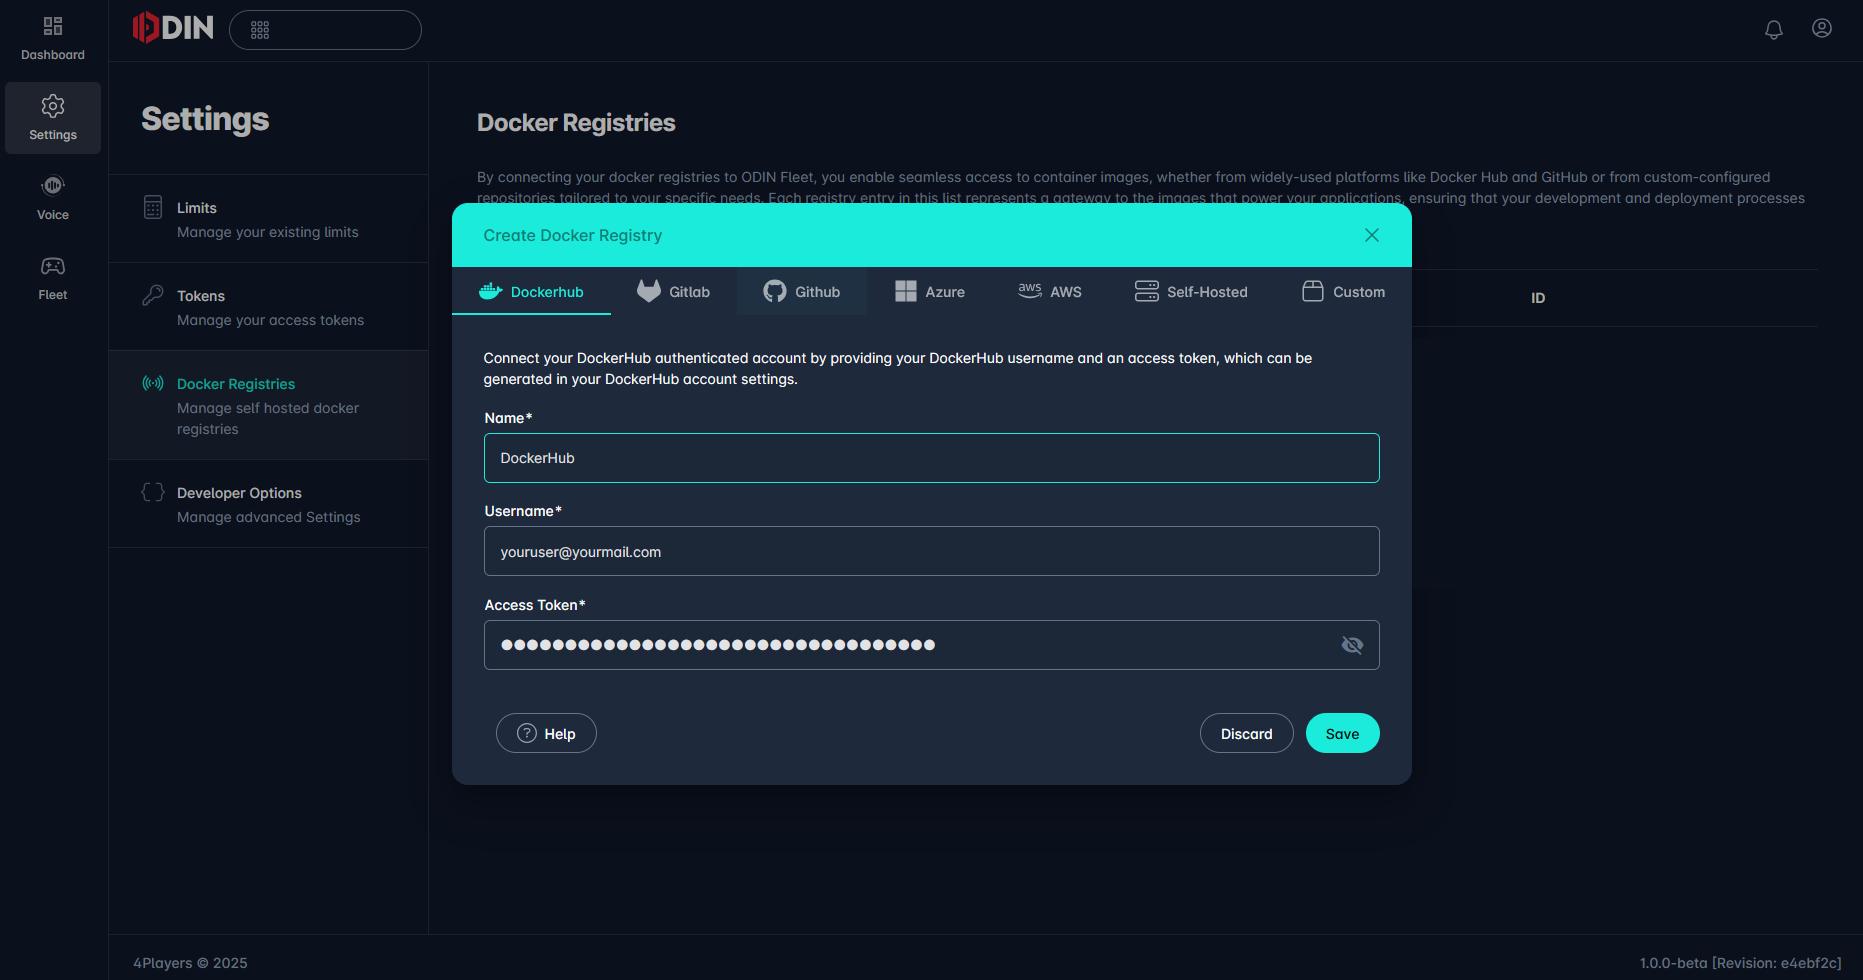
In the App Overview, go to Settings, Docker Registries and here you can click Add Registry. Select the Docker
Registry provider you have uploaded your Dockerhub to and all related settings - for Dockerhub you need your Username
and a Personal Access Token. You can create one in your Account Settings - on Dockerhub go to
your Account Settings - now switch to the Personal access tokens tab and click the
Generate new token button. Give it a name, set an appropriate expiration date and give it at least Read permissions.
Public or non-public depends on whether or not your repository is private or not. When done, save the registry settings
in the 4Players console.
Create an Image Reference
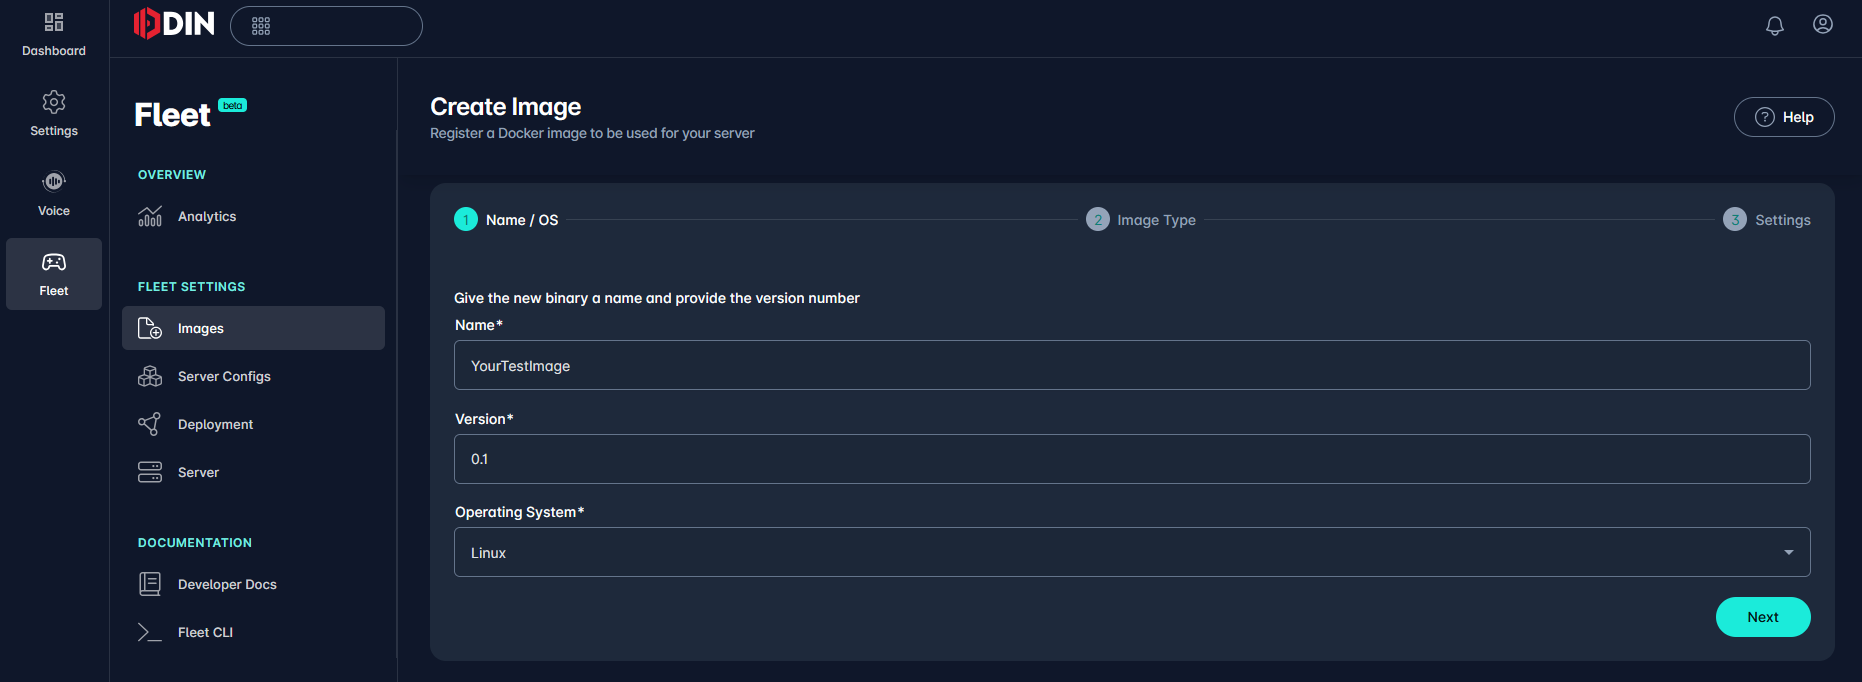
Now, in the App Overview, switch to the Fleet tab and under Fleet Settings go to Images. Here, click
Create Image, give it a name and version number. Leave Operating System set at Linux. Select
Image from container registry next, select your image registry and provide the name of the image in your registry
before hitting the Create button.
Create a Server Config
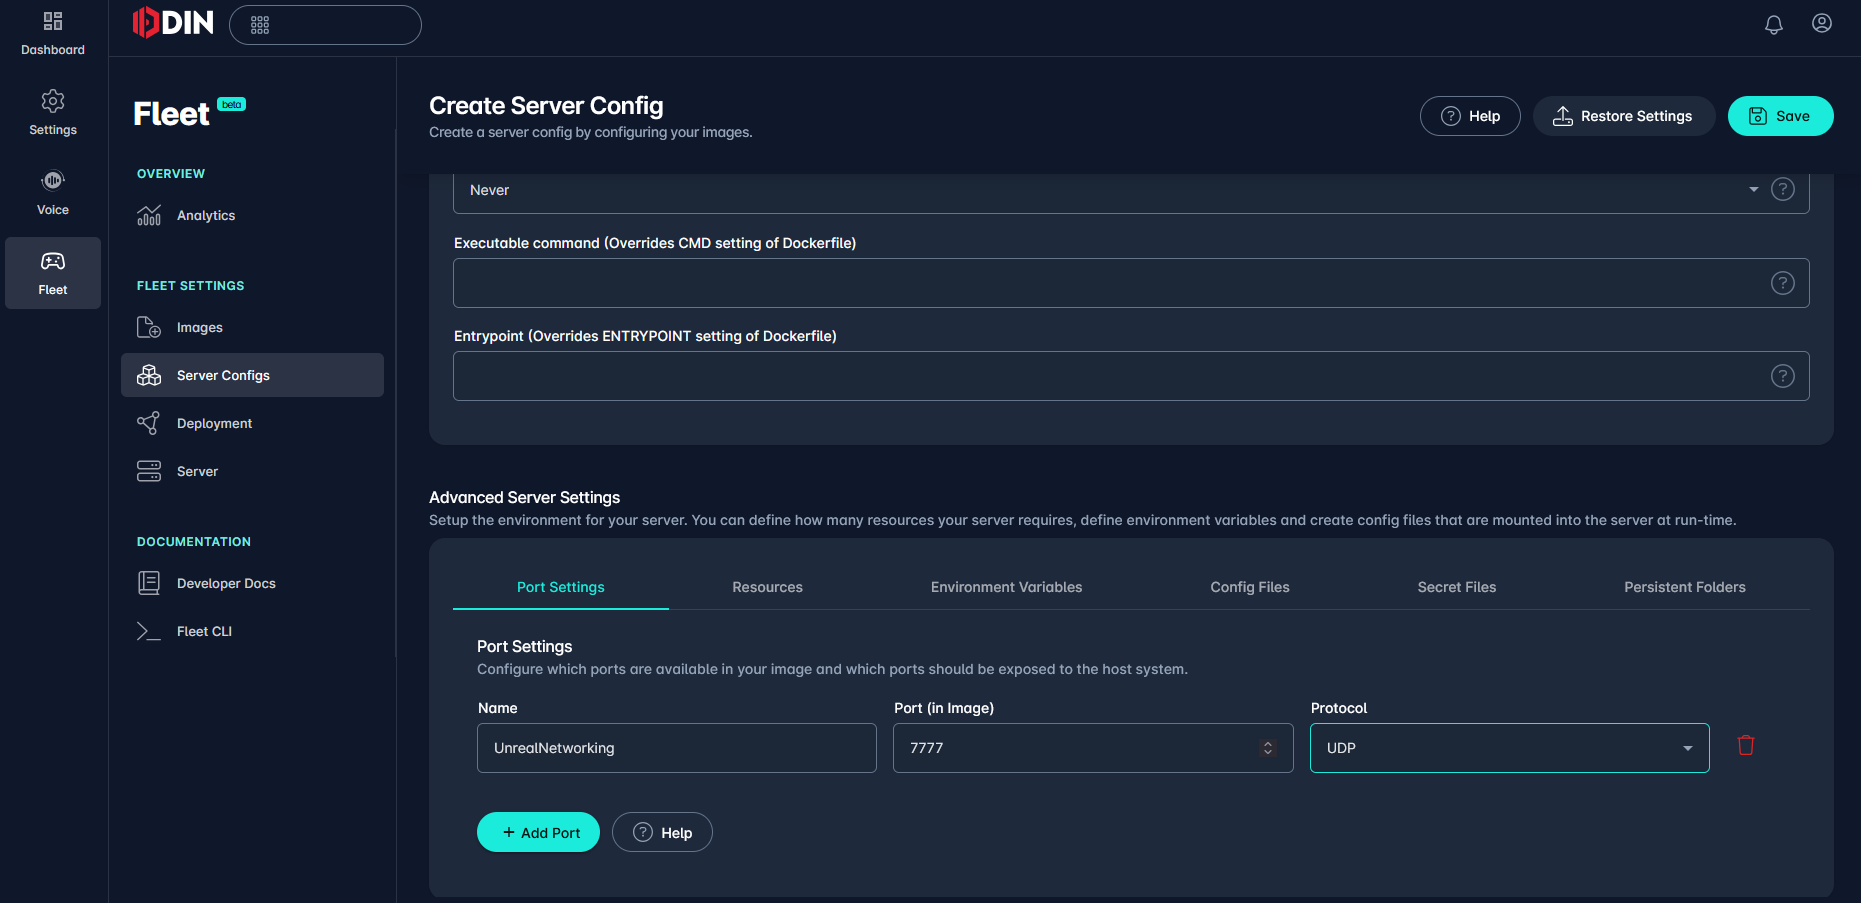
Next we need to create a Server Configuration. In the Server Configs tab click Create Server Config, give it a name,
select the image we just created and choose an appropriate restart policy. Before saving, remember to go to the Port
Settings at the bottom, add a Port with a name similar to Unreal Networking and Port Number 7777 and UDP protocol.
Optionally you can change the allocated resources, environment variables, add config files, secret files and persistent folders to your project's needs. Once done we can now deploy the container.
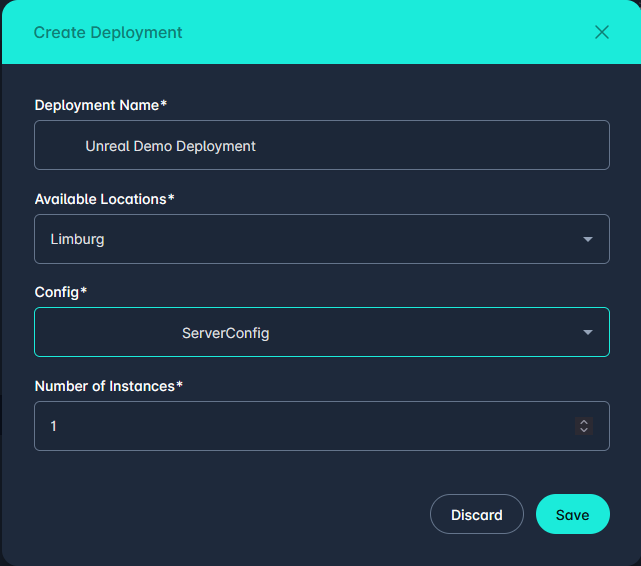
Server Deployment
Finally we want to deploy a server with the given configuration. Go to Deployments, Create Deployment, give it a
name, choose an appropriate location, select the configuration we created earlier and set the amount of needed
instances. Hit save and now the ODIN Fleet will startup your server(s)! That's it!
Connecting to your Server
Lastly we can have a look at how to properly connect to the server you have just created.
Testing with Command Line Options
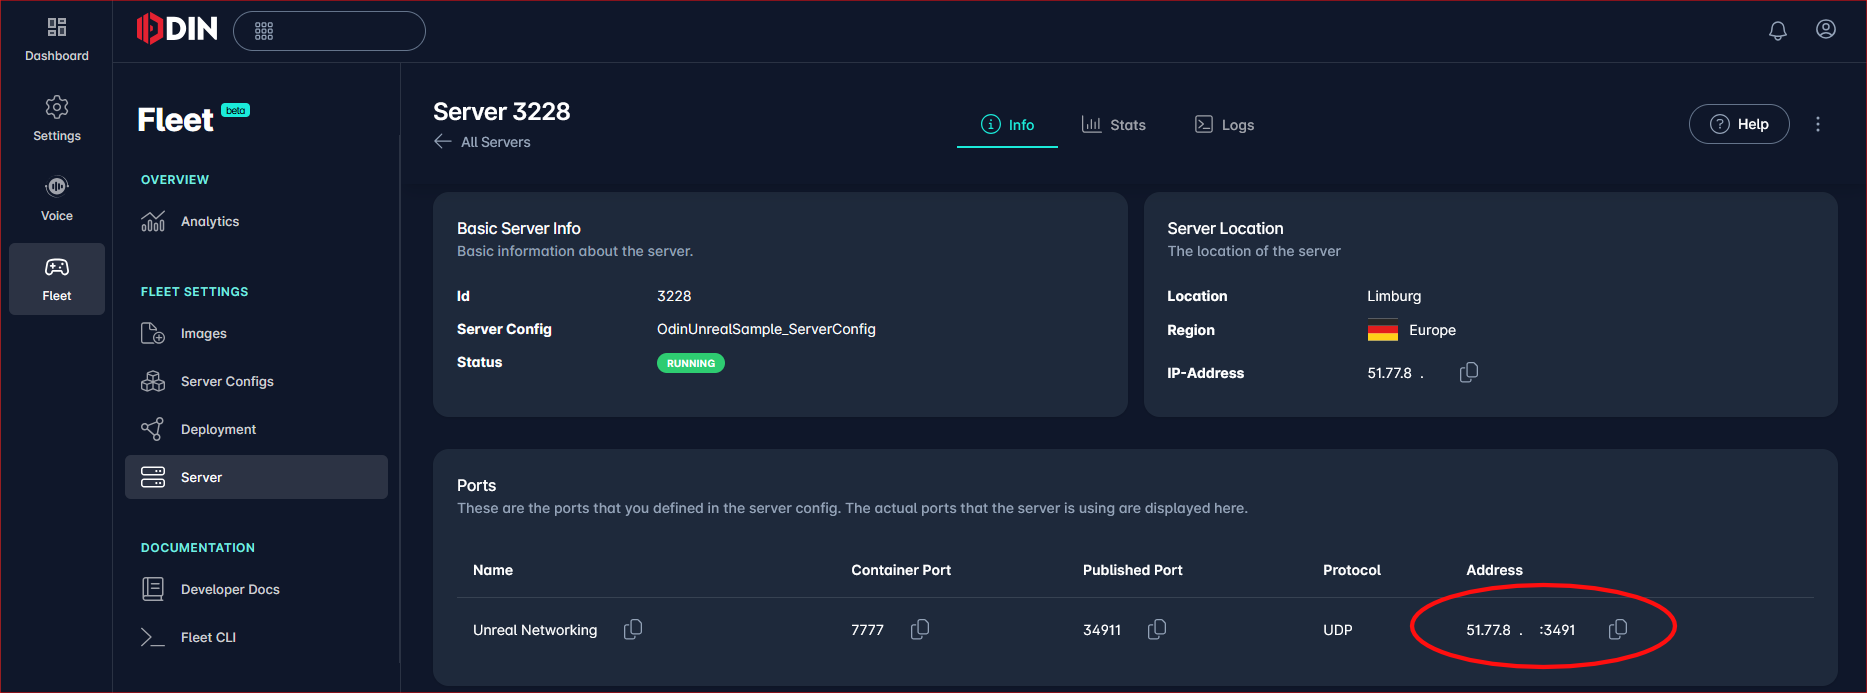
To test if the server is running properly and accepts incoming connections from Unreal Clients, you can retrieve the IP
and Port of the Server manually and use it in your client. In the 4Players Console
go to your App, Fleet, then Server and open your server's details. Here you can copy the full address of the server
in the Ports section of the information panel.
Back in the Unreal Editor of your game you can simply start a Play-In-Editor session as a standalone client. Go to the Output Log Window and in the Command Line type
with <IP:PORT> being the address information you just received. If everything works out, the level running on the
server should load and you can play it. You can also test this with multiple standalone clients in PIE easily.
Creating an HTTP Request in Unreal
To properly add a connection mechanism in your game you will want to retrieve the Server IP and Port dynamically during the Runtime, in case it changes because the Server needs to restart or similar. For this we will call the ODIN Fleet API and retrieve the information of relevant servers there.
For this guide we will call the ODIN Fleet API from your Unreal Client, using an ODIN Fleet Access Token - however this is not good practice since the Unreal Client should not hold any important secrets. Instead, you should consider moving this logic to a trusted server, providing the necessary functionality as a REST API.
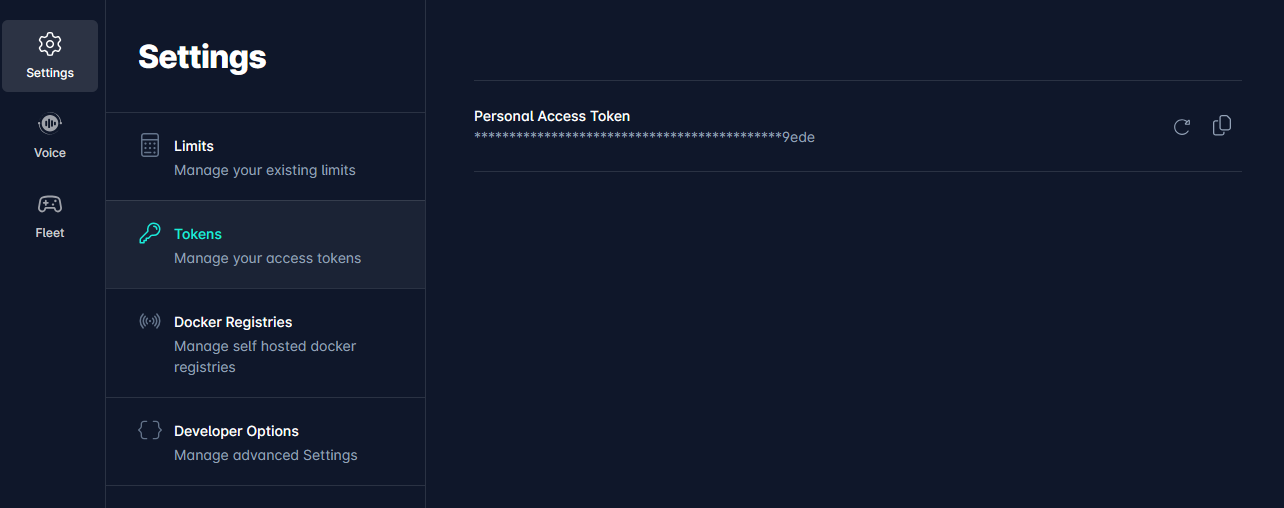
In order to interact with the ODIN Fleet API you will need to create an Access Key to act on your behalf of your App in
the ODIN Fleet. To do this, go to the 4Players Console, open your App, go to Settings
and then Tokens, here you can see your Personal Access Token, ready to be copied. We will use it later in your code.
HTTP Requests from your C++ code of the project. You can also use any HTTP Plugin to make these requests from Blueprints
but for this guide we will stick with a simple C++ function that can be called from Blueprint. You can start the project
in the Editor once and, when loaded, go to the Editor's menu bar, Tools and New C++ Class.... In the Add C++ Class
-Window you can scroll down to select the Blueprint Function Library as a parent class, click Next and give the
Function Library a name like OdinFleetFunctionsLibrary. The rest can be left as it is and you can Create Class.
Before using the HTTP and JSON Modules of the Unreal Engine in C++ you need to include it in your project's
dependencies. Open your <ProjectName>.sln in Visual Studio, then go to your <ProjectName>.Build.cs file and add this
line in the constructor of the class:
You can also extend an existing PublicDependencyModuleNames.AddRange(). Now we can add a function to our newly created
Function Library. In the OdinFleetFunctionLibrary.h header file, first declare a new delegate that we can use in
Blueprints, once the ODIN Fleet API call is completed:
Then add a helper function that is called inside the Blueprint Library class once the HTTP Call to the ODIN Fleet API responds, and the actual Blueprint function that we want to make accessible from Blueprints:
Also remember to add the necessary header files:
In the corresponding .cpp file you can then implement these two functions:
The BlueprintCallable is a little bit more straight forward. We construct the URL using the App Id we retrieve from
the 4Players Console and add an Authorization Header using the Personal Access Token as a
Bearer Token. Then we bind a Lambda function and bind the original delegate coming from Blueprints to it as well. Once a
response is received, we can call the OnResponseReceived() function declared above. Finally we process the HTTP
request. Next, we define OnResponseReceived():
This function is a little bit more verbose - mainly due to the parsing and interpreting the JSON response. First we check if the request succeeded at all and we get an expected result, then we parse the JSON in the content and iterate over the data to find all server nodes and read out their IPs and Ports. Each IP-Port-Combination that is declared as UDP, we add to the resulting array. The Blueprint logic can then handle what to do with it.
Once finished, you can now build the project again and start the Editor (e.g. by hitting F5 in Visual Studio to start
a debugging process).
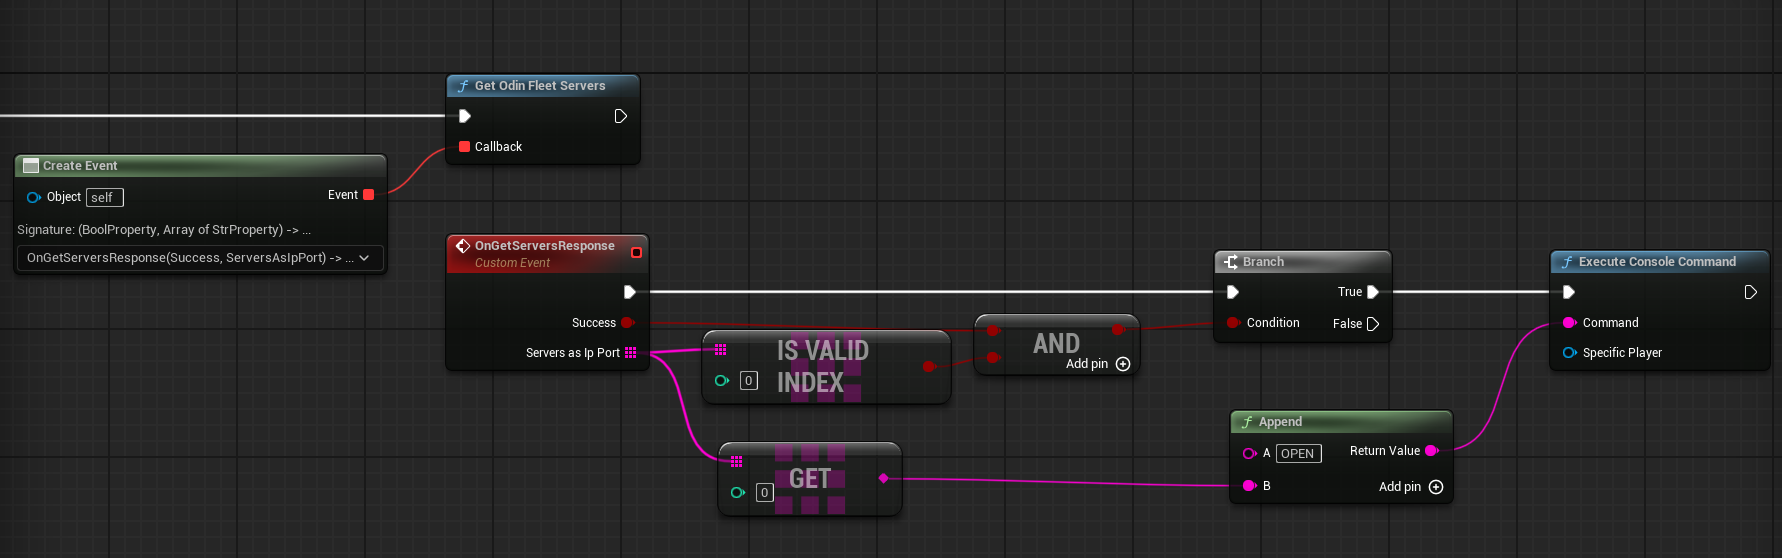
Connect to a Server via Blueprint
In the Edtior, you can add the logic to connect to a server wherever you need it - usually this is handled in the
GameInstance class of your project, but you can also put it inside a Widget with a Button to start the connection
process. The Blueprint Function takes a delegate that you can use to bind to an Event in your Blueprint, that then
handles the resulting server IP-Port-combinations to connect to a proper Server. This should look something like this:
Conclusion
Although detailed, a lot of these steps heavily depend on your specific scenario, so you can see this as an illustration of the most crucial steps. Here are some ideas on where to continue to further enhance your implementation of an Unreal Server in ODIN Fleet:
Robust Connection Mechanism
Especially retrieving server information from your ODIN Fleet should be handled on a trusted server. Additionally, to use Unreal's Session handling with its Online Subsystem Interface, you can create your own OSS-Implementation. This enables you to use pre-existing mechanics, e.g. for session handling, match making, friend lists, identity services, etc. A minimal sample of such a scenario can be found in our Odin Demo for Unreal. Here you have a simple Microsoft Azure Backend that handles the calls to the ODIN Fleet API and capsules it as an own REST API. Additionally it holds a Plugin that declares a Custom OSS (Online Subsystem ODIN Fleet), that rudimentarily implements the most important methods for a functioning Online Subsystem calling the Azure Backend. See the Readme of the repository for more details.
Again, this heavily depends on your scenario and is just one of many possibilities to achieve a robust connection to your Odin servers.
Automated/Continuous Deployment
You can use these steps to create an automated deployment pipeline - once the Unreal Project is set up for packaging a dedicated server, you can create and run a VM to start the Unreal Automation Tool (UAT) and use Docker to create an image and upload it to your docker registry. Automating this with a CI pipeline might save a lot of time - but again, the exact implementation of this heavily depends on your specific scenario and its requirements.